The procedure to add an inventory item to a functional unit adds the item to the functional unit and the Playground Management Structure in the same action.
Inventory items added to a functional unit are automatically included in any inspections created for the functional unit.
Inventory Item Being Inspected as Part of Inspection for Its Functional Unit
Add a New Inventory Item to a Functional Unit
To add an inventory item to a functional unit, its version must already exist in the Playground Management Structure hierarchy.
You can add a new inventory item on the functional unit's details page or by using the Add Inventory workflow on the Playground Management legacy dashboard.
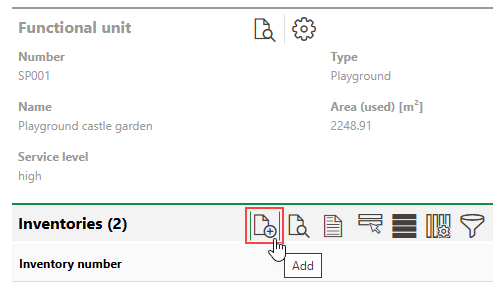
To Add a New Inventory Item to a Functional Unit
1.Navigate to the details page for the functional unit to which you want to add a new inventory item.
2.Expand the Inventory section and click the Add (![]() ) icon.
) icon.

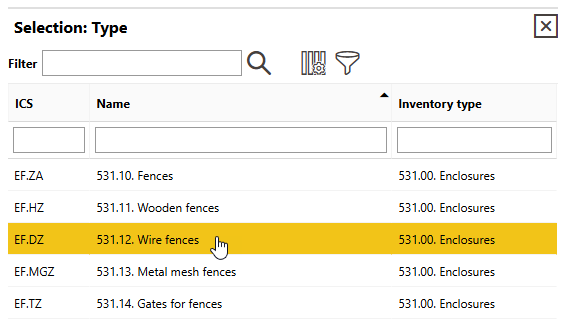
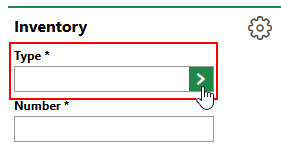
3.Click the > icon in the Type menu.
4.Select a version in the Playground Management Structure and click Apply. Alternatively, you can double-click the version.
If the version to which you want to add the new item does not already exist, you must create it.
5.Enter a number for the item in the Number field. VertiGIS FM may assign it a number programmatically after you save the new item if a number range entry is configured for the data field.
In several customer integrations, the inventory number is populated based on the location selected in the Location field. Refer to Number Ranges.
6.Enter any additional data in the inventory item details as available.
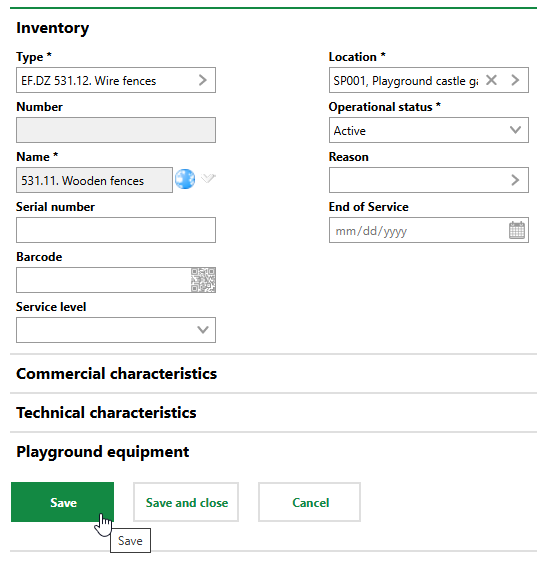
7.Click Save or Save and Close.
To Add an Inventory Item from the Start Page
1.Navigate to the Playground Management start page.
2.Under Operational Procedures, click Add Inventory.
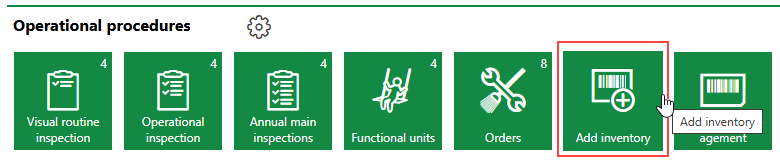
If you do not see the Operational Procedures template, an administrator must add it to your custom dashboard or restore the legacy dashboard. Refer to Dashboard Customization.
3.Select the functional unit to which you want to add the new inventory item and click the Additional Editing (![]() ) icon.
) icon.
4.In the Inventories section, click the Add (![]() ) icon.
) icon.
5.Click the > icon in the Type menu and select an existing version in the database to which you want to add the new inventory item.
6.At minimum, enter an identifying code for the new inventory item in the Number text box, and enter a name for the inventory item in the Name field.
7.Enter other inventory item properties as available in the corresponding data fields, including those collapsed in the Commercial Characteristics, Technical Characteristics, and Playground Equipment tabs. Refer to Inventory Item Details for descriptions of all form fields.
8.Click Save or Save and Close.
Assign Existing Inventory to a Functional Unit
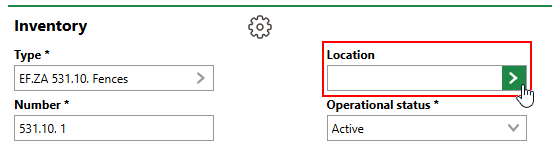
When you manually add a new inventory item to your database, you can assign it to a green area or functional unit by selecting it in the Location menu.
Location Menu for New Inventory Item
You must select the maintenance area and district in which the green area or functional unit is located before you can select the green area or functional unit.
After the item has been created, you can change its location by clicking the Assign Location (![]() ) icon in the Location section on the inventory item's details page.
) icon in the Location section on the inventory item's details page.
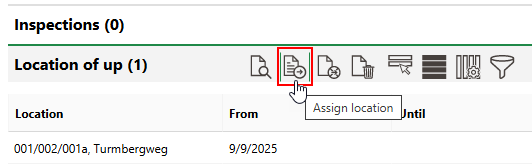
Location Section (1/2)
You can now select a green area or functional unit from the Location field. In the From menu, select a date that does not cause the item's location assignment to overlap with its current location assignment. Click Save and Close to assign the inventory item to the new location.

Assigning Item to New Location
The Location section now reflects the inventory item's new location.
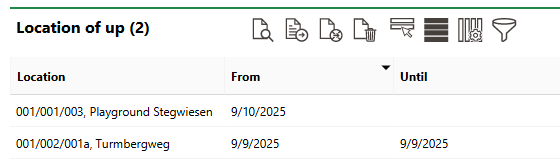
Location Section (2/2)
Field |
Description |
||||||||||
|---|---|---|---|---|---|---|---|---|---|---|---|
Type |
The inventory item's version. Refer to Inventory Management Hierarchy. |
||||||||||
Number |
A serial code to identify the inventory item. |
||||||||||
Name |
The name of the inventory item. This value typically reflects the inventory item's group and version. |
||||||||||
Serial number |
The inventory item's serial number. |
||||||||||
Barcode |
|
||||||||||
Service level |
A classification that indicates the level of service or maintenance the inventory item requires. Selectable options are stored in the Service Level catalog. You will be unable to create maintenance intervals, orders, and inspections for the inventory item without assigning it a service level in this menu. Examples could include major disruption, high safety risk, or general defect. |
||||||||||
Location |
The green area or functional unit in which the inventory item is located. You must first double-click the maintenance area and maintenance district in which the green area or functional unit is located before selecting a green area or functional unit and clicking Apply. This field is only visible when you are adding an item to the inventory. After the new inventory item is saved, you can change its location in the Location section on the inventory item details page. Refer to Install Inventory Item in a Location. |
||||||||||
Operational status |
The status of the inventory item. Selectable options are
|
||||||||||
Reason |
A reason that explains the status selected in the Operational Status field. Selectable options are saved in the Reason catalog. |
||||||||||
End of service |
The date until which the inventory item can be used. |
Commercial Characteristics
Field |
Description |
|---|---|
Division |
The department or division of the company the inventory item belongs to. Selectable options are stored in the Divisions section on the Divisions section on the Own Company or Tenant administration page |
Person responsible |
A person who can be contacted for inventory item maintenance or information. You must select a contact or company stored in the Contact Management module. |
Organization |
The organization or department within your company associated with the inventory item. Selectable options are stored in the Organizations section on the Own Company or Tenant administration page. |
Ownership |
The commercial status of the inventory item. Selectable options are stored in the Ownership catalog entry. |
Purchase price |
The price for which the inventory item was purchased. |
Date of purchase |
The date the inventory item was purchased. |
Actual cash value |
The market value of the inventory item. |
Cost center |
The cost center to which maintenance or consumption costs incurred by the inventory item are to be charged. An option must be selected from the set of cost centers created in the Costs and Budgets module. |
Cost object |
The cost object associated with the inventory item. |
Start warranty |
The date the inventory item's warranty started. |
Duration warranty |
The length of the inventory item's warranty. |
End of warranty |
The date the inventory item's warranty ends. |
Manufacturer |
The organization that manufactured of the inventory item. You must select a company stored in the Contact Management module. |
Manufacturer no. |
A manufacturer-assigned tracking number. |
Supplier |
The organization that supplied the inventory item. You must select a company stored in the Contact Management module. |
Installer |
The party that installed the inventory item. You must select a company stored in the Contact Management module. |
Inventory number |
An internal tracking number. |
Last stock-taking |
The date the inventory item was most recently accounted for in an inventory check. |
Warranty
When you enter the Start Warranty and one of the Duration Warranty or End of Warranty fields and click Save, VertiGIS FM populates the third field based on the warranty data entered.
|
|
|
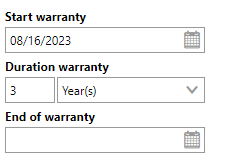
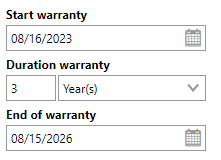
When you save the form with a valid warranty, a warranty message appears in red text on the inventory item's details page to indicate that the inventory item is covered by a warranty. This message no longer appears after the warranty expires.
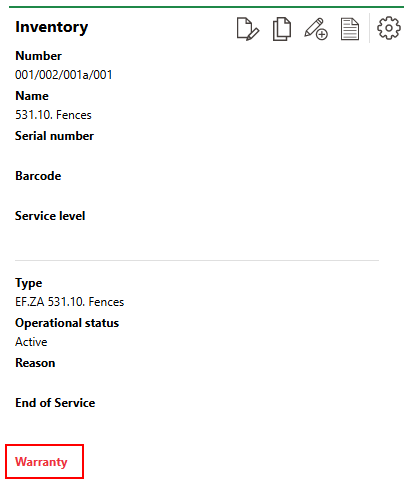
Warranty Warning on Item's Details Page
Value
VertiGIS FM can calculate an estimated market value of the inventory item in the Actual Cash Value field if you enter the Estimated Service Life value in the Technical Characteristics tab and the Purchase Price and Date of Purchase in the Commercial Characteristics tab. This feature allows you to make cost-sensitive decisions about the maintenance of the asset. For example, you may decide that a damaged asset that is no longer under warranty should not be repaired because the repair cost exceeds the value of the asset.
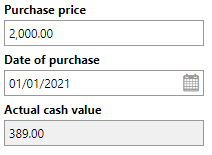
Value Field in the Commercial Characteristics Tab
Technical Characteristics
Field |
Description |
|---|---|
Model no. |
A serial number or product code for the inventory item. |
Year of construction |
The year the inventory item was manufactured. |
Installed on |
The date the inventory item was installed in its location. You must update this field manually. VertiGIS FM does not update it programmatically when you update the inventory item's location. |
Start-up Date |
The date the inventory item has been in production since. |
Estimated service life |
The estimated lifespan of the inventory item. Refer to Estimate Service Life for more information. |
Quantity |
The quantity of the inventory item. This field could be used if, for example, an organization has hundreds of identical demo devices but finds it sufficient to only create one instance of it in VertiGIS FM. |
Width [m] |
The width of the inventory item in meters. |
Length (depth) [m] |
The length of the inventory item. |
Height [m] |
The height of the inventory item. |
Diameter [m] |
The diameter of the inventory item. |
Weight [kg] |
The weight of the inventory item. |
Icon |
The symbol that represents the inventory item graphically in CAD drawings. Symbols that have been created under Administration can be selected. |
Comment |
Additional comments regarding the inventory item's commercial details. |
Several properties in the Commercial Characteristics tab are assigned to a new inventory item programmatically based on the property values in the Default Values section of the version to which they are added.
Estimated Service Life
It is important to enter the Estimated Service Life so that VertiGIS FM can calculate the market value of the inventory item. Refer to Value in Commercial Characteristics for more information.
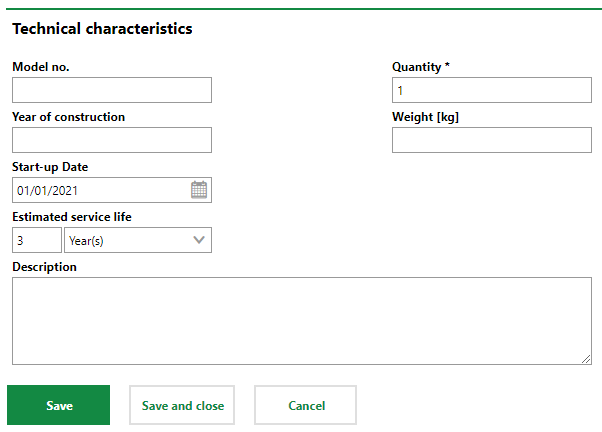
Technical Characteristics Tab on the Device Details Page
Playground Equipment
Field |
Description |
|---|---|
Flooring |
The type of flooring or surface on which the inventory item can be installed. Selectable options are saved in the Flooring catalog. |
Height of fall |
How far a person can fall off the equipment when using the inventory item. |
Railing |
Whether the inventory item has a railing. |
Hampered access |
Whether access to the inventory item is in any way blocked. |
Device combination |
|