You can assign an inventory item in a green area, partial area, or functional unit to indicate its current location.
An inventory item's installation location is indicated in the Location section on its details page. Location assignment occurs chronologically, which means the inventory item can only be assigned to one location at a time. The method for changing an inventory item's location assignment ensures the dates will not overlap with those of another location assignment.
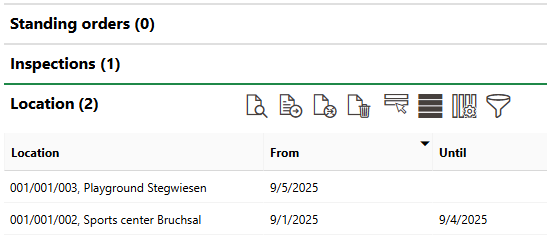
Location Section on Inventory Item Details Page
New Inventory Item
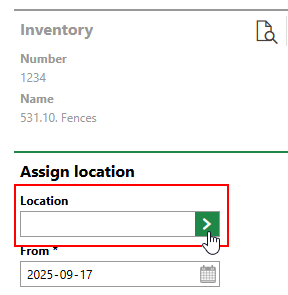
When you manually create a new inventory item, you can assign it to a location by clicking the > button in the Location menu.
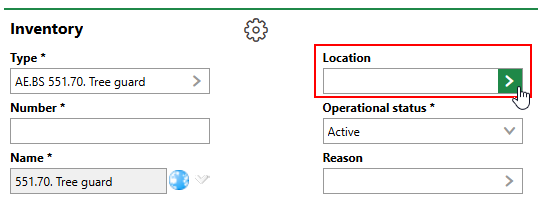
Location Menu for New Inventory Item
VertiGIS FM does not require you to select a location when you create a new inventory item.
Double-click the maintenance area and maintenance district in which the green area, partial area, or functional unit in which you want to install the inventory item is located.

Maintenance Area and District Selection
Double-click Green Area to install the inventory item in a green area or in a partial area or functional unit that is within a green area. Double-click Functional Unit to install the inventory item in a functional unit that is not located in a green area.
On the next screen, you can select a green area and click Apply to install the inventory item in the green area.
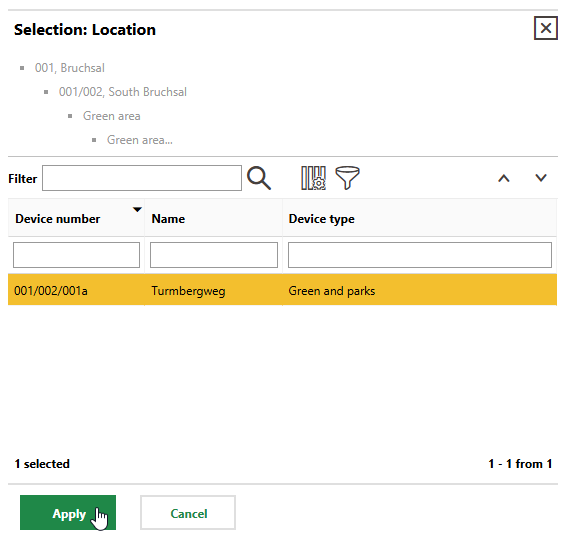
Select Green Area for Inventory Item Installation
Alternatively, double-click the green area if you want to assign the inventory item to a partial area or functional unit within the green area.
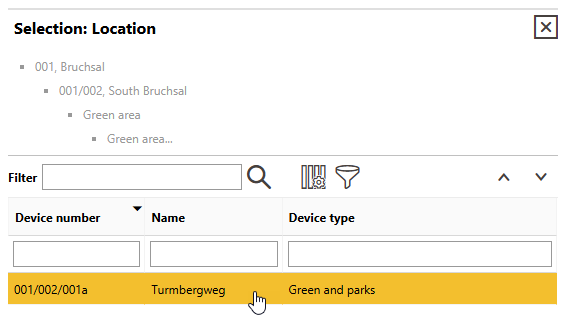
Double-Click Green Area to See Location Assets Within Green Area
To assign the inventory item to a functional unit within the green area, double click Functional Unit and then select the functional unit to which you want to assign the inventory item. To assign the inventory item to a partial area within the green area, double click Partial Area and then select the partial area to which you want to assign the inventory item.
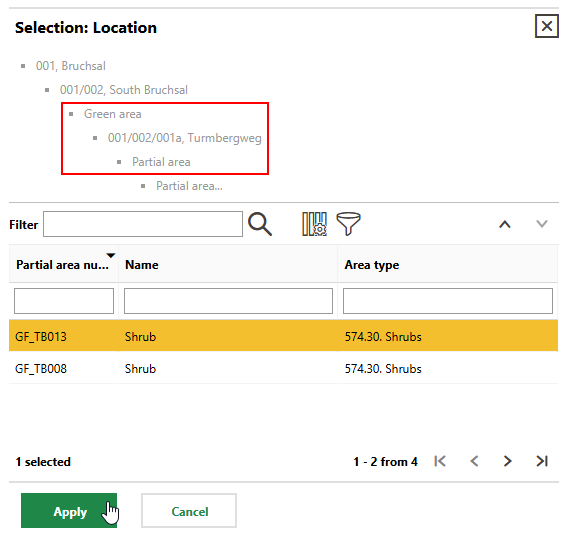
Install Inventory Item in Partial Area within Green Area
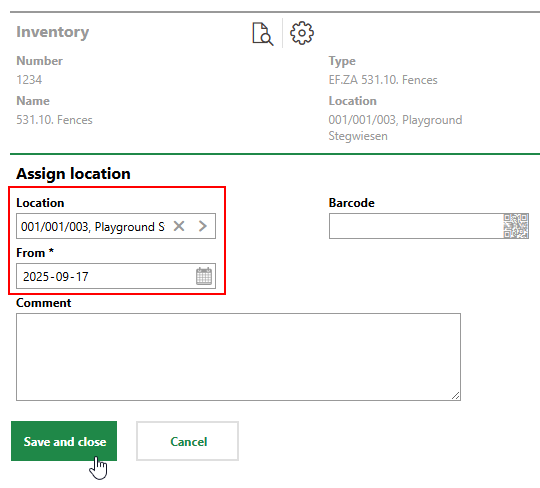
Click Save or Save and Close when you have selected the appropriate location asset.
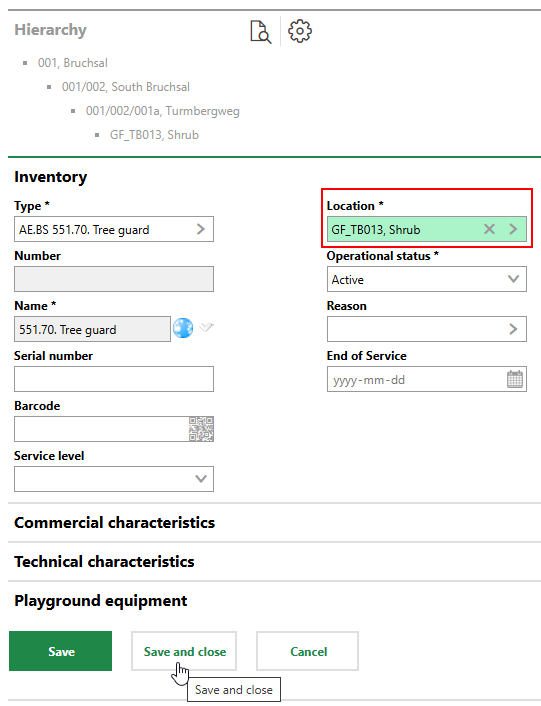
Saving New Inventory Item with Location Selected
After you save the new inventory item, you can see its location in the Location section on the inventory item's details page. The Location field is no longer visible or editable in the high-level details.
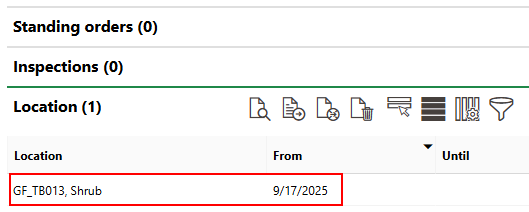
Location Section on Inventory Item Details Page
Functional Unit
If the location to which you want to add a new inventory item is a functional unit, you can use a separate procedure to add a new inventory item directly to the functional unit. Refer to Add Inventory to a Functional Unit.
Existing Inventory Item
You can update the location of an existing inventory item on its details page.
To Update the Location of an Existing Inventory Item
1.Navigate to the details page for the inventory item whose location you want to update.
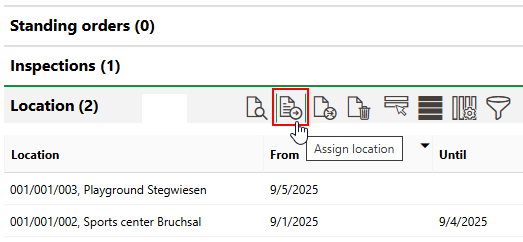
2.Expand the Location section and click the Assign Location (![]() ) icon.
) icon.
3.Click the > button in the Location menu.
4.Select the green area, partial area, or functional unit in which you want to install the inventory item and click Apply.
▪You will need to double-click the maintenance area and maintenance district that contains the location asset in which you want to install the inventory item.
▪After selecting the maintenance area and district, double-click Functional Units to see a list of the maintenance area's functional units that are not located in a green area.
▪Double-click a green area in the location selection dialog to see the partial areas and functional units within the green area. Select the green area and click Apply to assign the inventory item to the green area.
5.In the From menu, select the date from which the inventory item will be installed in the selected location.
6.Click Save and Close.
The Location section on the inventory item's details page now reflects the new installation location from the selected date. If the inventory item was already installed in another location, the system will end this assignment the day before the date of the new location assignment.
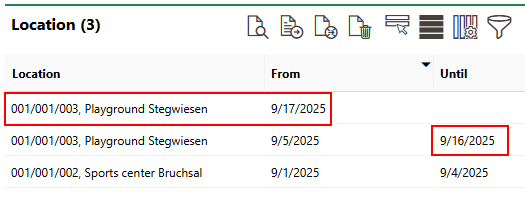
Updated Installation Location Assignment Dates