A tree cluster inspection is a routine review of the tree cluster's condition that requires the employee who completes it to gather and enter various data regarding the tree cluster's health.
All tree cluster inspections in VertiGIS FM Greenspaces are identical in terms of the forms and data fields the employee who conducts the inspection sees.
Inspections can only occur on tree clusters whose status is Active.
Inspections for tree clusters vary slightly from inspections for trees.
System-Generated Inspections
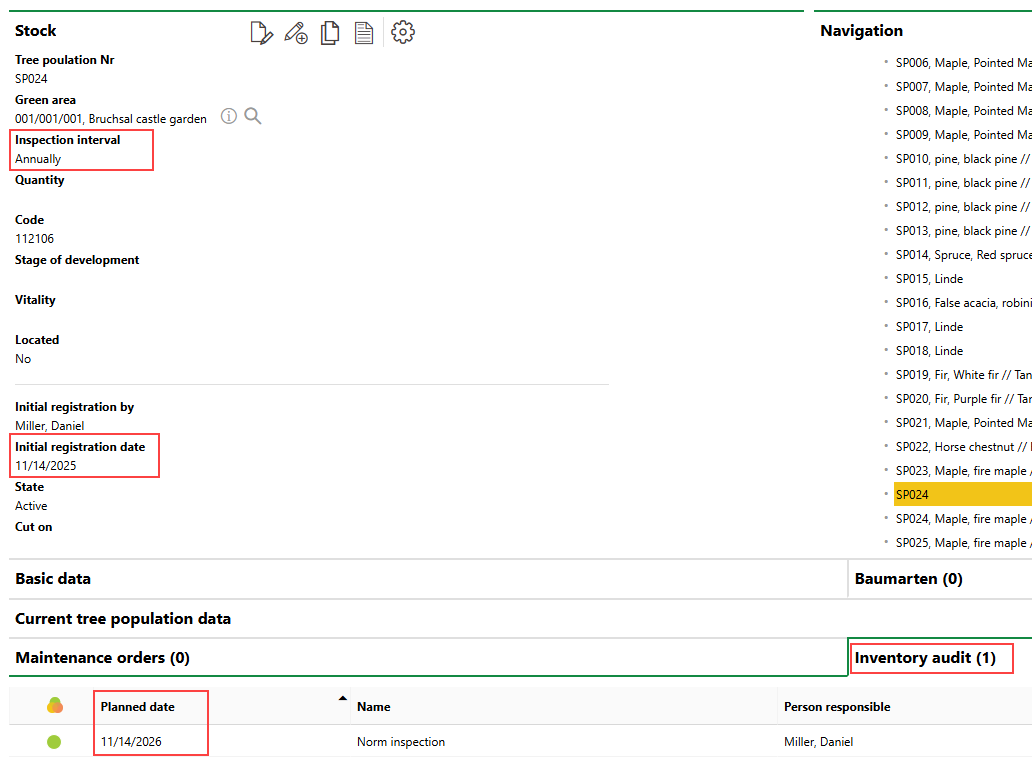
VertiGIS FM programmatically creates inspections for all tree clusters in the system. These inspections appear in the Inventory Audit section on the tree cluster details page.
All system-generated inspections in the Inventory Audit section indicate "Norm inspection" in the Name column.

Inventory Audit Section
An inspection's Name property indicates "Additional Inspection" if the inspection was manually created.
The Inspection Interval property in the tree cluster's core details determines the Planned Date of the first system-generated inspection. For example, if you add the tree cluster to VertiGIS FM on November 14, 2025, and its Inspection Interval value is Annually (specified as "Every 1 Year" in the "Annually" entry in the Inspection Interval catalog), VertiGIS FM will schedule the tree cluster's first inspection for November 14, 2026.
Inspection Interval and First Inspection
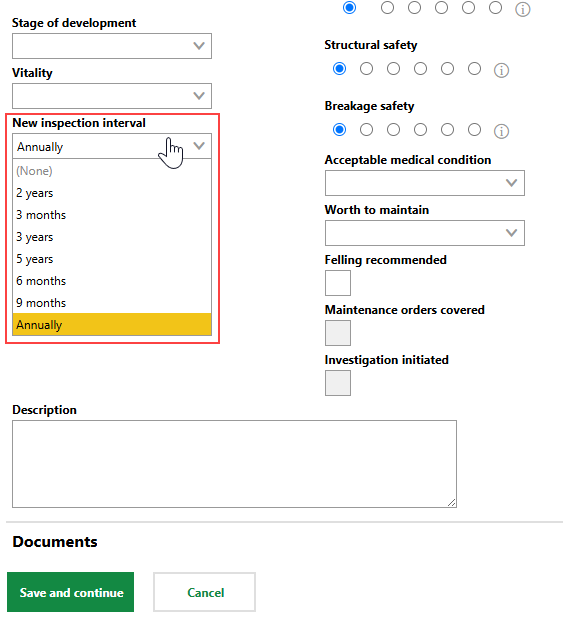
When an employee completes an inspection, they can select the interval that VertiGIS FM will use to determine the Planned Date of the tree cluster's next inspection in the New Inspection Interval drop-down menu. By default, the tree cluster's Inspection Interval property is selected in this menu.
New Inspection Interval Menu
The tree cluster's Inspection Interval property is overwritten with the value selected in the New Inspection Interval menu when you complete an inspection.
VertiGIS FM schedules the next inspection according to the interval selected in the New Inspection Interval menu in the previous inspection.
Tree Cluster Inspection
Manually Create Inspections (Create Additional Inspections)
If you need to create an inspection with a Planned Date different from the next inspection generated according to the Inspection Interval, you can manually create the inspection.
To Manually Create an Inspection
1.Navigate to the details page for the tree cluster for which you want to manually create an inspection.
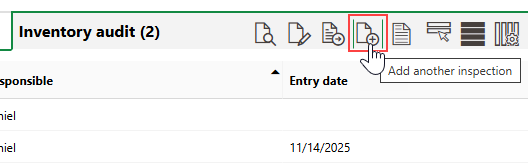
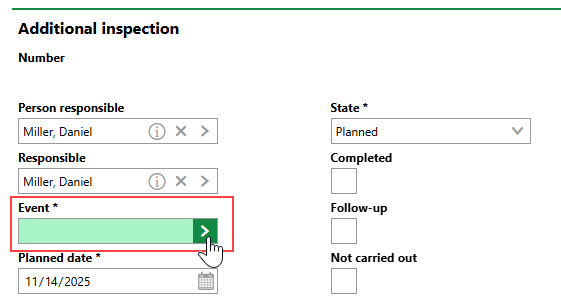
2.Expand the Inspections section and click the Add Another Inspection (![]() ) icon.
) icon.
3.In the Event menu, select an option. Selectable options are saved in the Event catalog.
4.Enter additional details as required. Refer to Additional Inspection Details for more information.
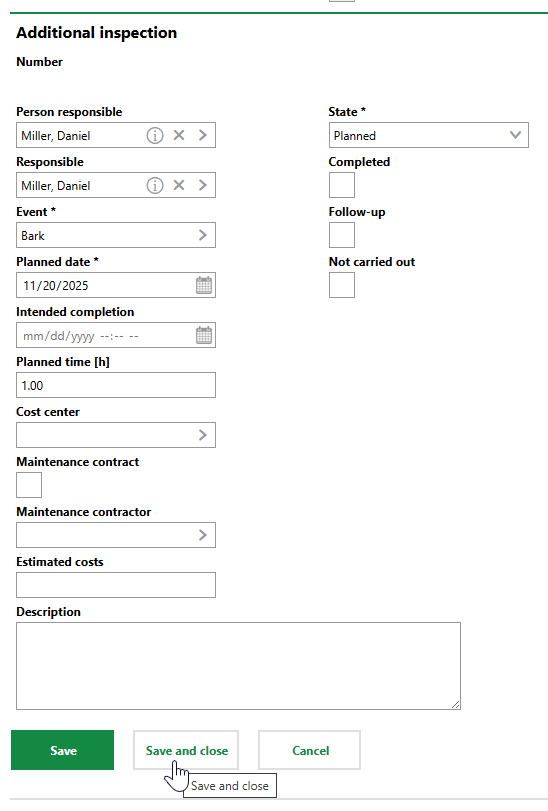
5.Click Save or Save and Close.
The new manually created inspection appears in the Inventory Audit section on the tree cluster's details page with the "Additional Inspection" title in the Name column.

Manually Created Inspection
Field |
Description |
|---|---|
Person Responsible |
The employee, contact, user, or team responsible for the inspection. Must be selected from an entry created in VertiGIS FM Contact Management. |
Responsible |
The employee, contact, or team responsible for the inspection. Must be selected from an entry created in VertiGIS FM Contact Management. |
Event |
An entry that outlines the need for the additional inspection. Selectable options are saved in the Event catalog. |
Planned Date |
The date the inspection should be completed. |
Intended Completion |
The date and time by which the inspection should be completed. |
Planned Time |
The number of hours of work the inspection is expected to take to complete. |
Cost Center |
The cost center associated with the inspection. |
Maintenance Contract |
Whether a maintenance contract exists for the tree. |
Maintenance Contractor |
The company that carries out the inspection according to the contract. Selectable options are stored in the Contact Management module. |
Estimated Costs |
The estimated costs to complete the inspection. |
State |
The current status of the inspection (Planned or Finished). Refer to Order Statuses. |
Completed |
A check box that indicates whether the inspection has been completed. Selecting this check box programmatically updates the inspection's status to Finished and opens the form to complete the inspection. |
Follow-up |
An information field that, if selected, indicates follow-up actions on the inspection are required. |
Not carried out |
A check box that can be selected if the investigation is being closed without all of the required work being completed. Selecting this check box programmatically updates the investigation's status to Finished. Refer to Not Carried Out. |
Description |
A general description of the inspection or the reason why it was created. |
Complete Inspections
Tree inspections are listed in the Inventory Audit section on the tree cluster's details page.

Inventory Audit Section
By default, the leftmost column in the section tables details indicates the inspection's or order's status.
Inspection or Order Statuses
Status |
Description |
|---|---|
Planned |
No work associated with the inspection, investigation, or order has begun. |
In progress |
Work associated with the inspection, investigation, or order is underway. This status cannot be assigned to orders and investigations associated with trees. |
Finished |
The order, investigation, or inspection is complete. The search page only shows these orders, investigations, or inspections if you select the Include History check box in the Filter menu. |
The icon symbol that accompanies the order in search pages and on details pages is based on its deadlines and not necessarily its status.
Order Status Symbols
Symbol |
Description |
|---|---|
|
The intended deadline is in the future. |
|
The intended deadline has passed, and the inspection, investigation, or order is overdue. |
|
The present time is between the lead time and the intended time, or the present time is between the intended time and the follow-up time. |
|
The inspection, investigation, or order is complete. |
|
The inspection, investigation, or order was closed, but the work associated with the inspection or order was not completed. |


Not Carried Out
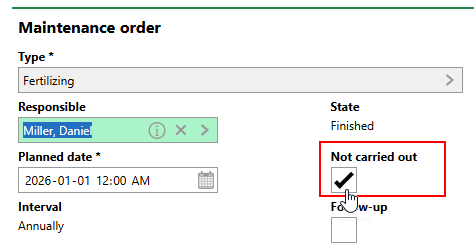
When editing an order or inspection, you can select the Not Carried Out check box to indicate that the order is being closed despite the associated work not being completed.
Not Carried Out Check Box
When you select this check box, VertiGIS FM updates the order's State to Finished. When you click Save and Close, the order's status icon indicates that the work was not completed.
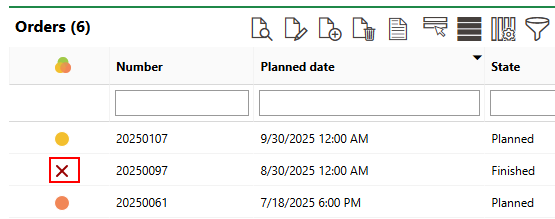
Status Icon for Order Not Carried Out
When saving an order as Not Carried Out, you can include a note in the Description field explaining that the work was deemed not necessary or otherwise cancelled..
Employees can complete inspections from the associated tree cluster details page or from the search page.
Norm Inspections (system-generated inspections) and Additional Inspections (manually created inspections) are identical except Additional Inspections has the Event property instead of the New Inspection Interval property.
To Complete a Tree Cluster Inspection
1.Do either of the following:
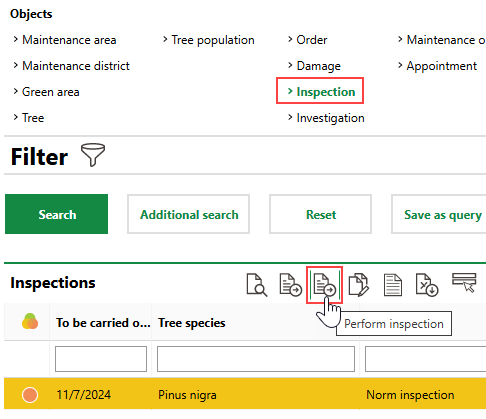
▪Navigate to the details page for the tree cluster associated with the inspection you want to complete. In the Inventory Audit section, select the inspection you want to complete and click the Perform Inspection (![]() ) icon.
) icon.

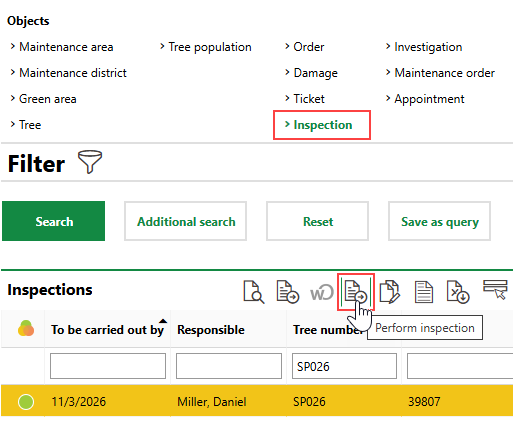
▪Navigate to the Tree Management search page. Under Objects, click Inspections. In the search grid, select the inspection you want to complete and click the Perform Inspection (![]() ) icon.
) icon.
2.Expand each section in the inspection form and enter the relevant tree data.
▪In the Tree Cluster Data section, enter the tree cluster's measurements and other observable traits.
▪In the Damage section, select issues present in the tree cluster and assess the severity of each selected issue.
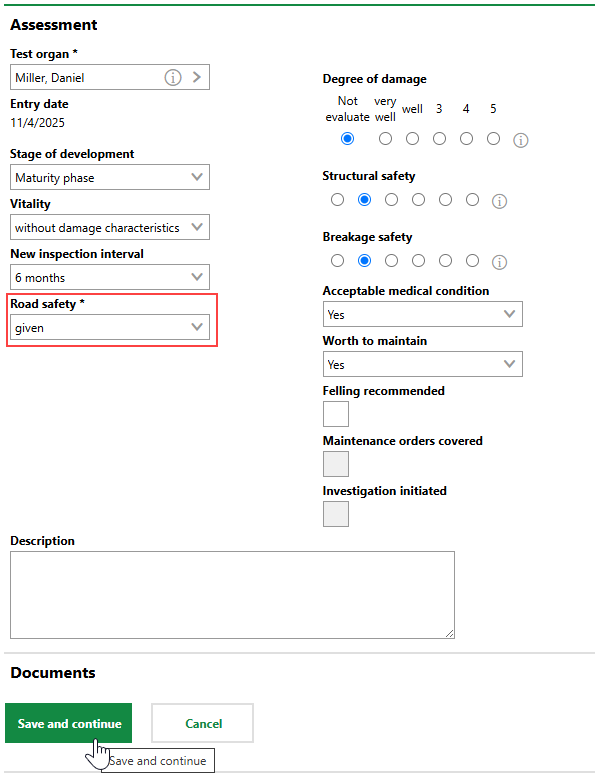
▪In the Assessment section, enter summarizing information and judgments about the inspection. It is mandatory to select a property in the Safety for Public Circulation menu in this section. For system-generated inspections, the property you select in the New Inspection Interval field determines the Planned Date of the next inspection for the tree cluster.
Refer to Inspection Form Sections for descriptions of all sections and fields in the tree cluster inspection form.
3.Click Save and Continue.
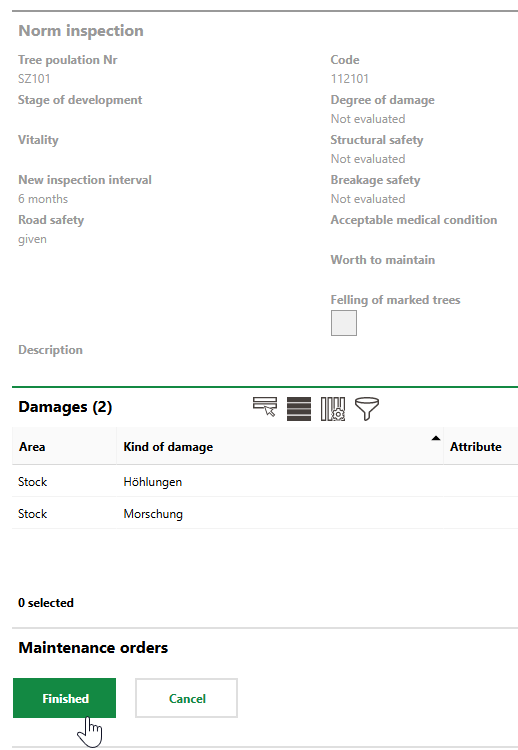
4.Review the high-level inspection details and issues being recorded in the Damages section.
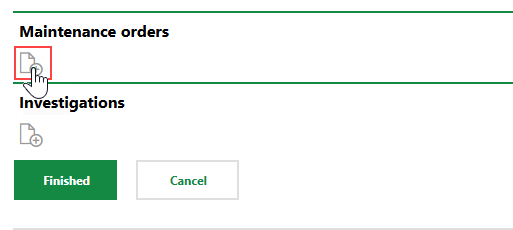
5.If, based on the inspection, there are issues with the tree cluster to resolve, click the Add (![]() ) icon in the Maintenance Orders section to create an order.
) icon in the Maintenance Orders section to create an order.
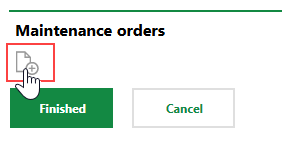
Orders address and resolve an issue (for example, "remove fungus"). Investigations determine whether any further actions are required (for example, "investigate fungus and, if necessary, create an order to remove it").
6.Click Finished.
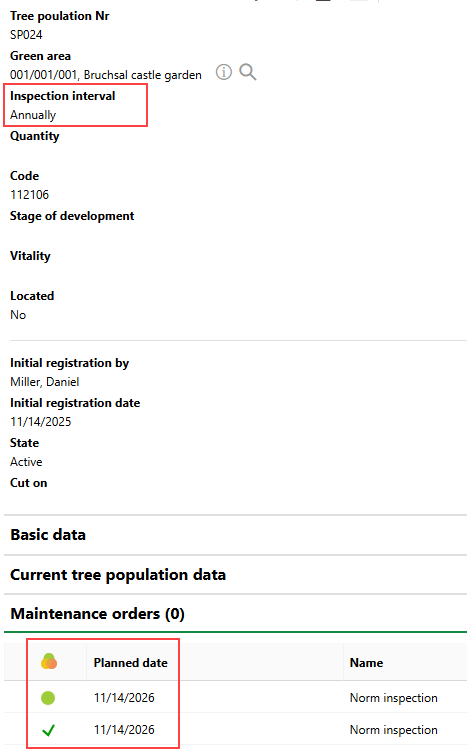
After you complete the inspection, you can see it marked as Finished in the Inventory Audit section on the tree cluster's details page, with the subsequent inspection scheduled according to the Next Inspection Interval property selected in the completed inspection.
Various data entered or selected during the inspection are reflected in the tree cluster's core properties and Basic Data section.
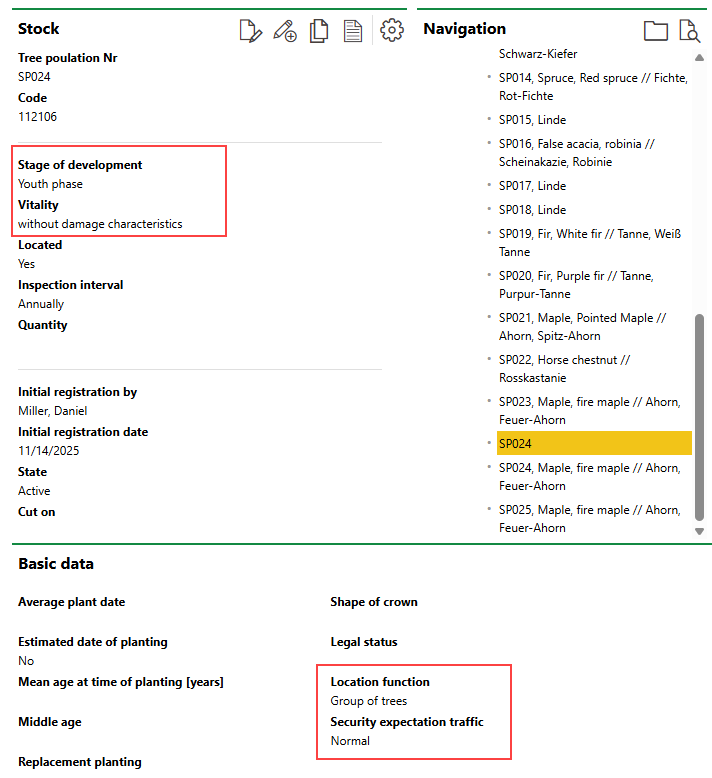
Tree Cluster Data Fields Populated by Inspection Inputs
When the next inspection is completed, the fields outlined above will reflect any differing values selected during that inspection.
Lastly, any issues documented in the Damages section during the inspection are listed in the Damage History section.
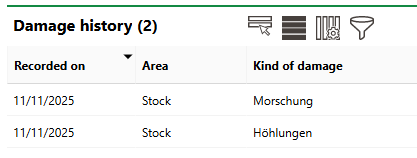
Damage History Section
Associated Orders and Investigations
If you added an order or investigation while completing an inspection, the employee who works on the associated item will see that it originated from the inspection.
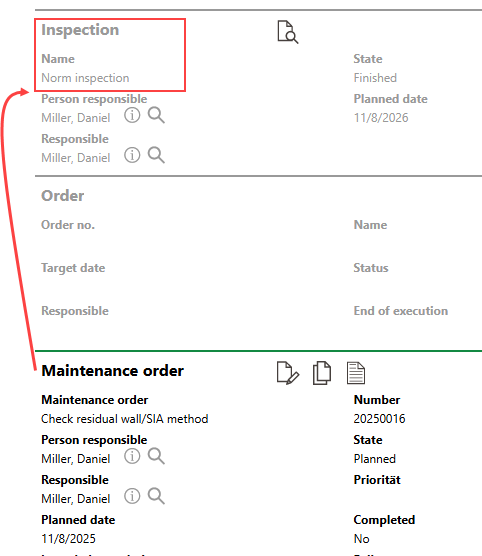
Order Created Based on Inspection
Search Page
You can also complete inspections from the Tree Management search page by clicking Investigation under Objects, selecting the inspection you want to complete, and clicking the Perform Inspection (![]() ) icon.
) icon.
Initiating Inspection from Search Page
The process to complete the inspection is then identical to the one outlined above.
Inspection Form Sections
The employee who performs the inspection can document the data points below in the various sections when inspecting the tree.
Norm Inspection or Additional Inspection
Field |
Description |
||||||
|---|---|---|---|---|---|---|---|
Number |
The inspection's identifying number. |
||||||
Protocol |
Selectable options are stored in the Protocol catalog. |
||||||
State |
The tree cluster's current state:
The status selected in this menu will be reflected in the State menu in the tree's details after you complete the inspection. |
||||||
Executed on |
The date and time the inspection was completed. By default, VertiGIS FM populates this field with the date and time a user clicked the Perform Inspection ( |
||||||
Executed by |
The VertiGIS FM user who completed the inspection. By default, VertiGIS FM populates this field with the user who clicks the Perform Inspection ( |
Tree Cluster Data
Field |
Description |
|---|---|
Tree Cluster number |
A serial number or string to identify the tree cluster being inspected. This value is inherited from the tree cluster's details. |
Code |
A serial number or string assigned to the tree cluster internally. This value is inherited from the tree's details. |
Tree species |
The species of trees in the tree cluster being inspected. This value is inherited from the tree cluster's details. You can add or remove species during the inspection. |
Security Expectation Traffic |
The level of activity near the tree cluster. Selectable options are saved in the Security Expectation Traffic catalog. The value selected in this field in a completed tree cluster inspection overwrites the value in the Security Expectation Traffic field in the Basic Data section of the tree cluster's details. |
Location function |
A description of the tree cluster's location. Selectable options are saved in the Location Function catalog. The value selected in this field in a completed tree cluster inspection overwrites the value in the Location Function field in the Basic Data section of the tree cluster's details. |
Mean population height |
The median height of trees in the tree cluster. The value entered in this field is stored in the corresponding field in the Current Tree Data section when you complete the inspection. |
Mean treetop height [m] |
The median crown height of trees in the tree cluster. The value entered in this field is stored in the corresponding field in the Current Tree Data section when you complete the inspection. |
Mean treetop diameter |
The median crown diameter of trees in the tree cluster. The value entered in this field is stored in the corresponding field in the Current Tree Data section when you complete the inspection. |
Mean trunk circumference [cm] |
The median circumference of trees in the tree cluster. The value entered in this field is stored in the corresponding field in the Current Tree Data section when you complete the inspection. |
Map
The Map section on the tree inspection form shows the location of the tree cluster being inspected on an integrated web map. You can click the Recenter Map (![]() ) icon to center the area shown in the map on the tree cluster's location.
) icon to center the area shown in the map on the tree cluster's location.
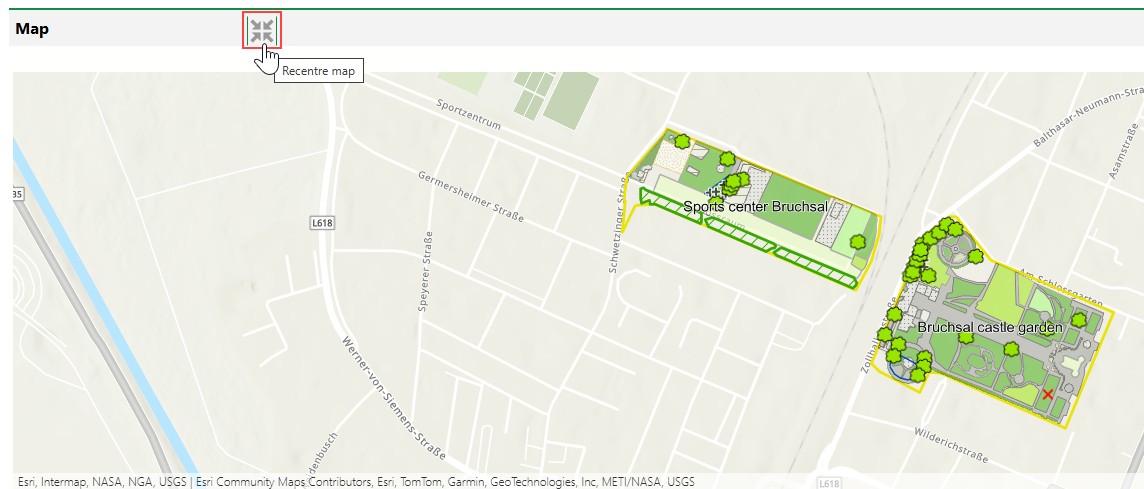
Map Section in Tree Cluster Inspection Form
Refer to VertiGIS Studio Integration for more information.
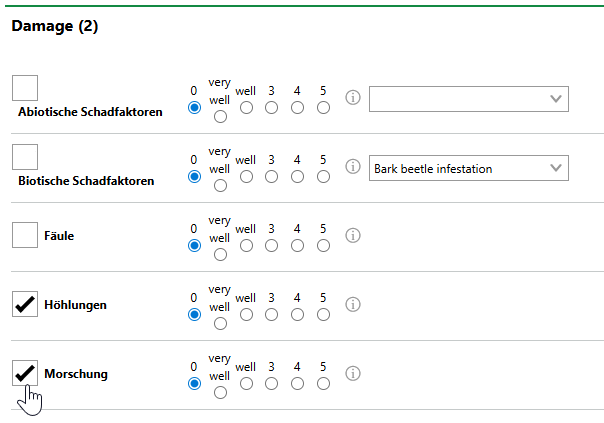
Damages
In the Damages section, document issues associated with the tree cluster by reviewing a list of potential issues and
•selecting the check box to indicate whether the issue applies to the tree cluster you are inspecting.
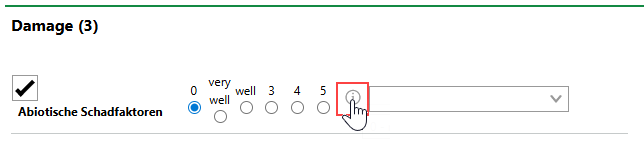
•if the issue's check box is selected, selecting a radio button to indicate the severity of the issue from 0 (no issue) to 5 (major issue).
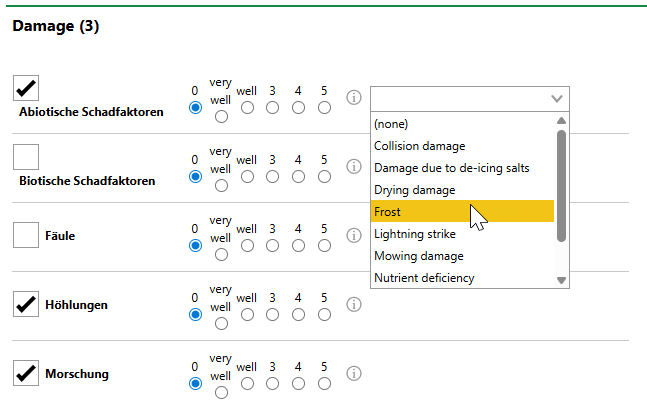
Damages Section
For each issue whose check box you select, VertiGIS FM will create an entry in the Damage History section.
VertiGIS FM programmatically selects the check box for an issue if you select a severity level other than 0.
Lists of potential issues that can be documented, as well as damage severity indices for each one, are determined by the customer and added to VertiGIS FM using import files.
Next to each potential issue, you can click the information icon (![]() ) to open a dialog that shows a description for each severity level.
) to open a dialog that shows a description for each severity level.
Severity Guide Button
Assessment
Field |
Description |
|---|---|
Assessed by |
The VertiGIS FM user who is completing the inspection. |
Entry date |
The date the inspection is completed. |
Stage of development |
The tree cluster's stage of development. Selectable options are saved in the Stage of Development catalog. |
Vitality |
A description of the tree cluster's vital status. Selectable options are saved in the Vitality catalog. |
New Inspection Interval |
For Norm Inspections only, when the next system-generated inspection for the tree cluster should be scheduled for (i.e., how much time should be added to the current date to determine the next inspection's Planned Date). Selectable options are saved in the Inspection Interval catalog. |
Event |
For Additional Inspections (i.e. manually created inspections) only, the event that merits the additional inspection. Selectable options are saved in the Event catalog. |
Safety for Public Circulation |
Whether it is safe for the public to circulate near the tree cluster. Selectable options are saved in the Safety for Public Circulation catalog. This field is mandatory. The selected value will appear in the Safety for Public Circulation field in the tree cluster's core properties. |
Degree of Damage |
An overall assessment of damage to the tree cluster. You can assess the damage on a scale of 0 (no damage) to 5 (severe damage). |
Structural Safety |
An overall assessment of the tree cluster's structural safety. You can assess the safety on a scale of 0 (no threat) to 5 (very unsafe). |
Breakage safety |
An overall assessment of the tree cluster's breakage safety. You can assess the safety on a scale of 0 (no threat) to 5 (very unsafe). |
Acceptable medical condition |
Whether the tree cluster's health is in an acceptable condition (yes or no). |
Worth to maintain |
Whether the tree cluster should be maintained (yes or no). |
Felling recommended |
A check box that, if selected, indicates felling is recommended for the tree cluster. |
Maintenance orders covered |
A data field that indicates whether the employee who completed the inspection created any orders based on the inspection. VertiGIS FM programmatically checks this box if the user clicks the Add (
Adding Order in Complete Inspection Form |
Documents
In the Documents section, you can attach photos taken during the inspection by clicking Place files for upload here (or click) and selecting a file on your computer.