On the Administration > Roles/Permissions > User Management page, you can manage the VertiGIS FM users with access to your system. A user must have an employee and a contact associated with them.

Users Listed on the User Management Administration Page
Add a User
You can add a user to the system on the Administration > Roles/Permissions > User Management page if the prerequisites below are met:
•you have already created a contact for the person for whom you are creating a new user.
•you have already created an employee for the person for whom you are creating a new user.
To Add a User
1.Navigate to the User Management page (Administration > Roles/Permissions > User Management).
2.Click the Add (![]() ) icon.
) icon.
3.Enter the user details in the form. The User name, Password, Confirm Password, Contact, and Language fields are mandatory. Refer to User Details for more information.
The password must comply with the password guidelines specified by an administrator. The system displays an error message if it does not. Refer to Password Guidelines for more information.
4.Click Save and Close.
Field |
Description |
|---|---|
Username |
The user name for the new user. This is their login credential. |
NT Username |
The domain user name for the new user. This could include their LAN credential for their system. |
Password |
The password the user will use to login to the application. Refer to Password Guidelines for more information. |
Confirm password |
The password re-entered. Refer to Password Guidelines for more information. |
Contact |
The contact associated with the user. You must already have created the contact before creating the new user. |
Language |
The language the user speaks. |
Valid from |
The date the account is created. |
Valid until |
The date until which the user can log into VertiGIS FM. |
Organisation filter active |
|
Remain logged in |
Whether you want the user to remain logged in between sessions using the same browser. |
Blocked |
Whether the user should be prevented from signing in to VertiGIS FM. If the user signs in with incorrect credentials three times, the system will block them for one hour. This check box can be deselected to unblock them. |
Password does never expire |
Whether you want the user's password to expire. |
Change password during next login |
Whether you want the user to reset their password the next time they log in. |
Display notifications |
Whether you want the notification protocol to display when the user signs in. Typically, this feature is only selected for administrators.
Notification Protocol Dialog |
Status icon as symbol |
Whether you want the user to see statuses represented by symbols instead of colours in the user interface. Typically, this feature is selected for users with color vision deficiency.
|
Navigation Bar |
Whether the modules panel on the left side of all screens in the application is visible to the user.
|
Roles
The Roles section lists the roles to which the user has been added. Roles are the primary method for assigning user permissions to users. You can open the roles listed here on the Role Administration page to view the actions within the various VertiGIS FM products that the user has privileges to perform.
1.Navigate to the User Management page (Administration > Roles/Permissions > User Management).
2.Double-click the user to whom you want to add a role.
3.In the Roles section, click the Add (![]() ) icon.
) icon.

4.Select the role you want to add to the user and click Apply.
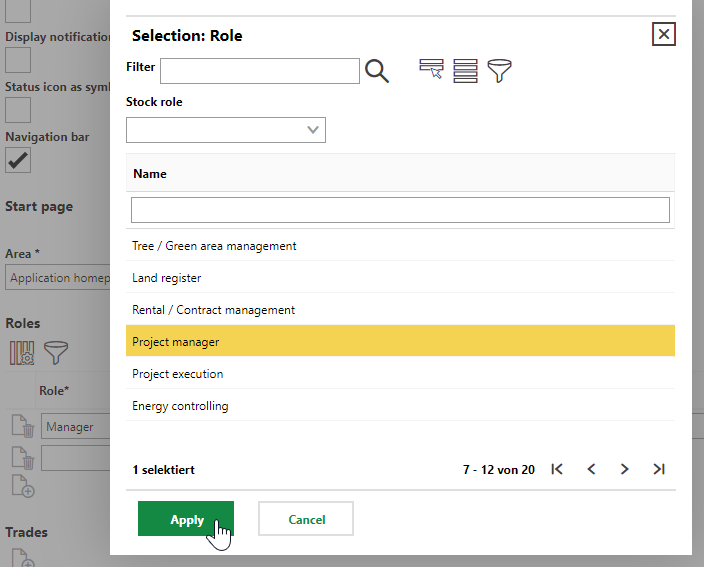
5.Click Save and Close.
For instructions on how to add new roles to the system that you can then add to a user, click here.
To Remove a Role from the User
1.Navigate to the User Management page (Administration > Roles/Permissions > User Management).
2.In the Roles section, click the Delete (![]() ) icon next to the role you want to remove from the user.
) icon next to the role you want to remove from the user.
3.Click Save and Close.
Object Rights
In the Object Rights section, you can restrict the user's access within some VertiGIS FM products to instances of data objects you specify. Often, administrator use this feature to limit a user's access to pages for certain buildings, floors, or rooms within the VertiGIS FM Buildings product for which they are responsible for maintaining.
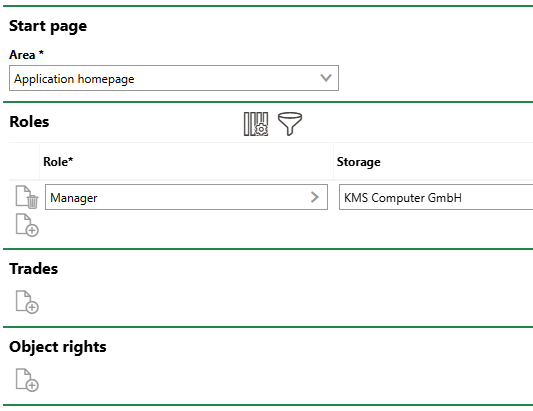
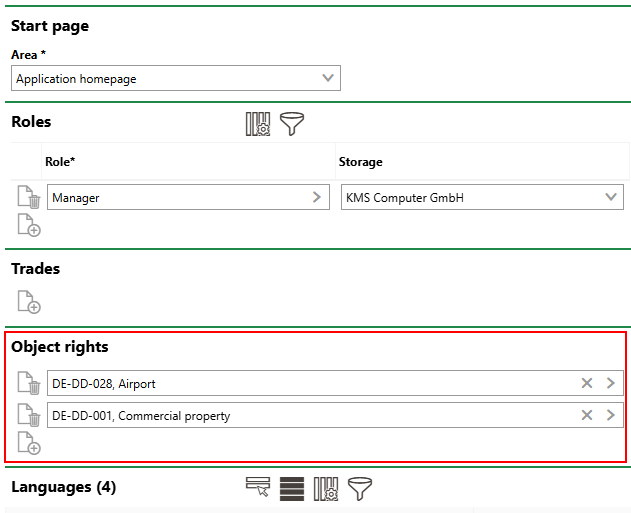
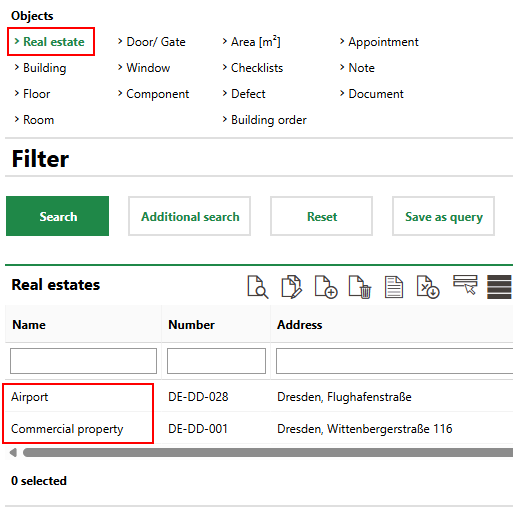
For example, you the user's duties involve maintenance tasks on only two real estates, you can add them in this section. Other real estates in your database will not appear on the search page when the user views it, or in any menus in which they select a real estate. The user will be unable to view or edit any real estates other than the ones you select in the Object Rights section.
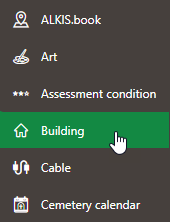
1.1 User with no Object Rights |
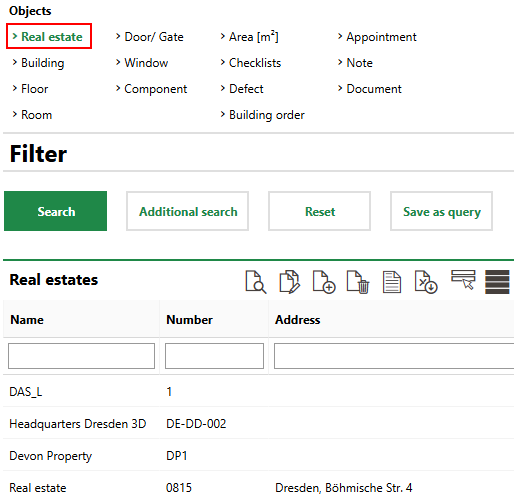
1.2 User Sees Full List of Real Estates |
2.1 User with Two Real Estates in Favourites |
2.2 Real Estate Search with Favourites |
To add a data object to a user's object rights, click the Add (![]() ) icon under Object Rights on the Administration > Roles/Permissions > User Management > [User] page.
) icon under Object Rights on the Administration > Roles/Permissions > User Management > [User] page.
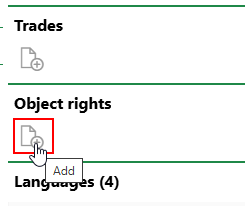
Add Object Rights Icon
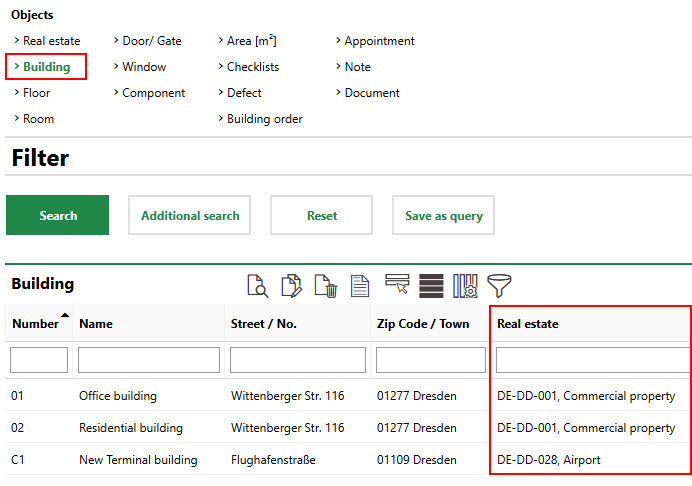
Object rights are manged hierarchically, which means any high-level objects you add to this section will filter out lower-level objects that are not directly beneath it for the user. For example, if you add a real estate as an object right, the user will only see buildings located on that real estate. Buildings located on other real estates will be filtered out from the user's view, like its parent real estate.
3.1 User with Two Real Estates in Object Rights |
3.2 Real Estate Search with Object Rights |
You can add data objects lower in a hierarchy by double-clicking its parent in the Object Rights selection dialog, instead of selecting it and clicking Apply. To add a building, for example, double-click the real estate in which it is located in the Object Rights selection dialog, and then select one of the building on the real estate and click Apply.
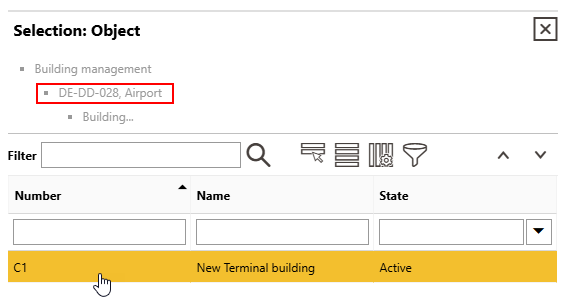
Adding a Building on a Real Estate as an Object Right
When you apply an object right to your a user's settings, a star icon appears in the top-right corner of all the dashboard pages when they are signed in to VertiGIS FM.

Object Rights Indicator Icon
Languages
The Languages section lists the languages in which the user can use VertiGIS FM.
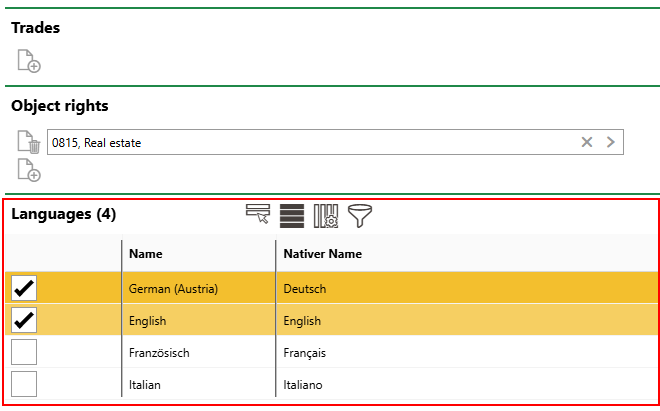
Languages Section on User Page
Selected languages appear in the drop-down menu when the user clicks the globe icon in the top-right corner of the application.
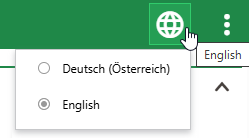
Available Languages According to Selected Languages on User Page
Select or deselect languages according to the languages you want the user to be able to set, and then click Save or Save and Close.
Edit a User
When you edit a user, you can change any of the user details associated with them. This includes changing their password.
To Edit a User
1.On the Administration > Roles/Permissions > User Management, select the user whose details you want to edit.
2.Click the Edit (![]() ) icon.
) icon.

3.In the form, update the information you want to edit. You can also add or remove Roles, Trades, or Object Rights in the respective sections below the form.
If changing a user's password, you are required to enter the new password in the Password text box and re-enter it in the Confirm Password text box.
4.Click Save and Close.
Copy a User
You can create a user who shares all the properties of an existing user with the Copy User feature. The Username, Password, Contact, and Valid From fields will have unique values, but the rest of the user fields can have inherited values. This feature is helpful if you want to create many users who share the same roles and privileges.
To Copy a User
1.On the Administration > Roles/Permissions > User Management, double-click the user you want to copy.
2.Click the Copy (![]() ) icon.
) icon.

3.Enter a unique Username for the new user.
4.Enter the new user's password in the Password text box, and re-enter it in the Confirm Password text box.
5.Click the arrow in the Contact menu and select the contact with which the new user is associated.
6.Update any additional details as required.
7.Click Save and Close.
Delete a User
You can delete a user on the Administration > Roles/Permissions > User Management page by selecting them in the User table and clicking the Delete (![]() ) icon.
) icon.
Export User Data
You can click the two ![]() icons to export reports on the users in the system. The reports are exported as Excel files.
icons to export reports on the users in the system. The reports are exported as Excel files.

Export User Data Icons
The Excel Report (![]() ) icon (on the left) exports the user data in the table for all selected users into the report. If no users are selected in the table, all users are included in the report.
) icon (on the left) exports the user data in the table for all selected users into the report. If no users are selected in the table, all users are included in the report.
The Export All User Data (![]() ) icon (on the right) exports all the user data for all users into a report. The Excel file includes additional worksheets for user data not shown on the Administration > Roles/Permissions > User Management page, including the user's Personal Data, Employee data, and more.
) icon (on the right) exports all the user data for all users into a report. The Excel file includes additional worksheets for user data not shown on the Administration > Roles/Permissions > User Management page, including the user's Personal Data, Employee data, and more.

