Using the merge parcel workflow in VertiGIS FM Parcel, you can combine multiple land parcels, or parts of multiple land parcels, to create a new land parcels.
This can involve merge parts of two existing land parcels to create a new land parcel.
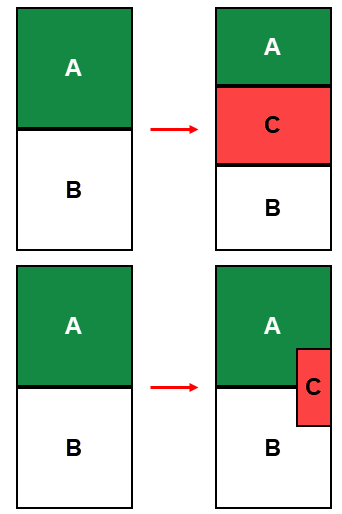
You can also merge part of an existing land parcel and the entirety of a new land parcel into a new land parcel, removing one existing land parcel from the database in the process.
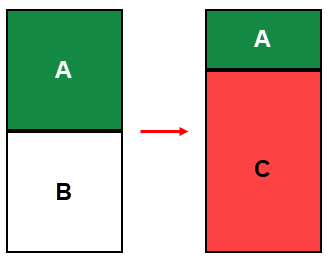
You can also remove two existing land parcels from the database and merge their areas into a new land parcel.

If your VertiGIS FM implementation includes integration with a GIS project, the web map will not immediately reflect updated boundaries of the reflected land parcels because the coordinate data is not stored in VertiGIS FM. You must manually draw the updated boundaries of the new or updated land parcels or upload an updated land registry cadastre file.
Merge Parcels
Merging land parcel is done by completing the following procedures, in order:
Refer to the procedures below for detailed instructions for each procedure.
Create a Proof of Change for a Land Parcel Split
Creating the proof of change involves specifying the land parcels you want to merge.
To Create a Proof of Change for a Land Parcel Split
1.Navigate to the VertiGIS FM Parcel dashboard.
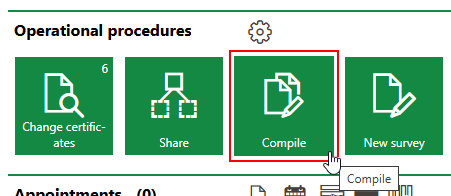
2.Under Operational Procedures, click Compile.
3.Enter the following inputs in the remaining mandatory fields:
▪Number: A number or code used to identify the change certificate internally.
▪Process: A string used to track the merge outlined in the change certificate.
4.In the Cadastral Districts menu, click the arrow icon, and then double-click the district in which the land parcel you want to merge is located.
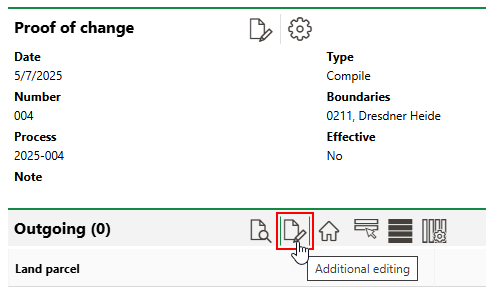
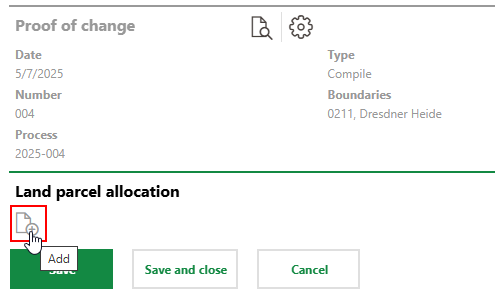
5.In the Outgoing section, click the Additional Editing (![]() ) icon.
) icon.
6. Click the Add (![]() ) icon.
) icon.
7.Select a land parcel you want to merge and click Apply. You can select any land parcel located in the district you selected in step #3.
8.In the Outgoing [m2] text box, enter the area that will be extracted from its current land parcel and merged into the new parcel.
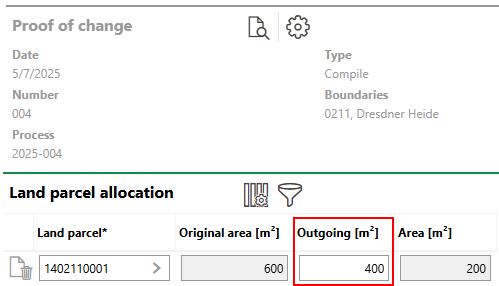
VertiGIS FM calculates the remaining area for the land parcel (its Original Area [m2] minus its Outgoing [m2]) in the Area [m2] field.
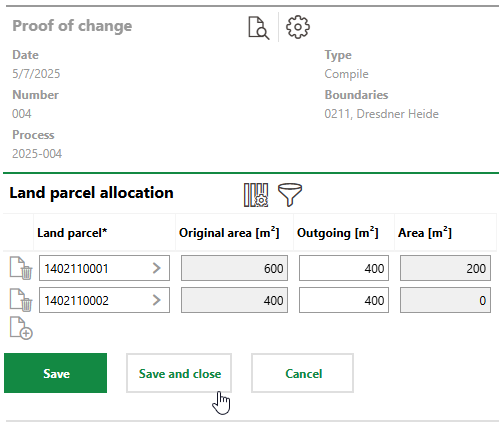
9.Repeat steps 6-8 to select another land parcel to be merged. Repeat these steps once for each land parcel you want to merge into a new land parcel.
10.Click Save and Close.
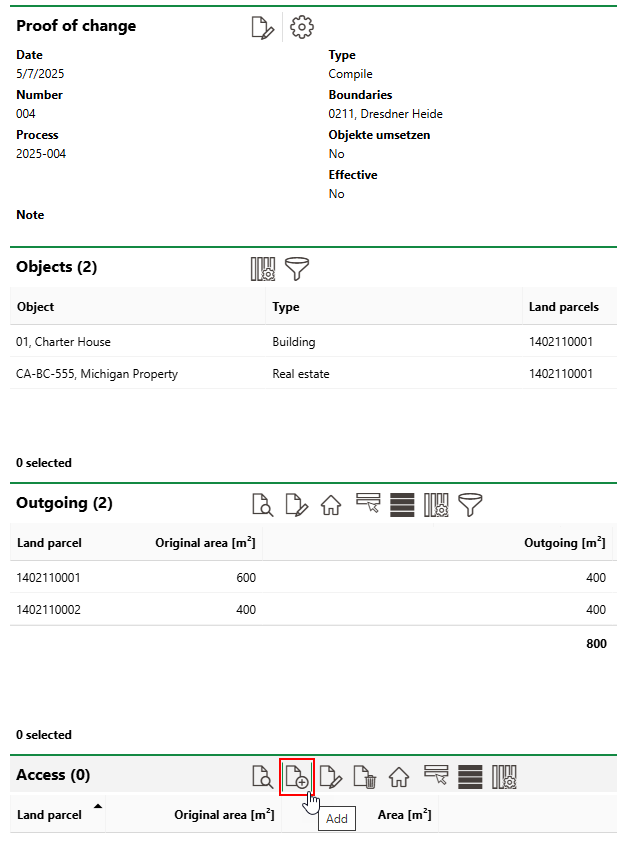
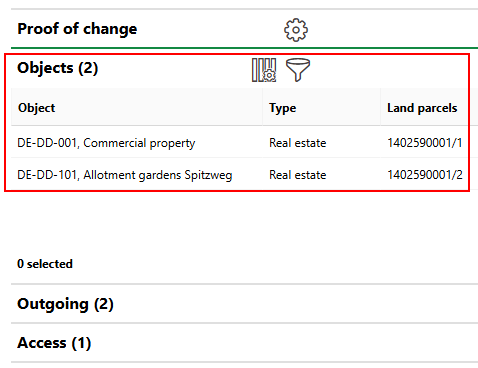
After you click Save and Close, the selected land parcel will appear in the Outgoing section, and any data objects (like real estates or buildings) will appear in the Objects section.
Create New Land Parcel
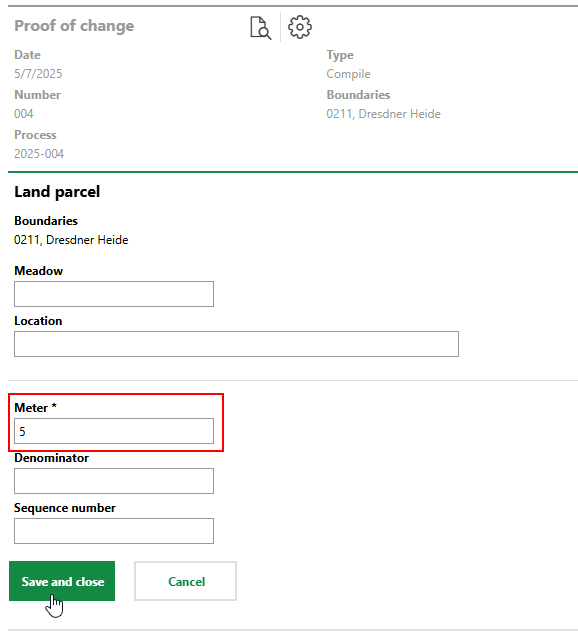
In the next procedure, enter details for the new land parcel that will be created as a result of the original land parcel's split.
To Create a New Land Parcel
1.In the Incoming section, click the Add (![]() ) icon.
) icon.
2.In the form to create a new land parcel, enter, at minimum, a numerator by which to identify the land parcel, Refer to Land Parcel Details for descriptions of all form fields.
3.Click Save and Close.
Object Assignment
If there are data objects like real estates or buildings present on the land parcels being merged, you can specify whether they should have their association changed to a newly created land parcel or remain associated with their original land parcel. Relevant objects are present on the land parcel being split if an Objects section appears on the page after you select land parcels in the Outgoing section and click Save and Close.
Objects Present on Merged Land Parcels
You can skip to the Make Change Effective procedure if
•the Objects section is not visible on the page.
•the data objects should remain associated with the original land parcel (i.e., they are not located on the part of the land parcel being merged into a new land parcel).
If you want to move the objects to one of the land parcels created by the split, complete the steps below.
To Re-Assign Objects to a New Land Parcel
1.In the Outgoing section, select a land parcel and click the Object Assignment (![]() ) icon.
) icon.
2.Deselect the objects you want to move to one of the newly created land parcels.
A real estate and a building located on it cannot be assigned to different land parcels. A real estate and a building located on it must both be moved to a new land parcel or both remain on the original land parcel.
If you do not want to move any of the listed objects from the original land parcel to one of the new ones created by the split, click Cancel.
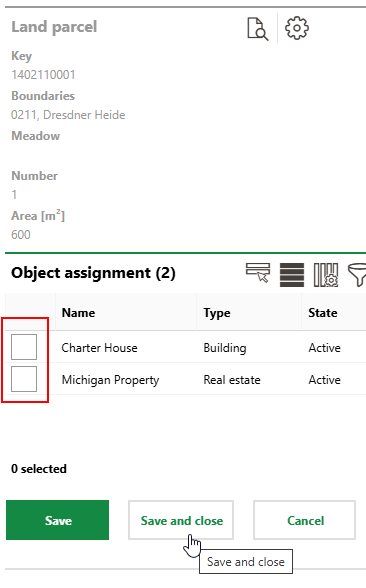
3.Click Save and Close.
4.Repeat steps 1-3 for the other land parcels listed in the Outgoing section.
5.In the Incoming section, select the new land parcel the objects will be moved to and click the Object Assignment (![]() ) icon.
) icon.
6.Select the objects you want to move to the new land parcel.
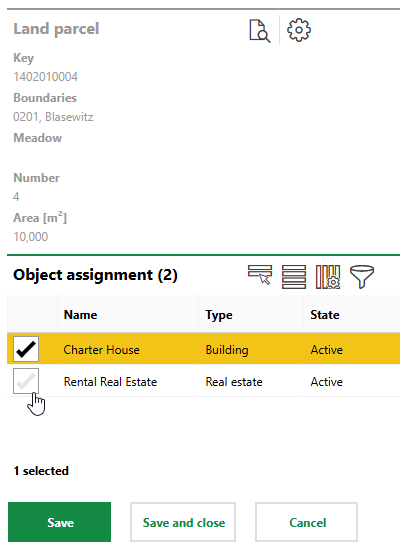
7.Click Save and Close.
8.Continue to the Make Change Effective procedure. To complete the object re-assignment to another land parcel, ensure you select the Implement Object Assignment check box when you complete the procedure.
Make Merge Effective
After you have created the proof of change, specified the original land parcels and new land parcel that will be created by the merge, and assigned objects located on the original land parcels to the appropriate location, you can make the merge effective. You will be unable to change the land parcel being merged after you complete these steps.
To Make Merge Effective
1.In the Proof of Change section, click the Edit (![]() ) icon.
) icon.
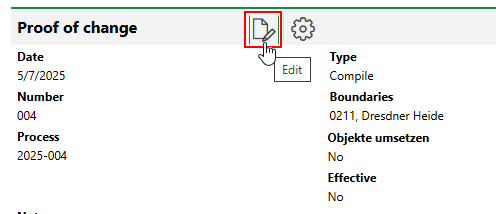
2.Select the Effective check box.
3.If you completed the object assignment procedure and specified that objects previously located on one of the original land parcels will now be located on the new land parcel created by the merge, select the Implement Object Assignment check box.
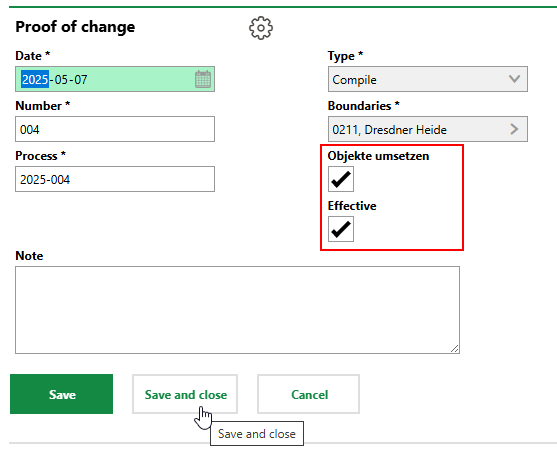
4.Click Save and Close.
The new land parcel is added to the VertiGIS FM database as a result of the merge.
Additionally, the objects (in this example, the real estate and building) that were previously located on the original land parcels are specified as being located on the new land parcel created by the merge.
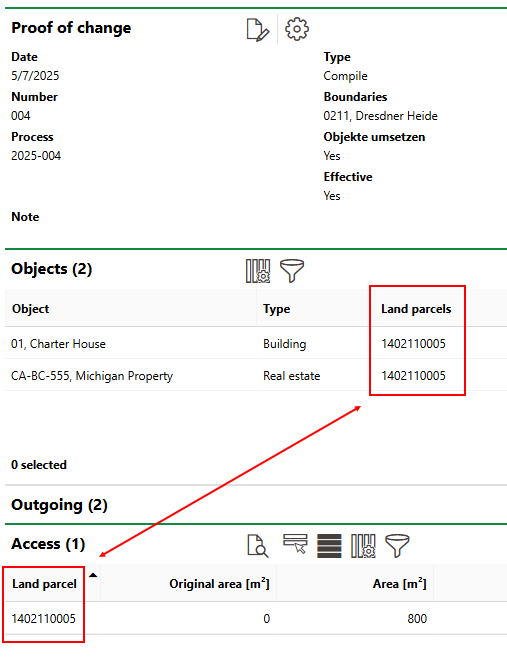
Building and Real Estate Moved to New Land Parcel