The Settle Consumption workflow allows you to transfer consumption data recorded in VertiGIS FM Energy into VertiGIS FM Rental Management and to create an internal invoice using the data. You can then allocate the costs in the invoice you produce to your tenants.
You can access the Settle Consumption page by clicking Settle Consumption under Operational Procedures on the Rental Management dashboard.

Settle Consumption
Add
The Add section lists all the buildings, real estates, and rental agreements that have a metering point assigned to them. In the Add section, you can pull consumption data from VertiGIS FM Energy and select the buildings or rental agreements for which you want to generate an invoice.
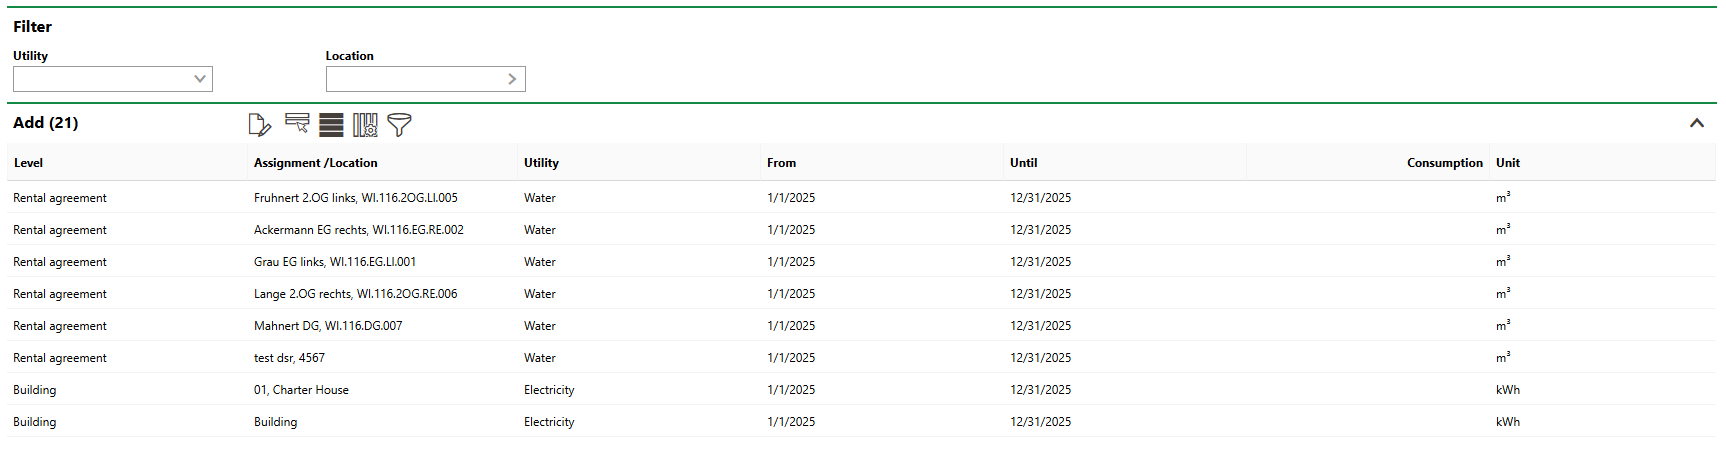
Add Section
You can filter the list of buildings and rental agreements associated with metering points by selecting an energy type in the Utility menu or the metering point's assignment location in the Location menu.
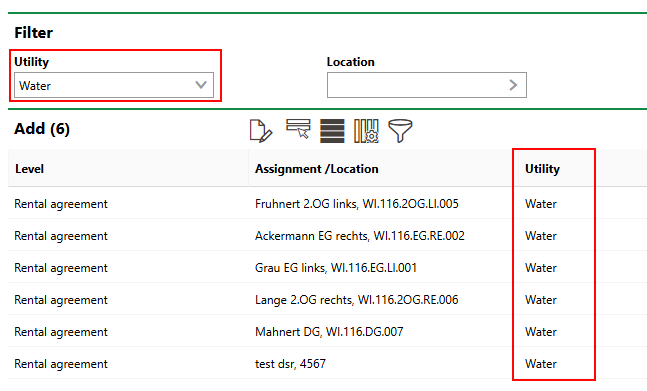
Filter by Utility
Submit Consumption Data
You can submit consumption data for invoicing in the Add section
To Submit Consumption Data
1.Navigate to the Rental Management dashboard.
2.Under Operational Procedures, click Settle Consumption.
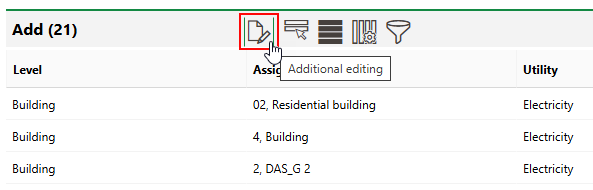
3.Expand the Add section and click the Additional Editing (![]() ) icon.
) icon.
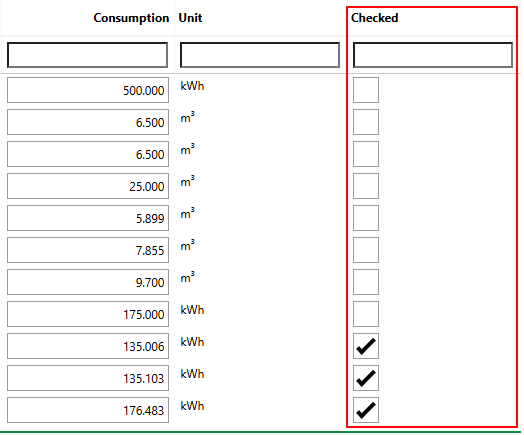
4.Populate the text box in the Consumption column with the number of units of energy consumed by the tenants of a rental unit or in a building. You can do this either of two ways:
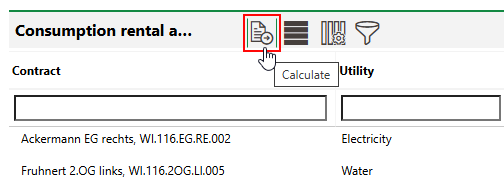
▪To populate the consumption values with data from VertiGIS FM Energy (i.e., consumption recorded at the metering point associated with the rental agreement or building), click the Calculate (![]() ) icon in the Consumption Rental Agreement or Consumption Building section.
) icon in the Consumption Rental Agreement or Consumption Building section.
▪To enter an amount manually, type the number of units of energy consumed in the text box.
5.Confirm the consumption data is accurate. If it is, select the Checked check box in the row for the rental agreement or building.
6.Click Save and Close.
Clear
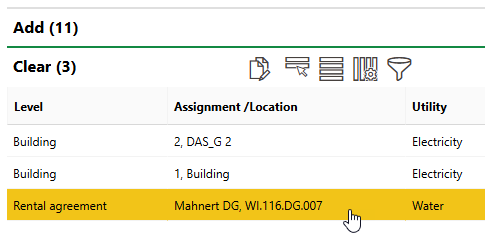
In the Clear section, you create an invoice using the consumption data you submitted for invoicing in the Add section. Entries appear in this section after you submit consumption data for a building or rental agreement.
To create an invoice, you must specify an account for the entry, the price per unit of the energy consumed, and whether taxes are applicable. This process creates an internal company billing invoice that reflects how much the tenant owes.
Create Invoice
You can create an invoice one entry at a time, by following the steps below for each entry for which you want to create an invoice. You can create invoices for multiple entries at the same time if the invoices should bill the same account and have the same pricing information. Typically, this is only done for entries reflecting the same kind of energy consumption (i.e., that have the same Utility property).
To Create an Invoice
1.Expand the Clear section.
2.Double-click the building or rental agreement whose consumption data you want to use to generate an invoice. Alternatively, select multiple entries and click the Batch Editing (![]() ) icon.
) icon.
3.Click the > icon in the Account menu and select the account to which the invoice will be billed.
You can only select accounts that have been assigned to an allocation key whose Utility property matches the Utility property of the selected consumption entry. Refer to Assign Accounts, Buildings, or Rental Agreements to an Allocation Key.
4.In the Subject menu, enter a subject for the invoice.
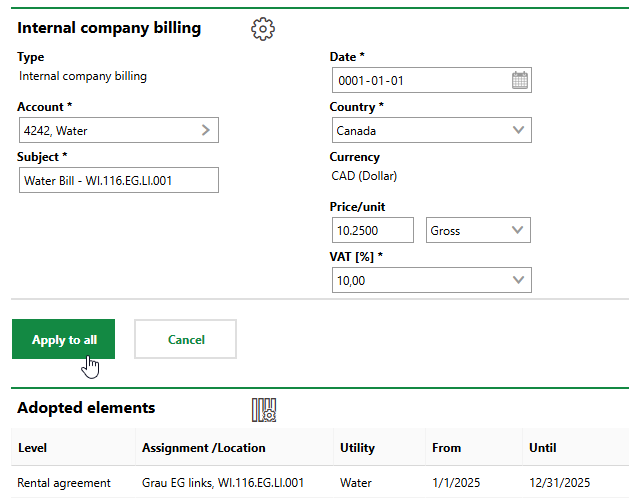
5.Click Apply to All, and then click OK.
Refer to Invoices for more information.
Proof
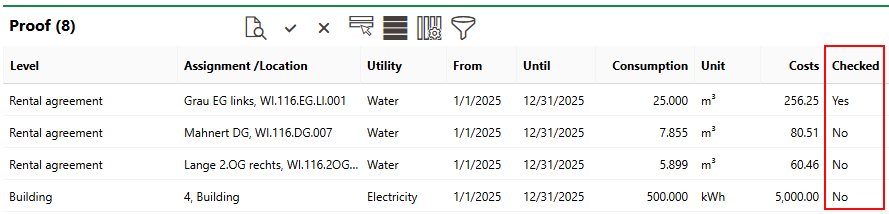
The Proof section lists internal company billing invoices associated with the various consumption entries. In this section, you can review invoices before they are sent to their respective tenant or payer.
You can see an invoice's status in the Checked column. Invoices whose Checked value is Yes are ready to be sent to the tenant.
Invoice Checked Status
To review an invoice, double-click it in the Proof section. You can then review the invoice's details, including the amount the customer is being charged and the amount of energy consumed.
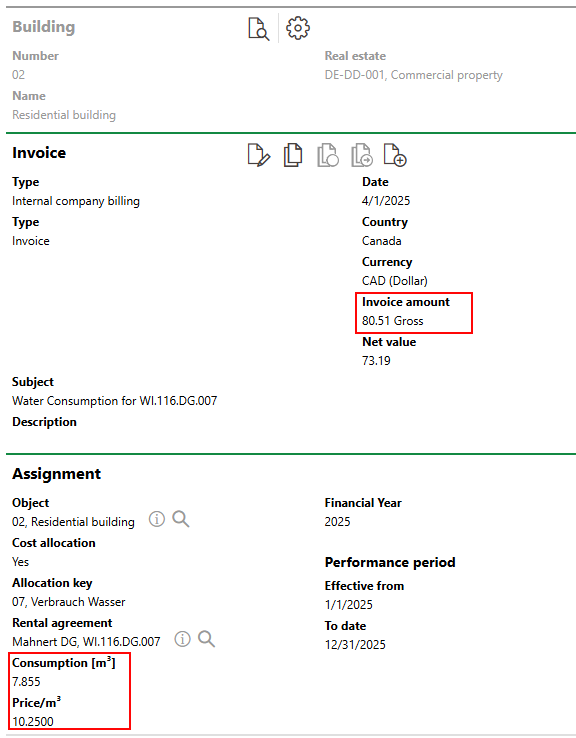
Invoice Preview
If the invoice's details are correct, you can check the invoice by selecting it in the Proof section and clicking the ![]() icon.
icon.
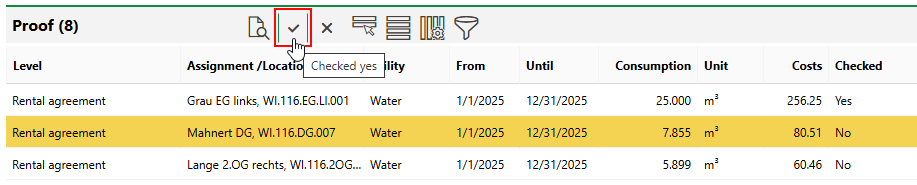
Checked Icon
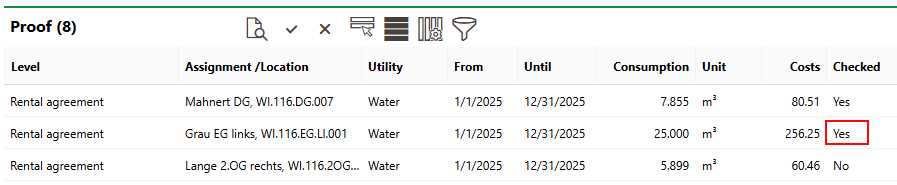
The invoice's Checked status changes to Yes.
Settle Consumption
The costs of the invoice can now be allocated to the tenants.