In the VertiGIS FM Fleet Management module, you can install components from the Vehicle Component Structure in vehicles in the Vehicle Structure to indicate where the component from your inventory is currently installed.
Unlike components from the core VertiGIS FM Maintenance Component Structure, which you install in select positions in another asset's installing structure, vehicle components are simply added to a list of components installed in a vehicle. There are no superior or subordinate relationships between vehicle components installed in a vehicle.
Install a Vehicle Component in a Vehicle
You can install a vehicle component in a vehicle on the vehicle's details page, or on the vehicle component's details page.
To Install a Vehicle Component in a Vehicle on the Vehicle's Details Page
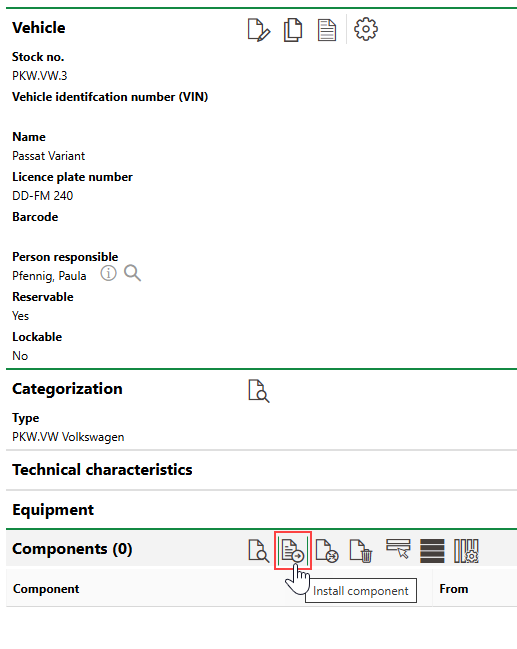
1.Navigate to the details page for the vehicle in which you want to install a vehicle component.
2.Expand the Components section and click the Install Component (![]() ) icon.
) icon.
3.Click the > icon in the Component menu.

4.Select the vehicle component you want to install in the vehicle and click Apply, or double-click the vehicle component.
You can select any active vehicle components in your database that are not already installed in another vehicle.
5.Click the date picker in the From menu and select the date the vehicle component was installed in the vehicle.

6.Click Save and Close.
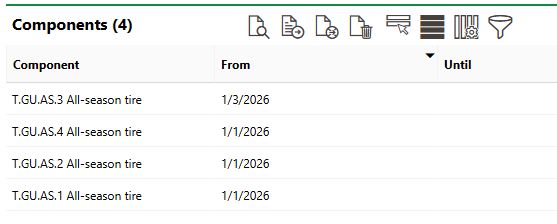
The Components section now indicates that the vehicle component is installed in the vehicle. Repeat the process above for all additional vehicle components you want to install in the vehicle.
Components Section
To Install a Vehicle Component in a Vehicle on the Vehicle Component's Details Page
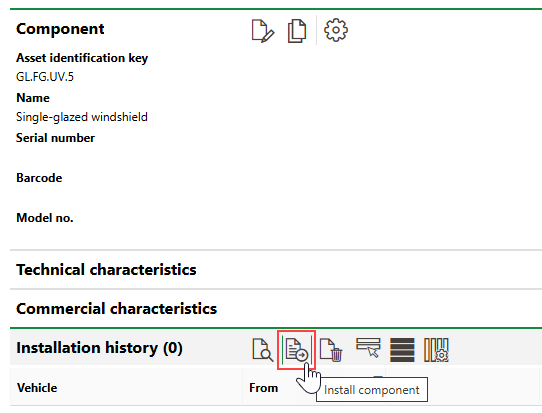
1.Navigate to the details page for the vehicle component you want to install in a vehicle.
2.Expand the Installation History section and click the Install Component (![]() ) icon.
) icon.
3.Click the > icon in the Vehicle menu.
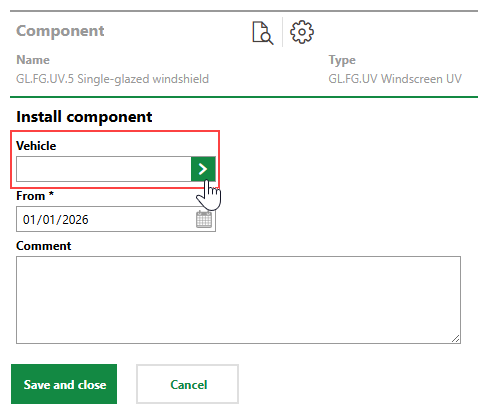
4.Select the vehicle in which you want to install the vehicle component and click Apply, or double-click the vehicle.
5.Click the date picker in the From menu and select the date the vehicle component was installed in the vehicle.
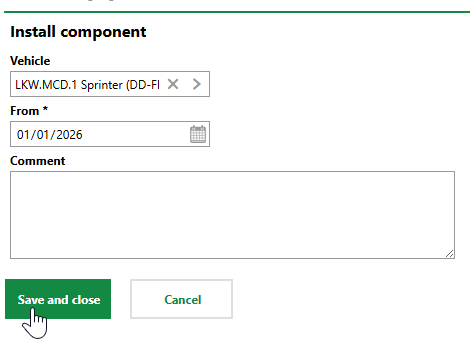
6.Click Save and Close.
The Installation History section now indicates that the vehicle component is installed in the vehicle. Because a vehicle component can only be installed in one vehicle at a time, the system removes the Install Component (![]() ) icon from the section.
) icon from the section.
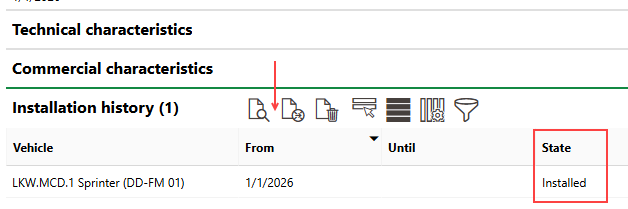
Vehicle Component Installed in Vehicle
Uninstall a Vehicle Component
You can uninstall a vehicle component from a vehicle on the component's or the vehicle's details page.
To Uninstall a Vehicle Component on the Vehicle's Details Page
1.Navigate to the details page for the vehicle from which you want to uninstall a vehicle component.
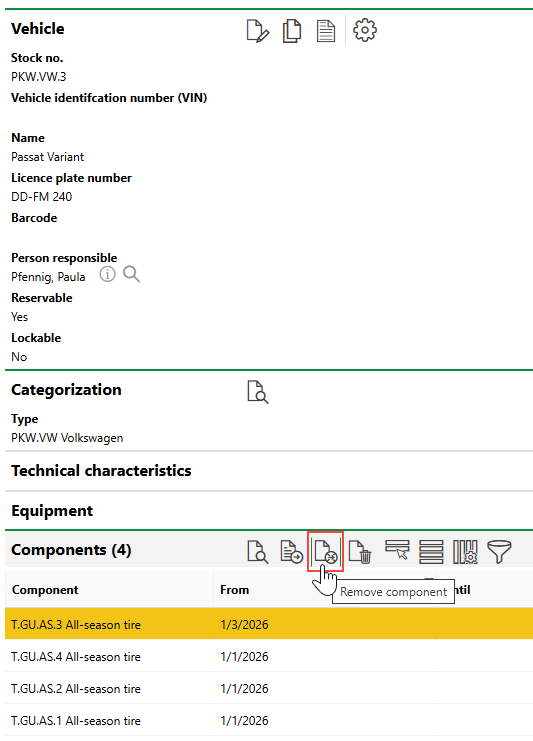
2.Expand the Components section.
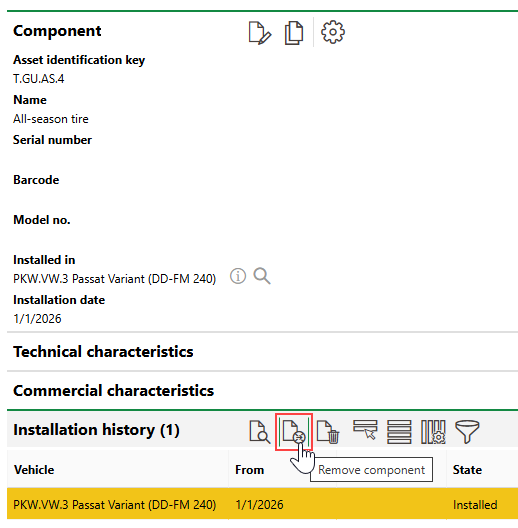
3.Select the vehicle component you want to uninstall and click the Remove Component (![]() ) icon.
) icon.
4.Click the date picker icon in the Until menu and select the date the vehicle component was removed from the vehicle.
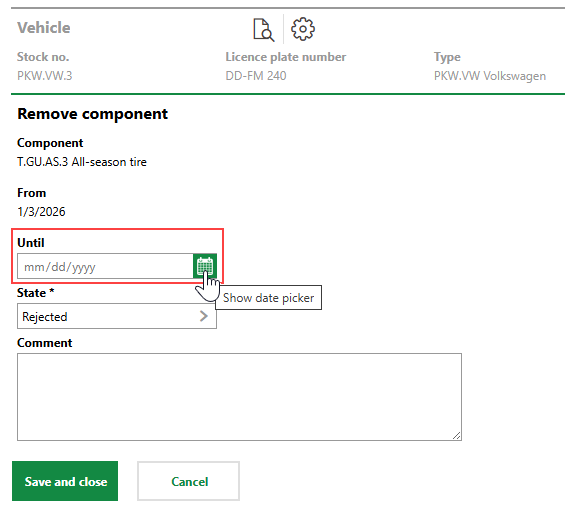
5.In the State menu, select the state you want the vehicle component to be in after you uninstall it.
▪In stock components can be installed in other vehicles once they are uninstalled from the current vehicle.
▪Rejected components cannot be installed in other vehicles once they are uninstalled from the current vehicle.
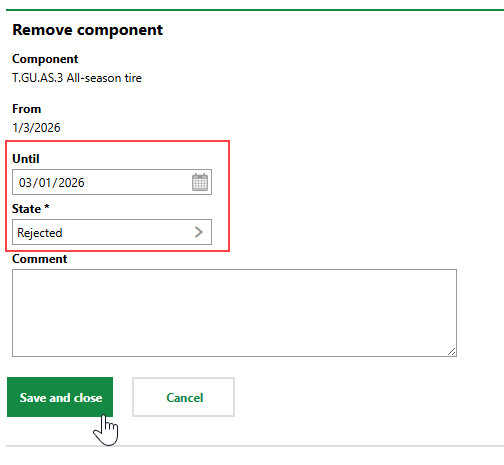
6.Click Save and Close.
The Until column in the Components section now indicates the date the component was uninstalled from the vehicle.

Component Uninstalled from Vehicle
To Uninstall a Vehicle Component on the Vehicle Component's Details Page
1.Navigate to the details page for the vehicle component you want to uninstall from a vehicle.
2.In the Installation History section, select the vehicle in which the component is currently assigned and click the Remove Component (![]() ) icon.
) icon.
3.Select the date picker icon in the Until menu and select the date the vehicle component was removed from the vehicle.
4.In the State menu, select the state you want the vehicle component to be in after you uninstall it.
▪In stock components can be installed in other vehicles once they are uninstalled from the current vehicle.
▪Rejected components cannot be installed in other vehicles once they are uninstalled from the current vehicle.
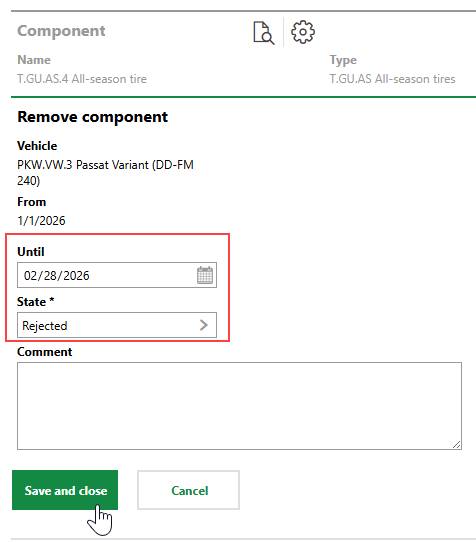
5.Click Save and Close.