When you install a cylinder in a door, keys and locks associated with the cylinder control access to the room(s) associated with the door.
The value entered in the Installation Positions field in the Cylinder Data section on the door's details page determines the number of cylinders that can be installed in a door at a time.
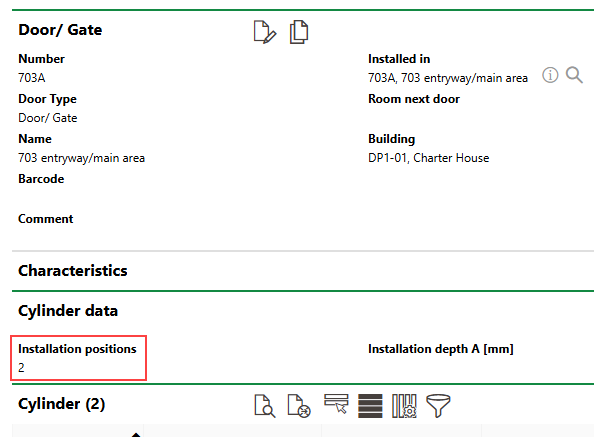
Installation Positions Field on Door Details Page
You can install cylinders in a door on the door's details page or on the cylinder's details page. The cylinder you want to install in the door must already exist in the system, which means it has been added to a lock. Additionally, the cylinder's State must be Available or Ordered.
To Install a Cylinder in a Door (Door Details Page)
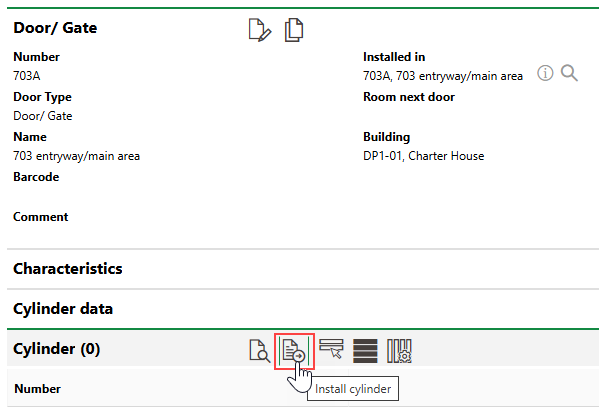
1.Navigate to the details page of the door you want to install the cylinder in.
2.Expand the Cylinder section and click the Install Cylinder (![]() ) icon.
) icon.
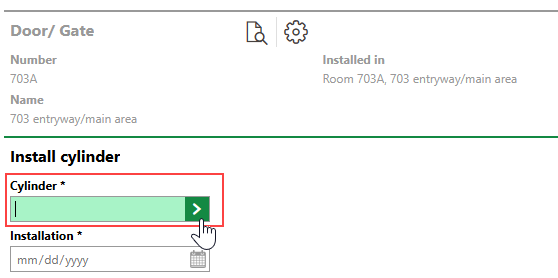
3.Click the > button in the Cylinder menu and double-click the cylinder you want to install in the door.
4.Select the cylinder you want to install in the door and click Apply, or double-click the cylinder.
Cylinders that are already installed in another door or whose State is Rejected, Out of Order, or Loss do not appear in the selection dialog.
5.Click the > button in the Installation menu and select the date the cylinder was physically installed in the door.
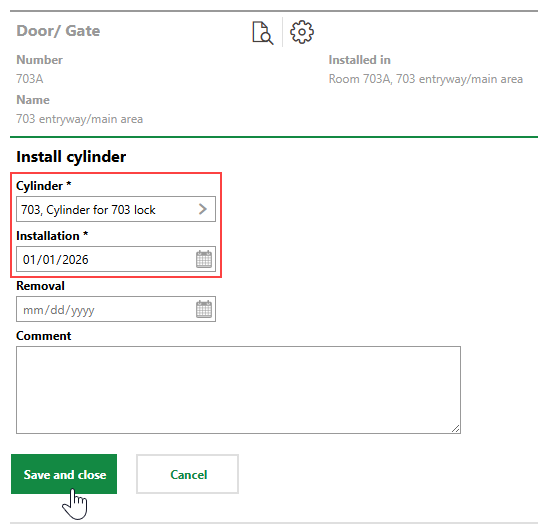
6.Click Save and Close.
The cylinder now appears in the Cylinders section on the door's details page. You can install additional cylinders up to the value in the door's Installation Positions property.
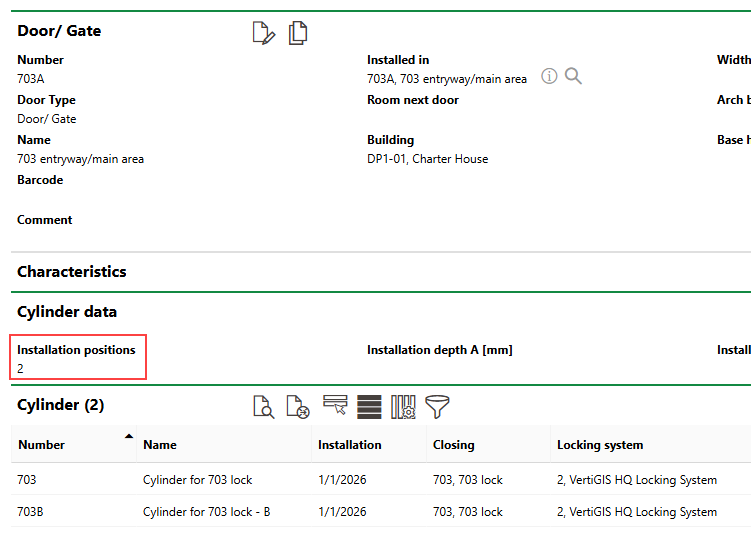
Installed Cylinders and Installation Positions Property
To Install a Cylinder in a Door (Cylinder Details Page)
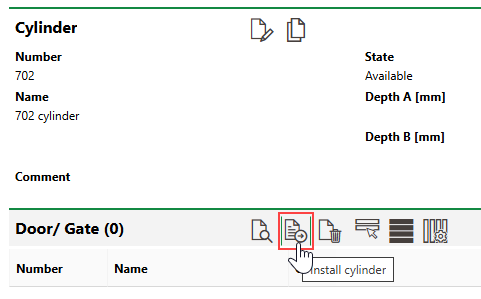
1.Navigate to the details page of the cylinder you want to install in a door.
2.Expand the Door/Gate section.
3.Click the Install Cylinder (![]() ) icon.
) icon.
4.Click the > button in the Door/Gate menu and double-click the door you want to install the cylinder in.
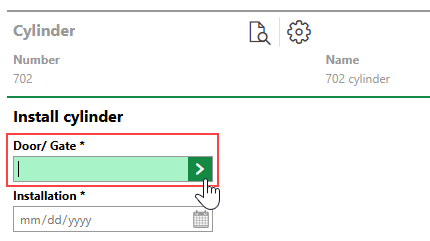
5.Click the calendar icon (![]() ) in the Installation menu and use the date picker to select the date the cylinder was installed in the door.
) in the Installation menu and use the date picker to select the date the cylinder was installed in the door.
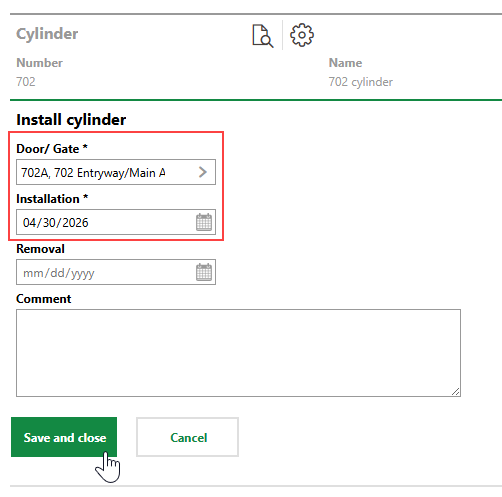
6.Click Save and Close.
Uninstall a Cylinder
You can uninstall an installed cylinder on the door's details page or on the on the cylinder's details page.
To Uninstall a Cylinder (Door Details Page)
1.Navigate to the details page of the door you want to uninstall a cylinder from.
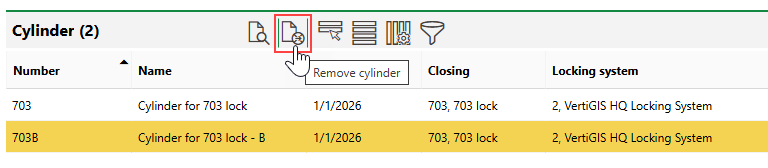
2.Expand the Cylinder section.
3.Select the cylinder you want to uninstall and click the Remove Cylinder (![]() ) icon.
) icon.
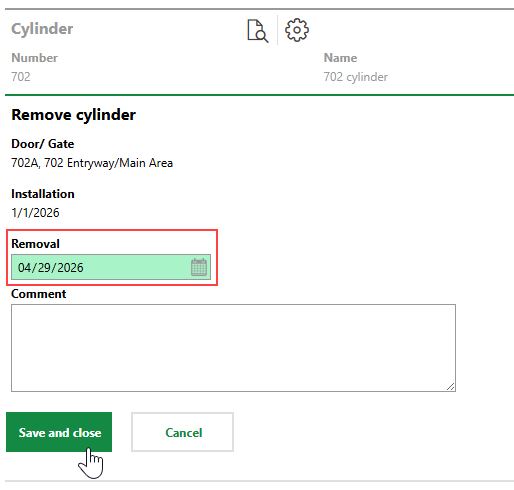
4.Click the calendar icon (![]() ) in the Removal menu and use the date picker to select the date the cylinder was physically uninstalled from the door.
) in the Removal menu and use the date picker to select the date the cylinder was physically uninstalled from the door.

5.Click Save and Close.
The Cylinders section now indicates that the cylinder was uninstalled.
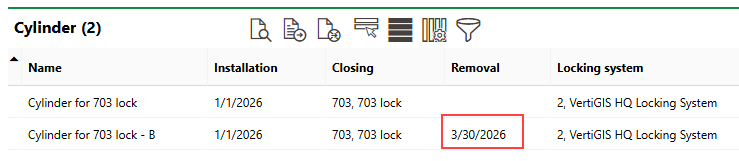
Uninstalled Cylinder
To Uninstall a Cylinder (Cylinder Details Page)
1.Navigate to the details page for the cylinder you want to uninstall from a door.
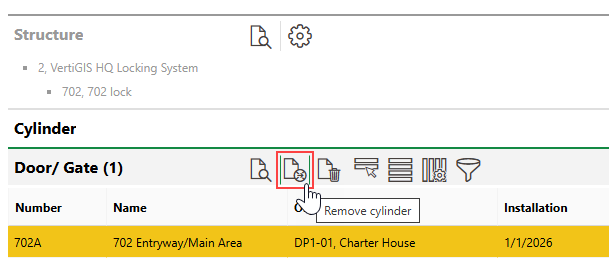
2.Expand the Door/Gate section.
3.Select the door you want to uninstall the cylinder from and click the Remove Cylinder (![]() ) icon.
) icon.
4.Click the calendar icon (![]() ) in the Removal menu and select the date the cylinder was uninstalled from the door.
) in the Removal menu and select the date the cylinder was uninstalled from the door.
5.Click Save and Close.