Applies to: Administrators only
Job Management groups organize jobs and permissions along your operational boundaries, such as the teams or contractors responsible for separate areas.
Groups come from ArcGIS Portal. The administrator creates a group and manages its membership in the Portal, then registers it with Job Management. Once registered, all members gain access through the Job Management tab.
The lifecycle has three stages: create the group and add members in Portal, register the group in Job Management, then members can access Job Management.

Before You Begin
•The portal group must already exist in ArcGIS Portal with its members assigned.
•The group must not already be registered with Job Management. Only unregistered groups appear in the list.
Job Management does not check user types or permissions at registration. You must ensure members have the permissions required to use Job Management and to edit in the application.
Default user role
The default role assigned to a user in Job Management system depends on the manageVersion permission.
•Users with version management permission are assigned the supervisor role.
•Users WITHOUT version management permission are assigned the worker role.
Register a Portal Group
To register a portal group with Job Management:
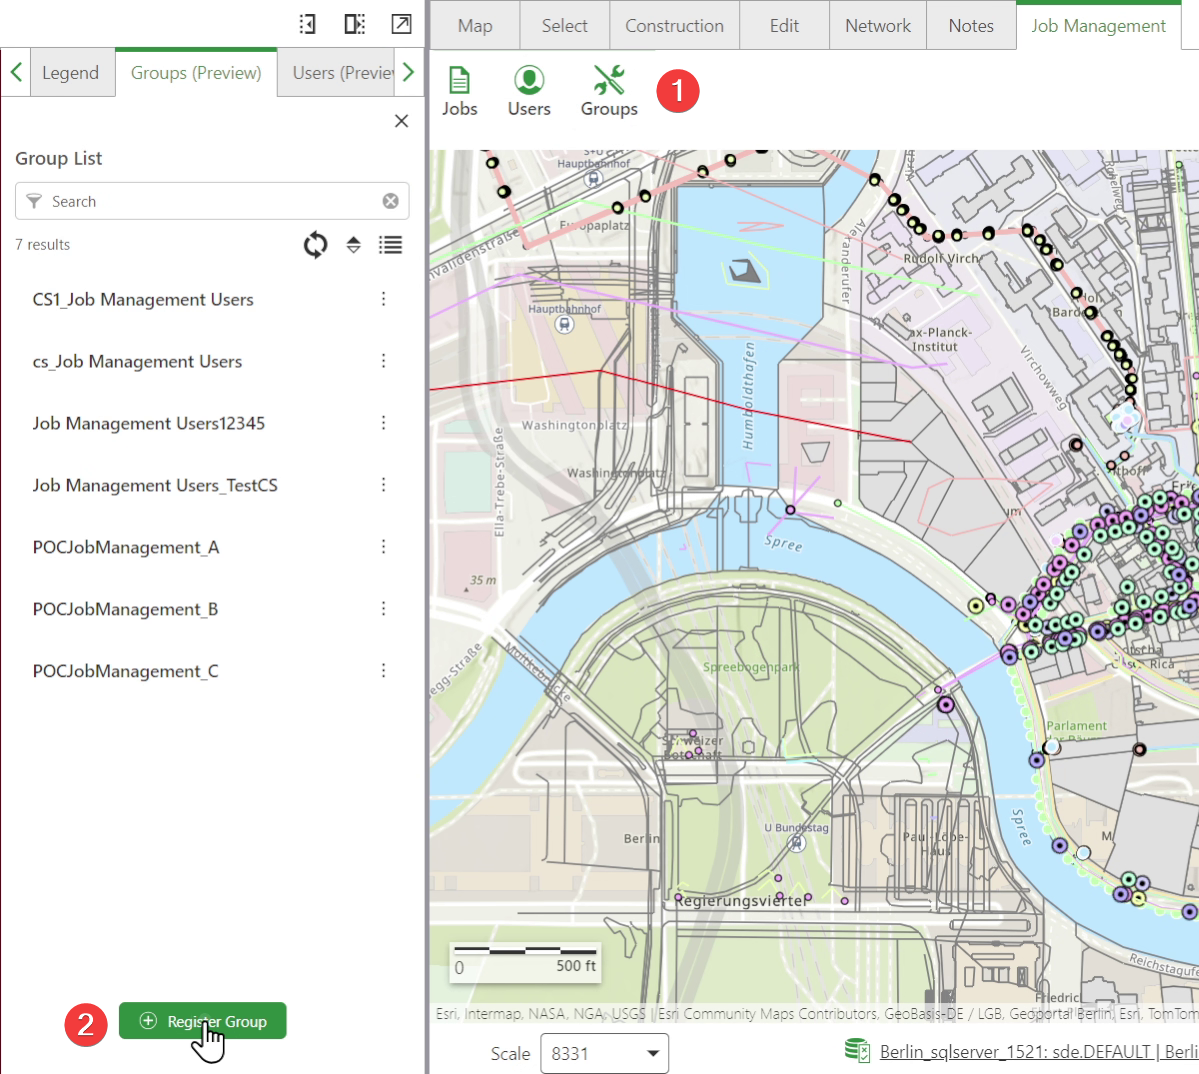
1.Open Job Management from the toolbar, then select Groups.
2.Click Register Group to open the registration panel.
3.In the Group Name dropdown, select the portal group you want to register. The dropdown lists only portal groups that have not yet been registered with Job Management.
Use the search input to narrow down the group list or to find an exact match.
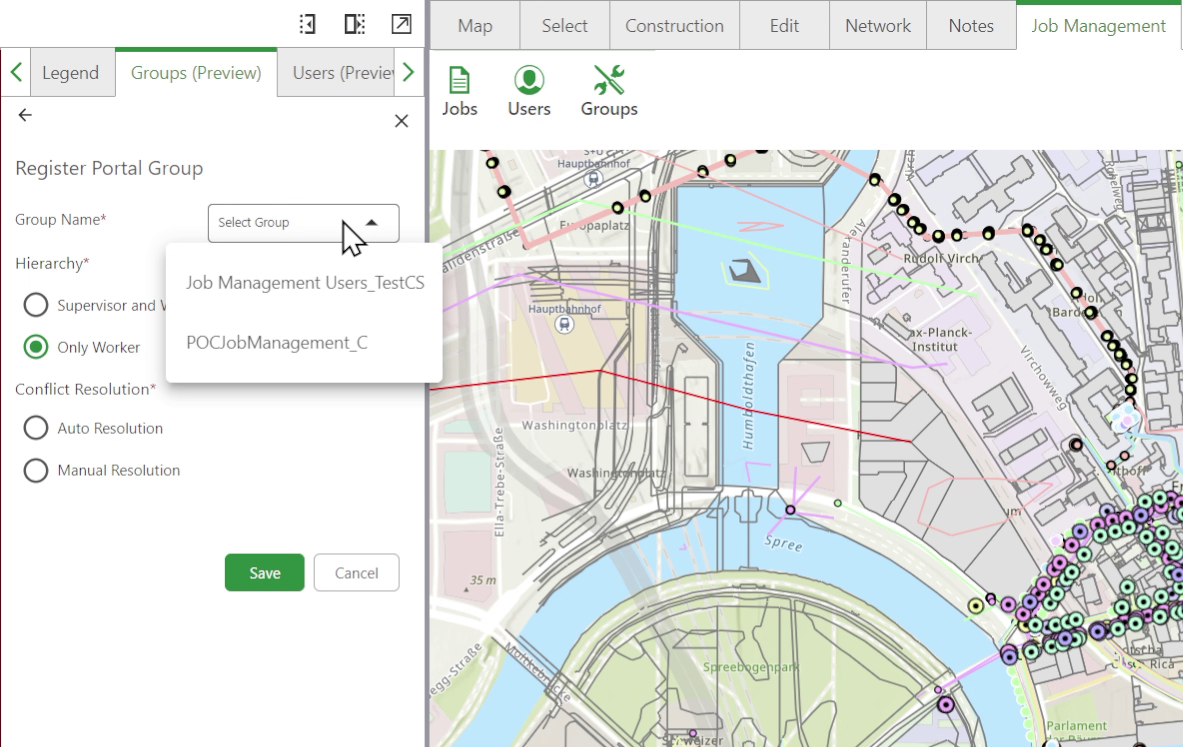
4.Under Conflict Resolution, select how conflicting changes between the default and the job branch will be handled:
oAuto Resolution: Conflicts are resolved automatically. Select an In favor of preference:
▪Default: The default version is retained.
▪Branch: The job (branch) version is retained.
oManual Resolution: Users manually choose which version to retain for each conflict.
5.Click Save to register the group.
The group is registered with the Job Management system:
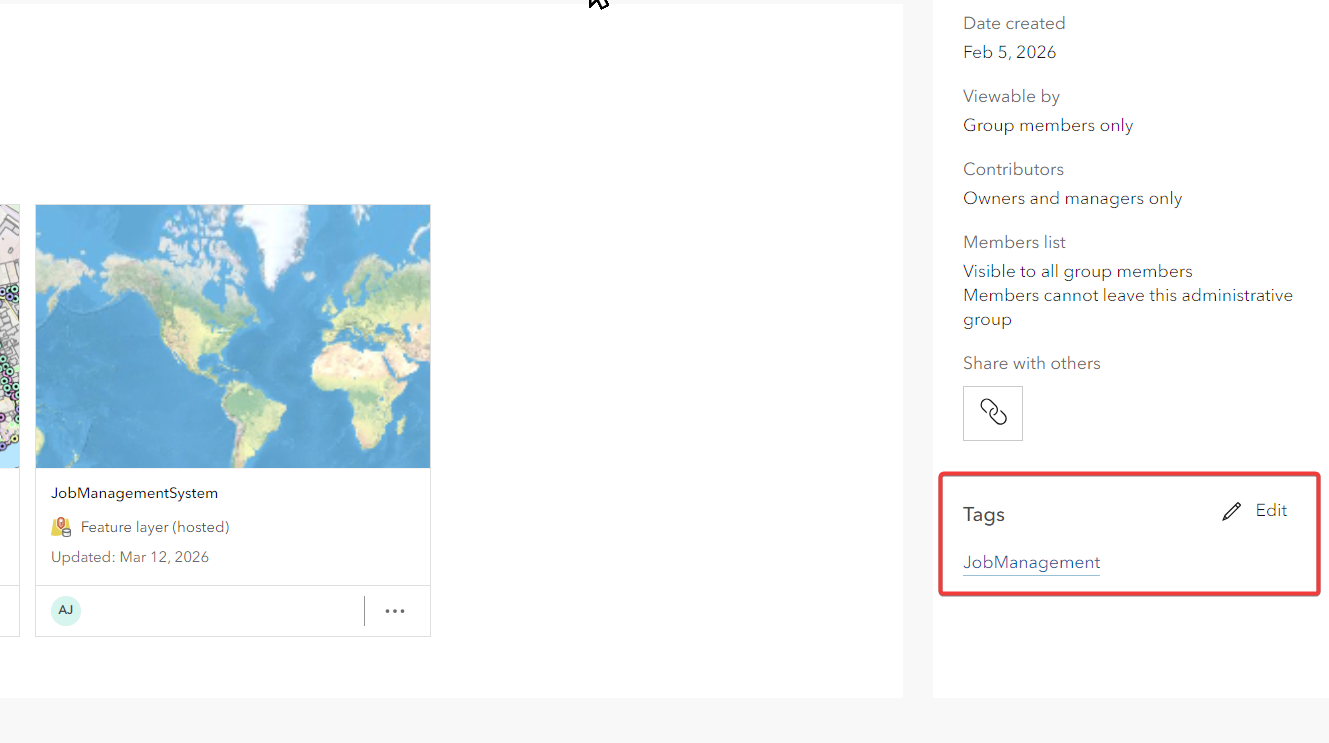
•Group is tagged with JobManagement in the Portal
•Group's settings are stored in the Job Management Groups table.
•All current members of the portal group can now access Job Management features.
•System assigns default roles.
Do not remove the JobManagement tag from the portal group, as it can disrupt Job Management functionality.
View Registered Groups
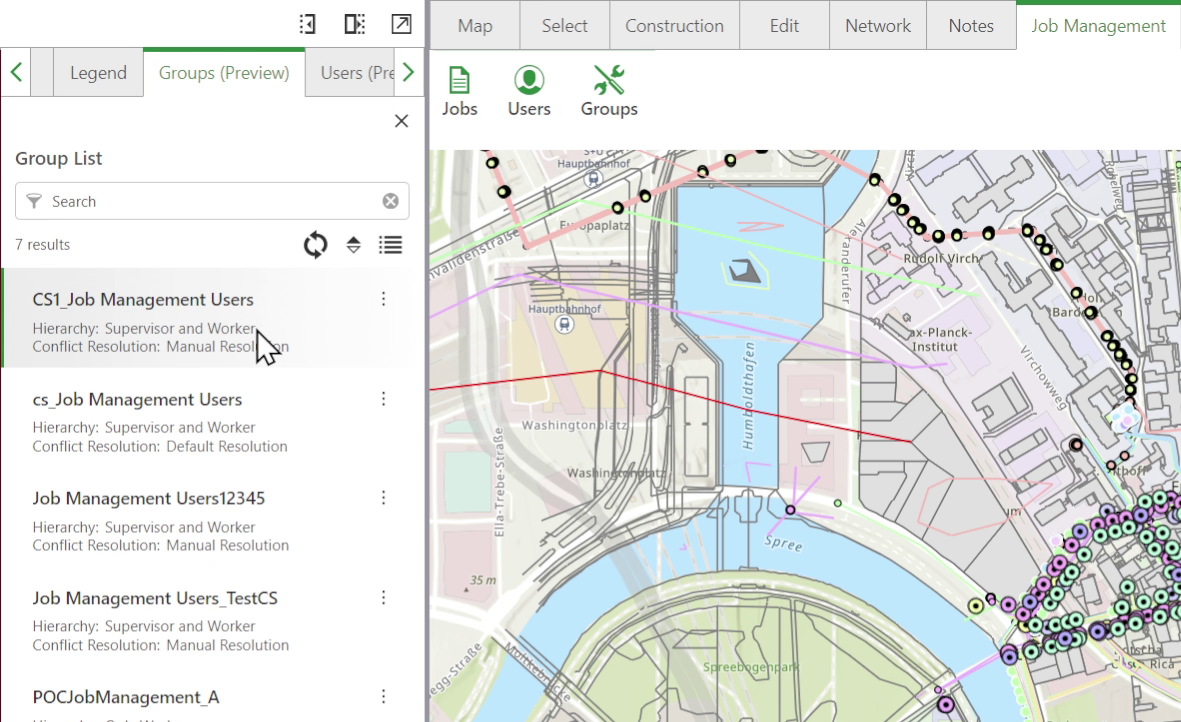
Registered groups appear in the Groups panel under Job Management > Groups.
To see a group's configuration, open its context menu and select Details. The panel shows the Conflict Resolution method configured for each group.
Edit a Registered Group
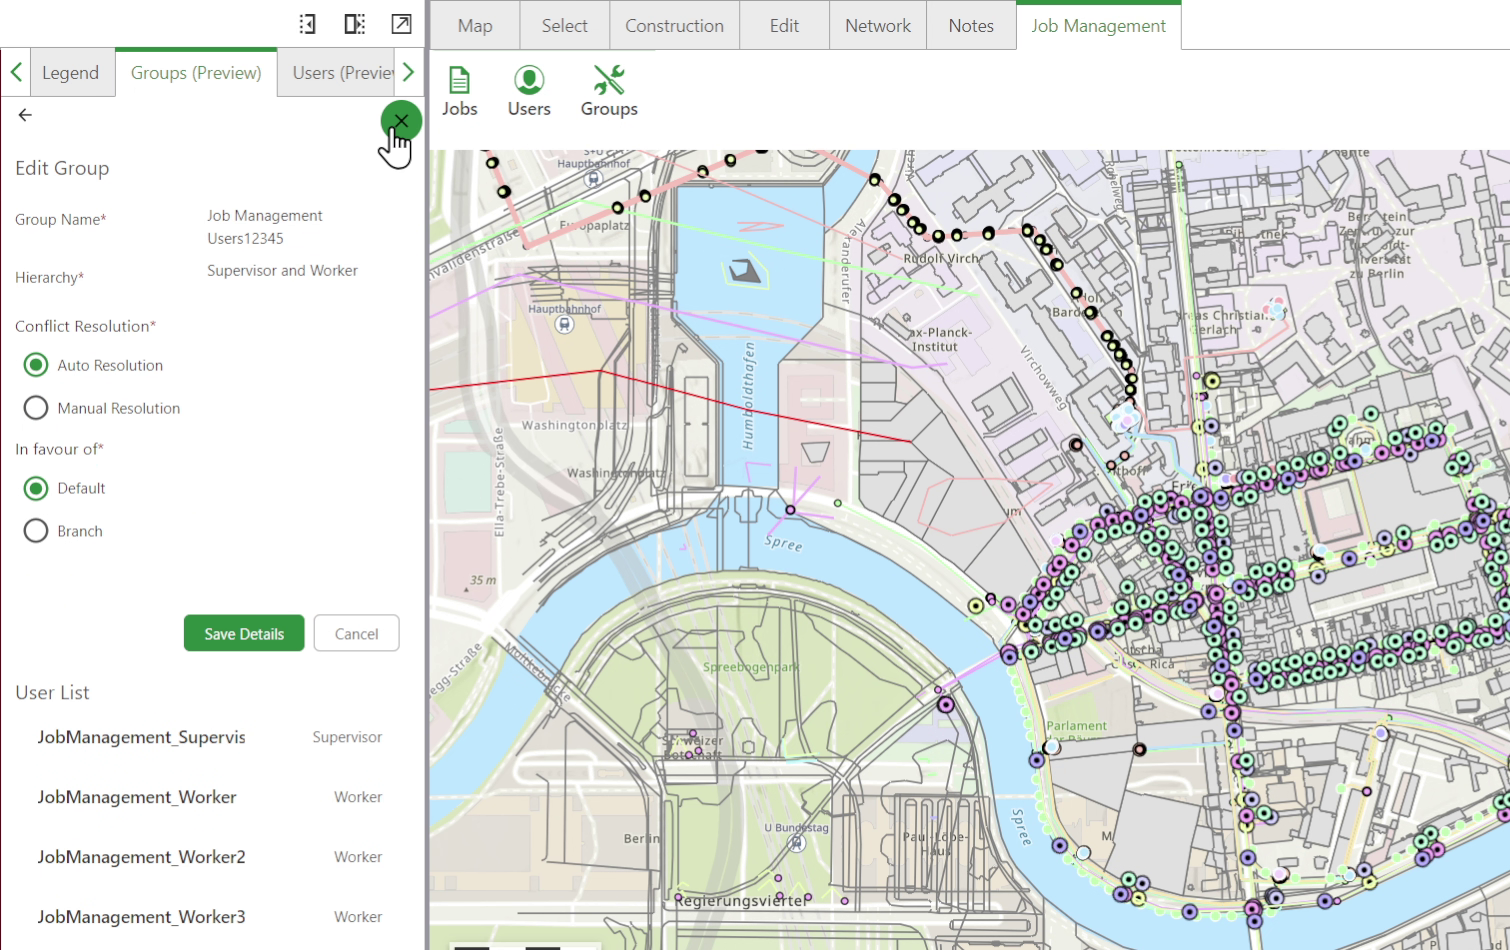
To update the configuration of a registered group:
1.Open Job Management, then select Groups.
2.Open the context menu for the group you want to edit, then select Edit.
3.Review the group settings. The Group Name field is read-only and cannot be changed after registration.
4.Update the Conflict Resolution method if required. If Auto Resolution is selected, you can switch the In favor of preference between Default and Branch.
5.Review the list of current group members displayed at the bottom of the panel.
6.Click Save Details to apply your changes, or Cancel to discard them.
Manage Group Membership
Group membership is managed entirely in the ArcGIS Portal. To add or remove members from a registered Job Management group, update the group membership in the Portal.
Changes to membership are reflected in Networks Editor after a sync or a hard refresh.
Delete Groups
You can remove a group in two ways, with different effects:
Method |
Where you do it |
Effect |
|---|---|---|
Deregister |
In Job Management |
Removes the group from Job Management; the portal group remains |
Delete the portal group |
In ArcGIS Portal |
Removes the group at the source; the next sync prompts you to handle its jobs |
When a group is removed, its members lose Job Management access unless they belong to another registered group, in which case access continues through that group.
Deregister a Group from Job Management
Deregistering removes the group from the Job Management system without deleting the portal group itself.
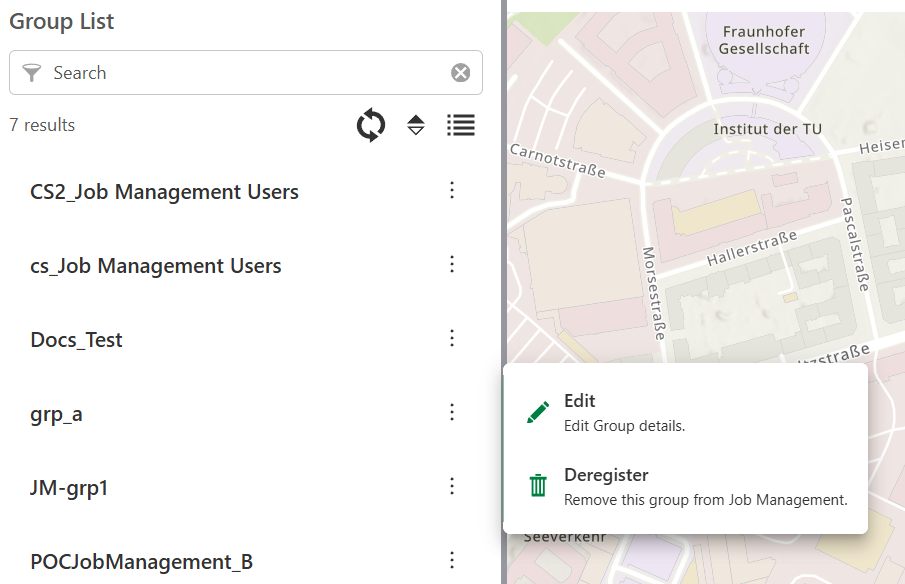
Groups that still have jobs that are NOT closed cannot be deregistered.
To revoke the registration of a group:
1.Open the Job Management tab, then select Groups.
2.Open the context menu for the group you want to remove.
3.Select Deregister.
4.Confirm to remove the Group from the Job Management system.
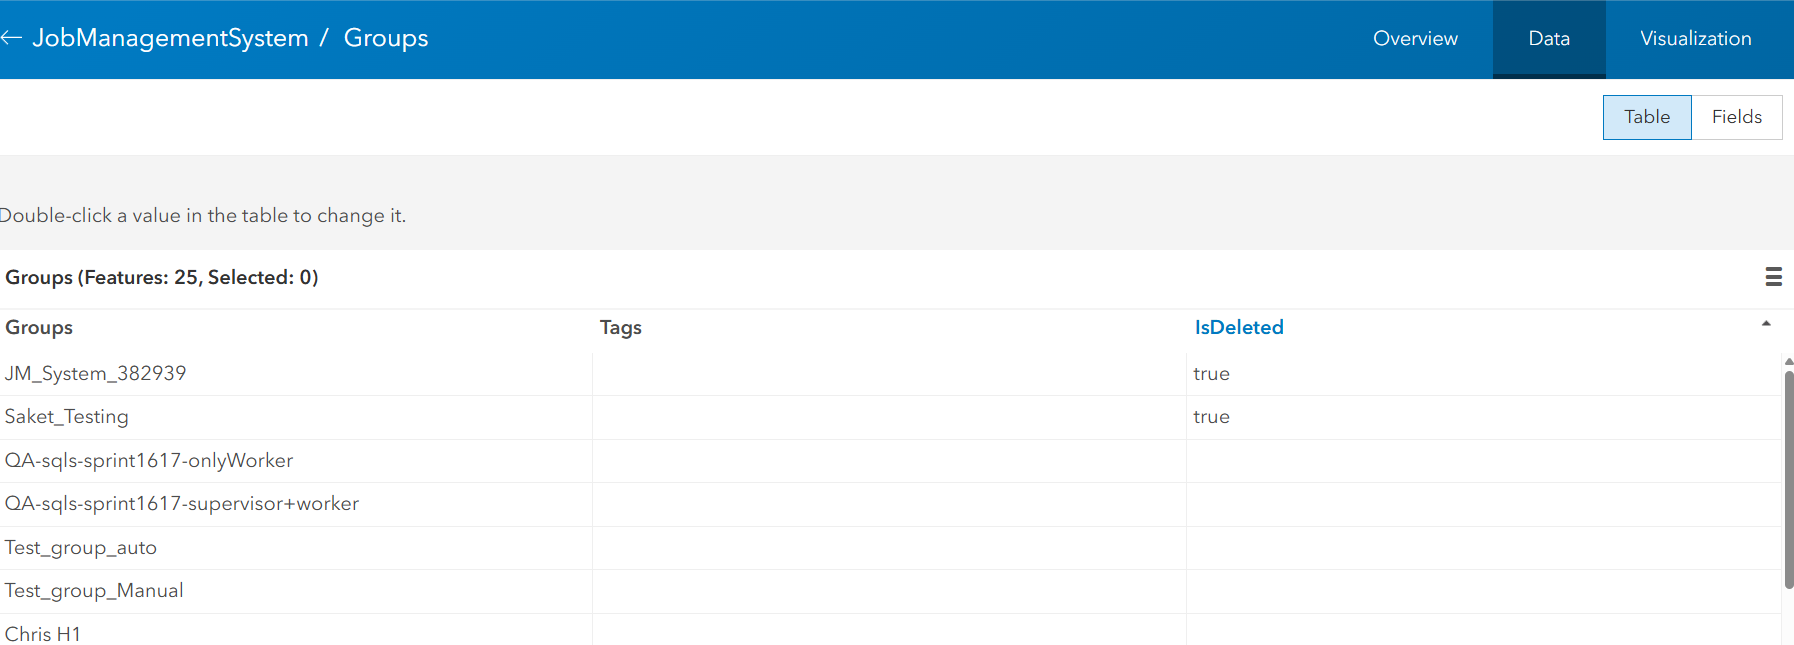
The tag JobManagement is removed from the portal group. The deletion is recorded in the Groups table of the Job Management feature service.
Delete a Group from the Portal
When a portal group registered with Job Management is removed directly from ArcGIS Portal, and the administrator syncs the Groups in Job Management, the administrator is informed about the same.
The administrator is then presented with two options for handling the group's jobs:
•Delete all jobs: All open and active jobs belonging to the group are permanently removed, along with their associated branch versions.
•Assign jobs to another group: All open and active jobs are reassigned to a different group registered in the Job Management system. The worker and supervisor fields on reassigned jobs are cleared and set to unassigned.
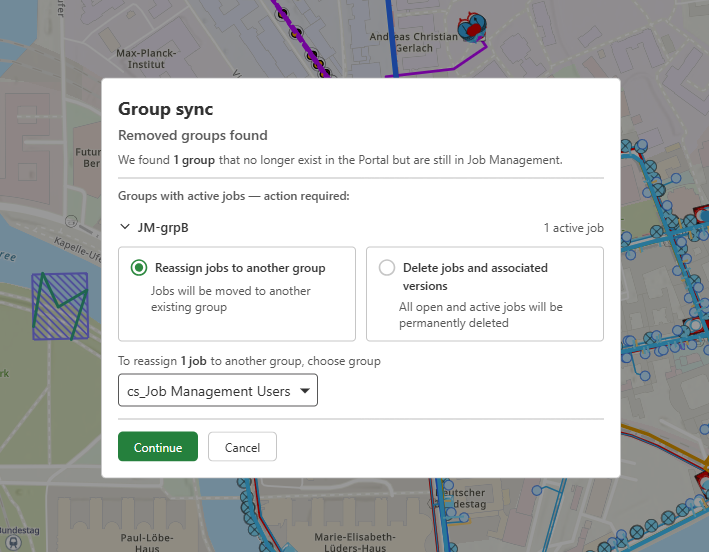
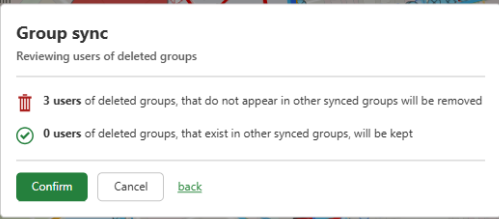
To reassign jobs to another group:
1.Select Assign jobs to another group when prompted.
2.In the dialog that opens, select the registered Job Management group to which the jobs should be reassigned.
3.Confirm the selection.
Jobs are moved to the selected group. The worker and supervisor are set to unassigned on all transferred jobs.
Workers and supervisors do not have access to the Groups section in Job Management. As a result, group management is available to administrators only.
Next, see Manage Users.