The ability to create and assign jobs depends on the role assigned to the logged in user.
Create a New Job
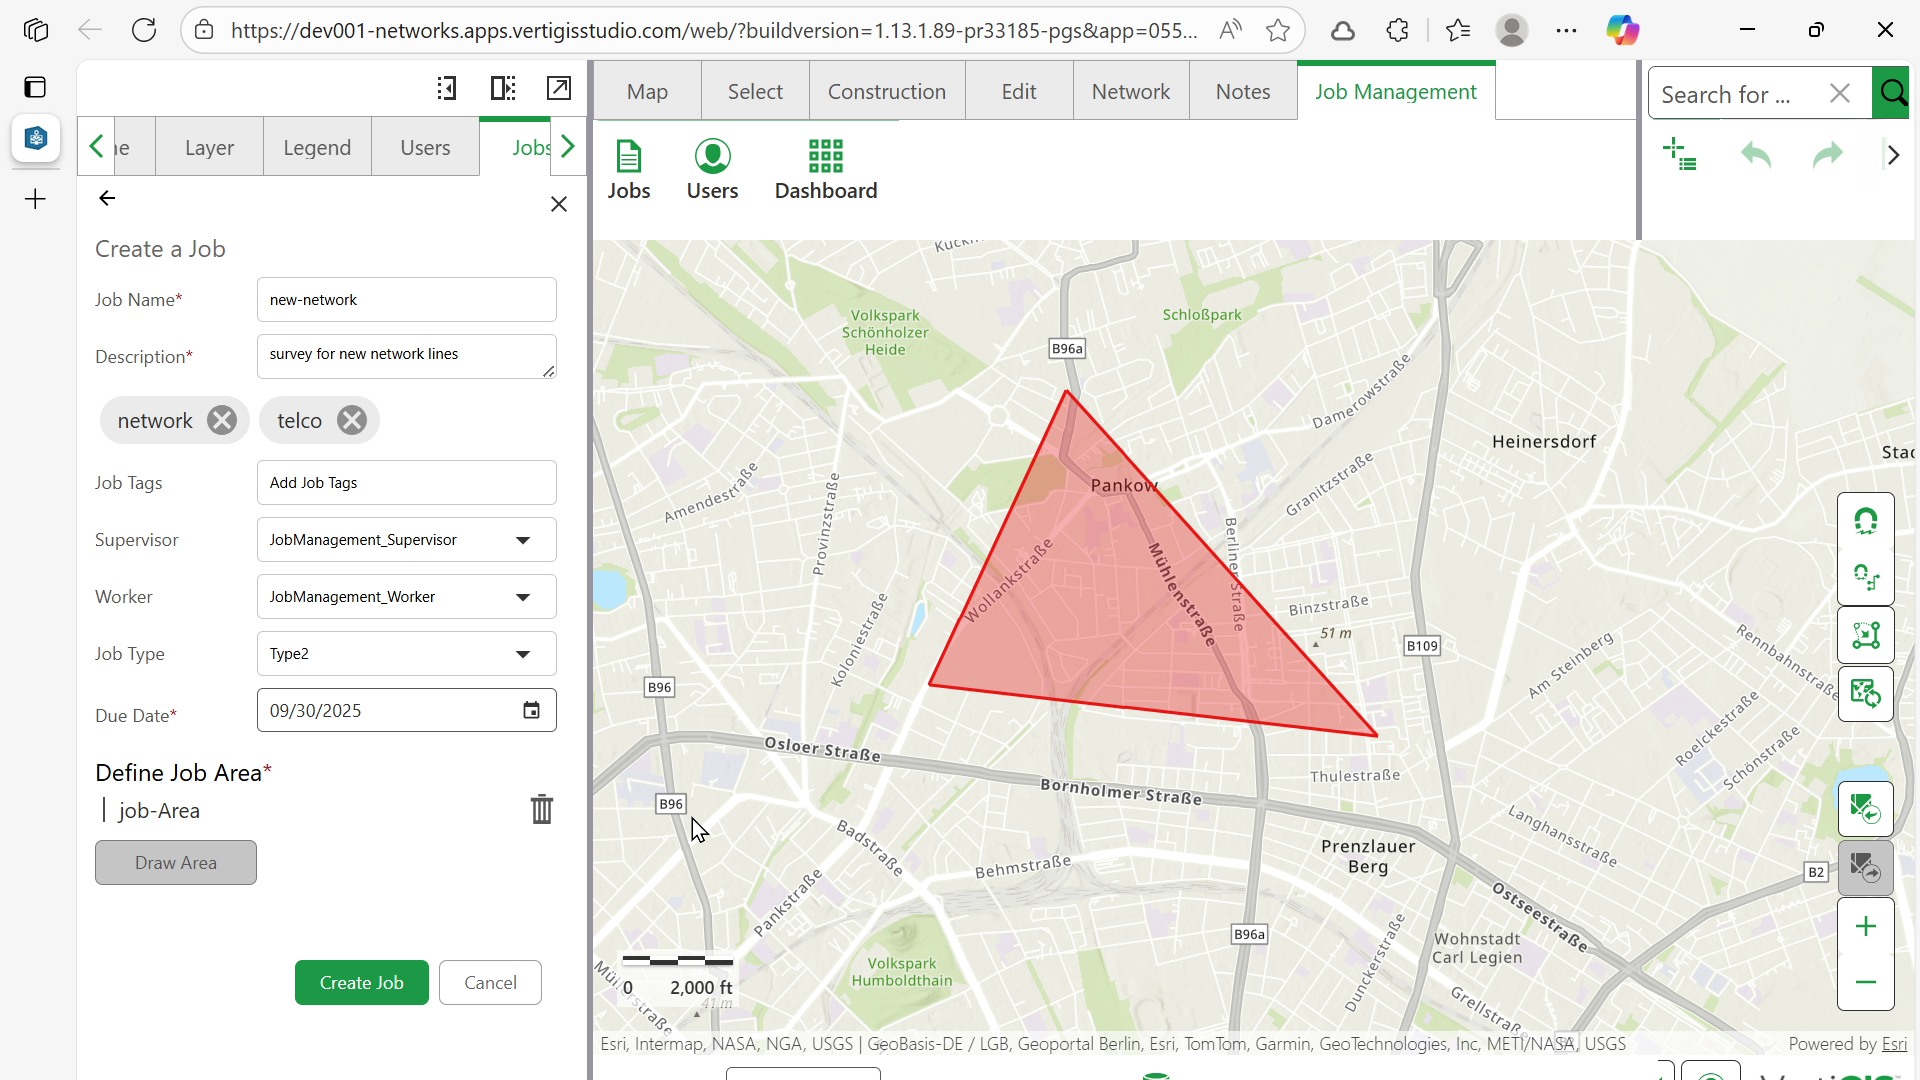
To create a new job:
1.Go to the Job Management tab.
2.Select Jobs from the menu.
3.Click Create Job to open the job creation form.
4.Enter the following job details:
oJob Name
oDescription (maximum 256 characters).
5.Add tags by typing the tag name and pressing Enter.
When searching for jobs in the Jobs panel, use a tag name to find jobs associated with that tag.
6.Select a Group (Conditional)
oIf you are a member of multiple registered portal groups, select the group for the job.
▪The Supervisor and Worker lists are filtered to show only users from the selected group.
oIf you are a member of only one registered portal group, this step is skipped:
▪The Group field is not displayed.
▪You can assign the job only to users in that group.
7.Select a User as a Supervisor responsible for monitoring and approving the job.
If you're the only supervisor in the selected group, you'll be assigned automatically and won't see the Select Supervisor option.
If no supervisor exists in the selected group, an error is displayed.
8.Select a user as the Worker to assign the job to.
9.Set the Due Date for job completion.
10.Draw the job area on the map to define the job region:
oClick to start drawing the area boundary.
oContinue clicking to define the region.
oClick on the initial point to close the area.
oUse the delete button to clear and redraw if needed.
11.Input URL to external resources in the Customer Field (separate links with comma).
Customer Field renders any value starting with http:// or https:// as a clickable hyperlink in the job detail panel. This lets users link directly to external resources such as survey data or photo documentation from within a job record.
Standard custom fields do not support link rendering. Only the designated URL custom field displays entered values as clickable links.
12.Input values in the custom fields (Optional).
Custom fields have a cus_ prefix and are displayed below the main fields.
13.Click Create Job to finalize.
When a new job is created, the system creates a new branch version for each feature service in the map that supports branch versioning. Each of these branch versions is then associated with the job.
When the job is started, the map automatically switches all feature services to the branch versions associated with that job, ensuring the user works in the correct version.
Next: