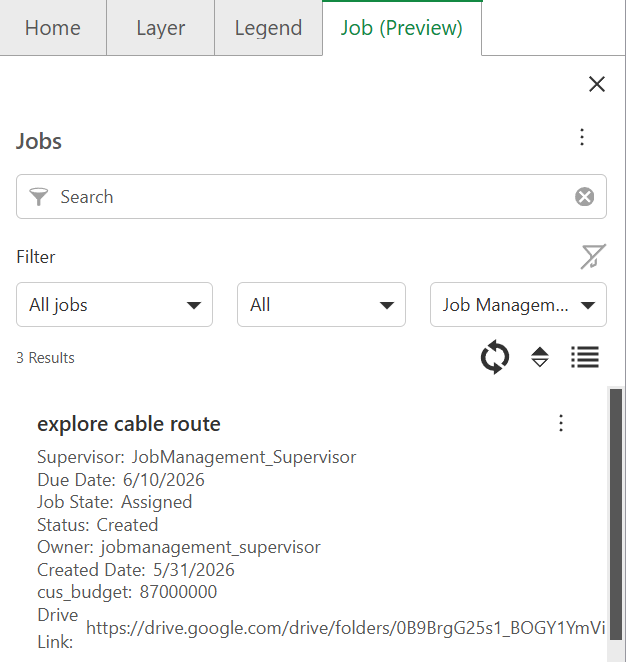
Organizations can extend job records with custom fields to capture metadata specific to their workflows.
Portal administrators add these fields directly to the Jobs table in ArcGIS Portal.
Once added, the fields appear in the job creation form and job detail panel alongside the standard fields.
Common uses include:
•A link to CCTV footage or photo documentation relevant to the job site
•A link to a shared document, inspection report, or work order in an external system
•A budget or cost estimate for the job
•A deadline or regulatory due date separate from the standard job due date
•A reference number for tracking the job in an external system
Custom Field Requirements
Custom fields must meet the following requirements before they appear in Job Management:
•The field name must use the prefix CUS_
•Supported field types are String, Numeric, and Date
•String fields support values up to 255 characters
•All custom fields are optional unless your organization enforces values through other means
Ensure that custom fields are preserved during system updates and not removed by upgrade scripts.
Add a Custom Field
There is no UI for creating custom fields. You add them directly to the Jobs feature layer in ArcGIS Portal.
To add a custom field to the Jobs table:
1.In ArcGIS Portal, go to Content > My Content.
2.Select the JobManagementSystem hosted feature service.
3.Open the Jobs layer in the feature service.
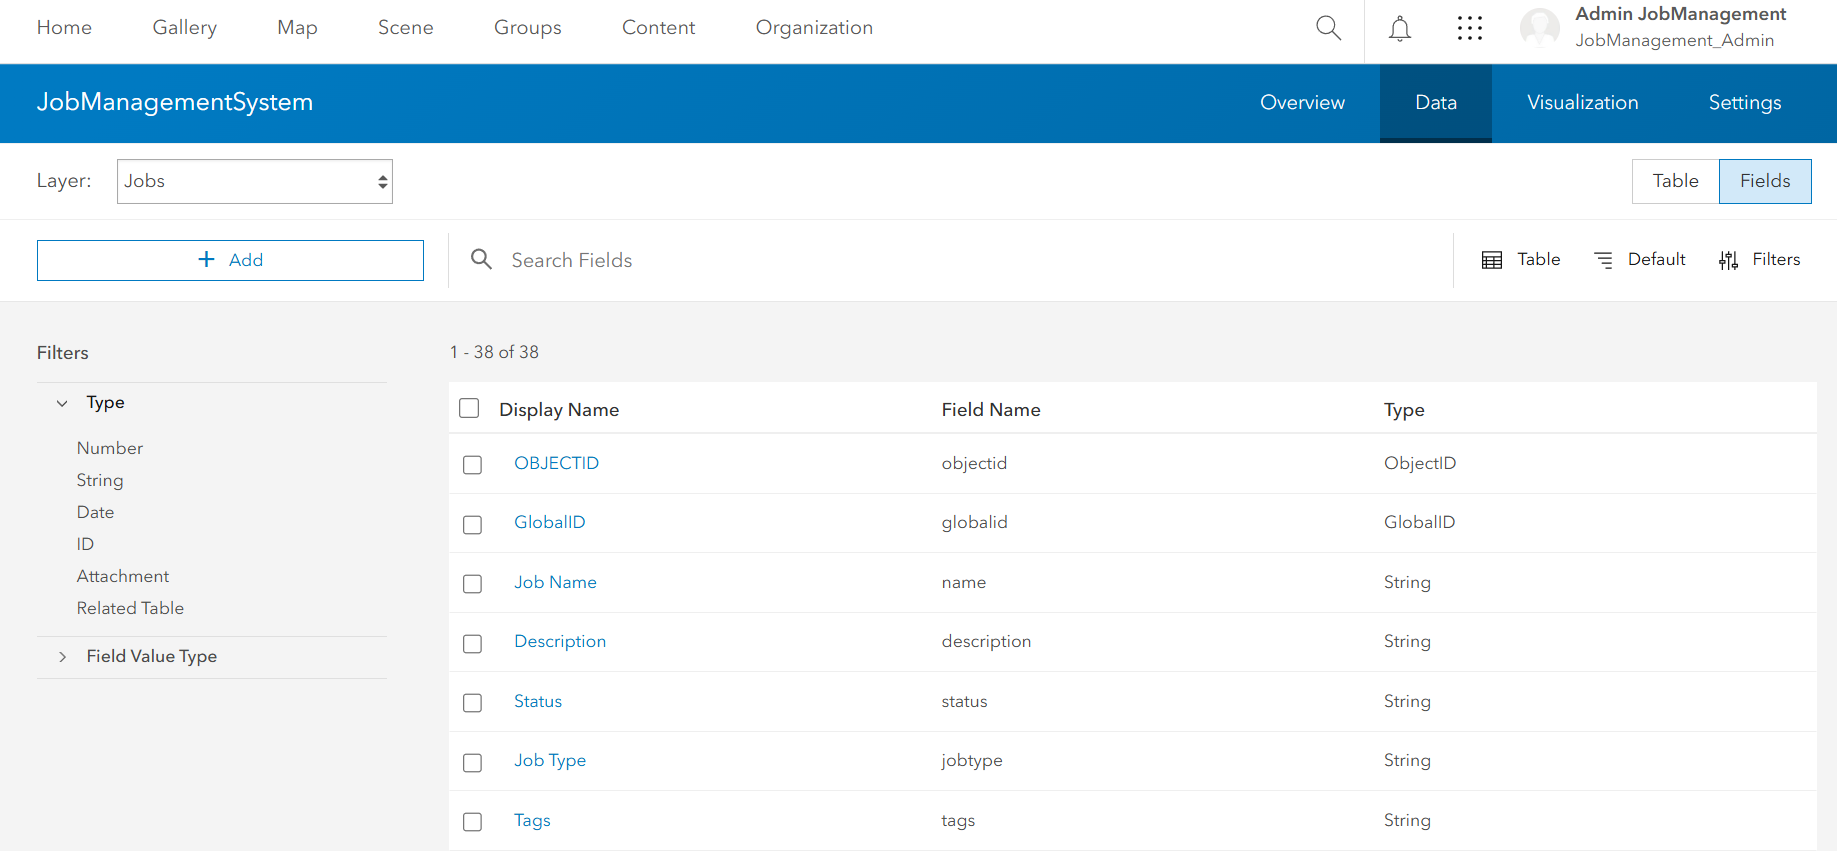
4.Add a new field with the prefix CUS_ in the field name (for example, CUS_Budget or CUS_SurveyLink).
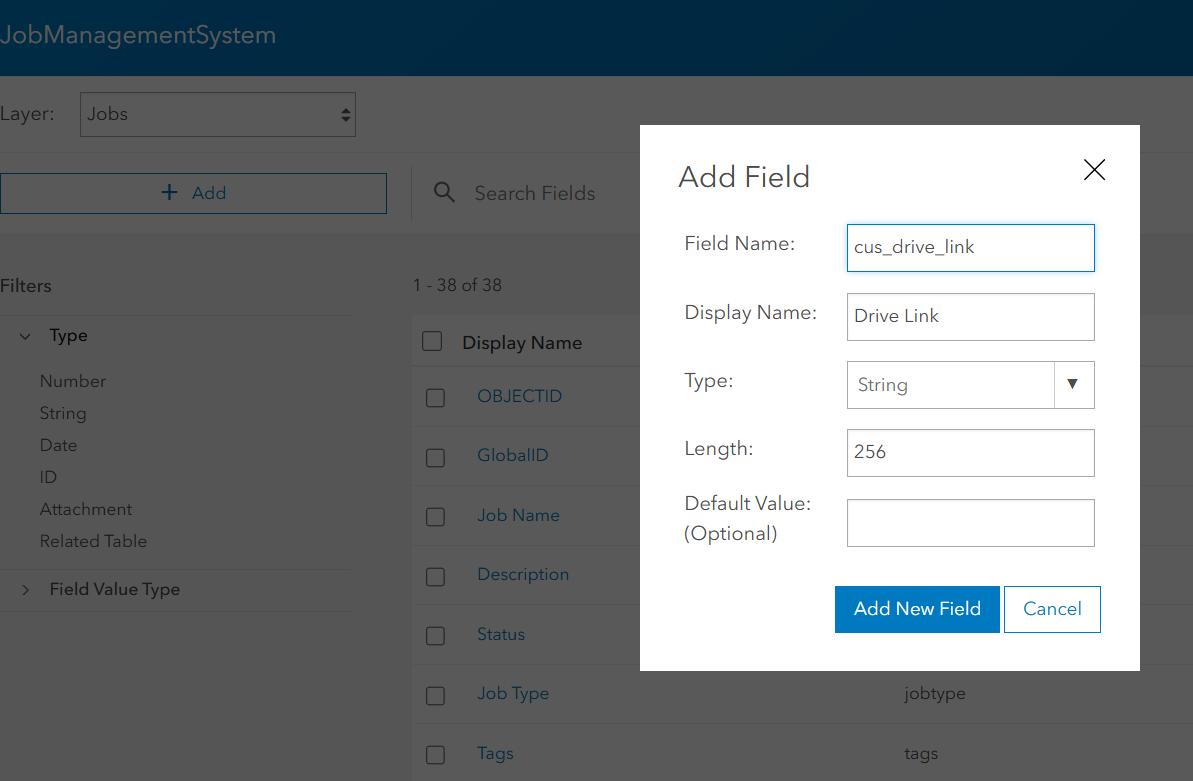
5.Set the field type to String, Numeric, or Date.
6.Enter a Display Name, which is shown as the field label in Job Management. If no alias is set, the field name is shown instead.
7.Save your changes.
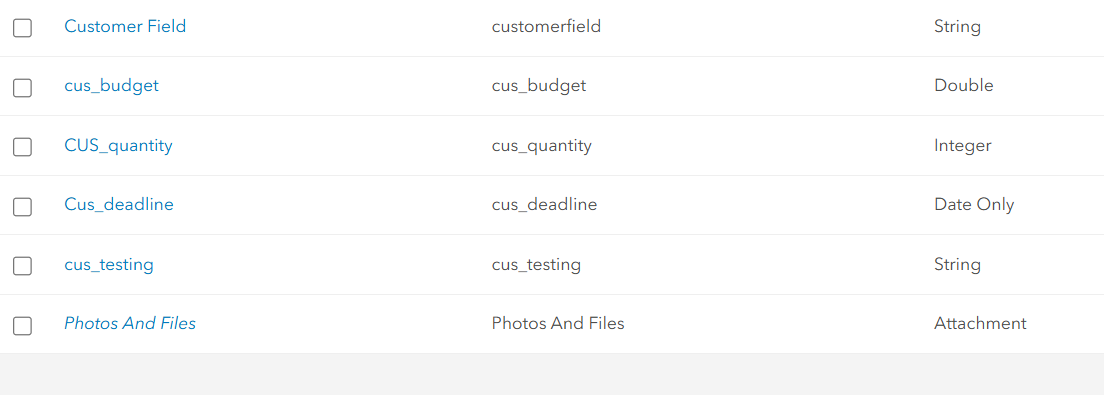
The field will appear in the job creation form and job detail panel the next time a user opens Job Management.
Deleting a custom field removes its data from all past records. This action is irreversible, and the data cannot be recovered.
How Custom Fields Appear in Job Management
Custom fields are displayed below the standard job fields in both the job creation form and the job detail panel. The label shown for each field is the alias if one is defined, otherwise the field name.
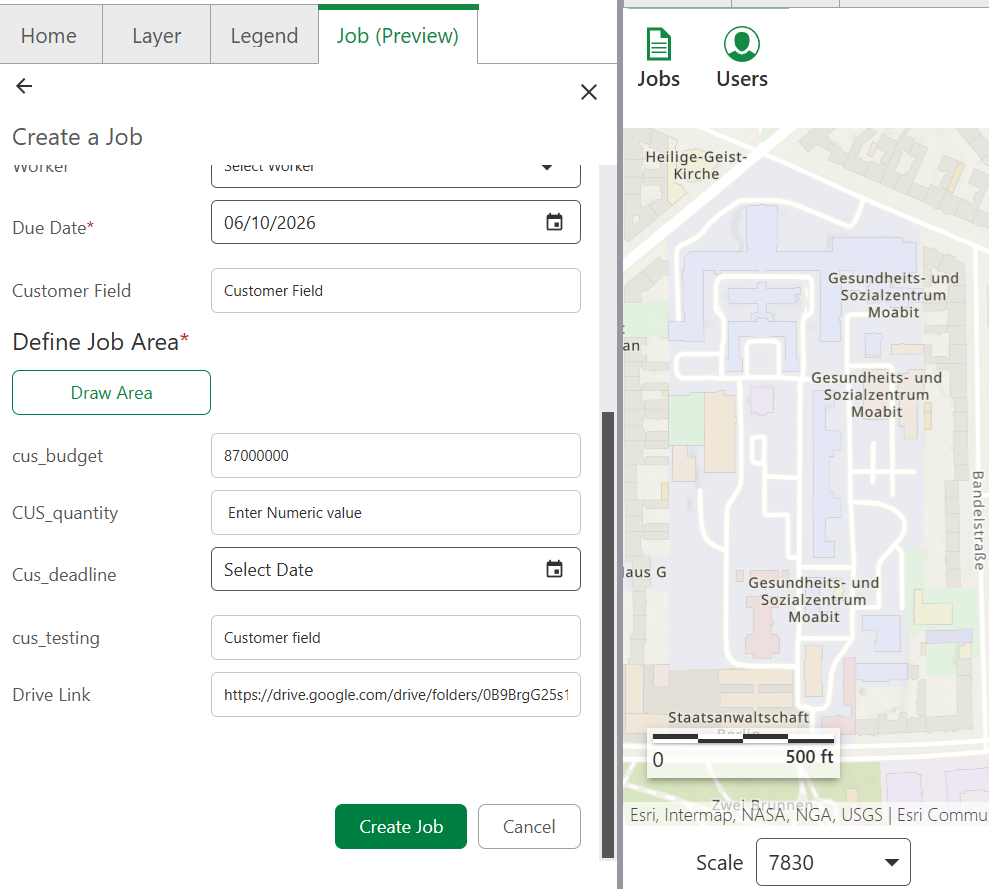
The input control shown depends on the field type:
•String: text input, validated against the maximum field length
•Numeric: text input, validated to accept only numeric values
•Date: date picker
Custom Fields support validation. If a user enters a value that exceeds the string field length or enters a non-numeric value in a numeric field, an error is shown and the job cannot be created or saved until the value is corrected.