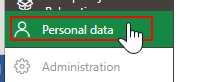
The Administration > Own Data > Personal page information about you (the user signed in to the application). This includes basic employee information as well as login credentials. You can access this page by clicking Personal Data in the bottom-left corner of any page in the application.
Personal Data Link
Your personal own data page includes the sections and fields below.
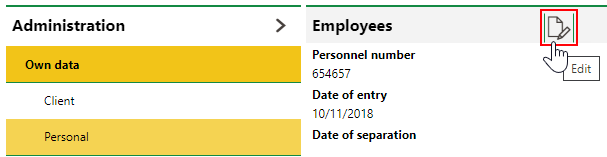
Employees
The Employees section stores your basic employee information. You can edit it by clicking the Edit (![]() ) icon in the section.
) icon in the section.
Edit Icon on the Personal Employee Page
Employee
Field |
Description |
|---|---|
Personnel number |
An internal identification number assigned to you by the company. |
Date of entry |
The date on which you joined the company. |
Date of separation |
The date you left the company, if applicable. |
Abbreviation |
An abbreviation that can be used to identify you. |
Salutation |
The salutation you use (Mr., Ms., Dr., etc.). Selectable options are stored in the Contact Management catalog. |
Title |
Your academic credentials. |
First Name |
Your first name. |
Name |
Your last name. |
Addendum |
Additional information that describes your and your role. |
Signature |
|
Telephone |
Your telephone number. |
Fax number |
A number to which documents can be faxed to you. |
Mobile number |
Your cell phone number. |
Your email address. |
|
Internet Address |
Your web page. |
Function |
Your role or occupation. |
Division |
The department within the company that you work for. Selectable options are stored in the Divisions section on the Own Client adminisration page. |
Organisation |
The section of the company's organizational structure in which you work. For example, its North American or European operations. Selectable options are stored in the Organisation section on the Own Client adminisration page. |
Subsidiary |
The subsidiary or branch of the company you are associated with. |
Cost Center |
The cost center you're associated with. |
State |
Your employee status. |
Sector |
The sector in which you work. This value is inherited from your company but can be changed. Selectable options are stored in the Sector section in the Contact Management catalog. |
Comment |
Any additional information about yourself. |
Personnel Data
Field |
Description |
|---|---|
Country |
The country in which you're located. |
Federal State |
The federal state (state, province, or regional jurisdiction) in which you're located. Federal states must be added to the country selected above to be selectable from this menu. Refer to country management for more information. |
ZIP Code |
The ZIP code or postal code of your location. |
City |
The city in which you're located. |
Street |
The street on which you're located. |
Number |
The street address at which you're located. |
Telephone |
Your telephone number. |
Fax Number |
Your fax number. |
Mobile Number |
Your mobile number. |
Your email address. |
|
2nd address |
A check box that, if selected, allows you to enter a second country, Zip Code, City, Street, and Number for yourself. |
Nationality |
Your nationality. |
Gender |
Your gender. |
Date of birth |
Your date of birth. |
Characteristics
Field |
Description |
|---|---|
Working time from |
The time of day you start work. |
Working time till |
The time of day you end work. |
Weekly working hours |
The number of hours you work every week. |
Duration of break |
How long your lunch break lasts. |
Internal hourly rate |
How much you are paid hourly for work done within the company. |
External hourly rate |
How much you are paid hourly for work done outside of the company. |
Job title |
Your job title or role. |
Qualification |
Your qualifications or degrees. |
Trades |
The field in which you are skilled or qualified (plumber, electrician, etc.). Information-only field. |
Foreign languages |
Any foreign languages you speak. |
Suitable for height |
Whether you are comfortable working at heights (for example, on a ladder or building roof). |
Workwear |
Whether you require special gear or equipment to perform your job. |
Comments |
Any additional information relevant to the fields in this section. |
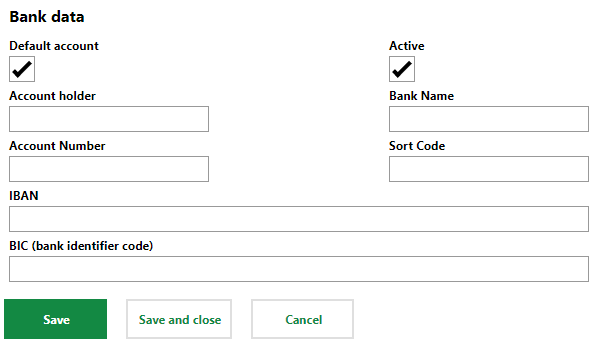
Bank Accounts
You can store the employee's banking information in the Bank Accounts section. This allows you to select the bank account when you create invoice payments for a contract to which the employee is a party in VertiGIS FM Contracts. The section can contain multiple bank accounts.
To add a bank account, click the Add (![]() ) icon. You can enter the account information shown below.
) icon. You can enter the account information shown below.
Bank Account Form for a Contact or Employee
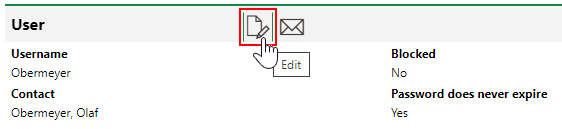
User
The User section stores information related to your VertiGIS FM user, including your login credentials. You can edit your user information by clicking the Edit (![]() ) icon in the User section.
) icon in the User section.
Edit Icon in the User Section
Some of the fields below cannot be edited by the user signed in. They must be edited by an administrator on the Administration > Roles/Permissions > User Management page. The administrator can edit any of these user settings on the Administration > Roles/Permissions > User Management page.
User Fields
Field |
Description |
Edit Privileges |
|---|---|---|
Username |
Your username. |
User |
Contact |
The contact associated with your user. |
Administrator (Administration > Roles/Permissions > User Management) |
Language |
The language you speak. |
User |
Fiscal year |
The default year for invoices or other financial objects the user works on. |
User |
Organisation filter active |
Whether the user is limited to viewing objects (tasks, assets) related to their own organization. |
Administrator (Administration > Roles/Permissions > User Management) |
Remain logged in |
Whether you want the user to remain logged in between sessions. |
User |
Blocked |
If the user signs in with incorrect credentials three times, the system will block them for one hour. This check box can be deselected to unblock them. |
Administrator (Administration > Roles/Permissions > User Management) |
Password does never expire |
Whether you want your password to expire. |
Administrator (Administration > Roles/Permissions > User Management) |
Change password during next login |
Whether you want to reset your password the next time you log in. |
Administrator (Administration > Roles/Permissions > User Management) |
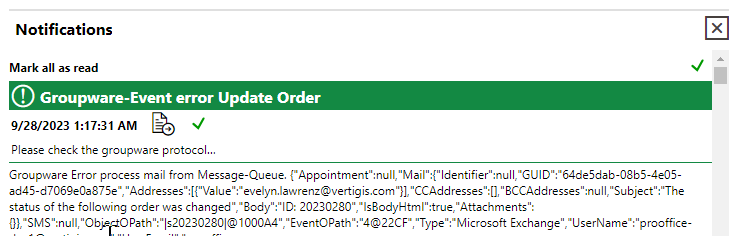
Display notifications |
Whether you want the notification protocol to display when you sign in. Typically, this feature is only selected for administrators.
Notification Protocol Dialog |
User |
Status icon as symbol |
Whether you want to see statuses represented by symbols instead of colours in the user interface. Typically, this feature is selected for users with color vision deficiency.
|
User |
Navigation bar |
Whether you want to see the navigation section in the left pane to navigate to different VertiGIS FM products and modules.
|
User |
You can also reset your password in the User section.
Favourites
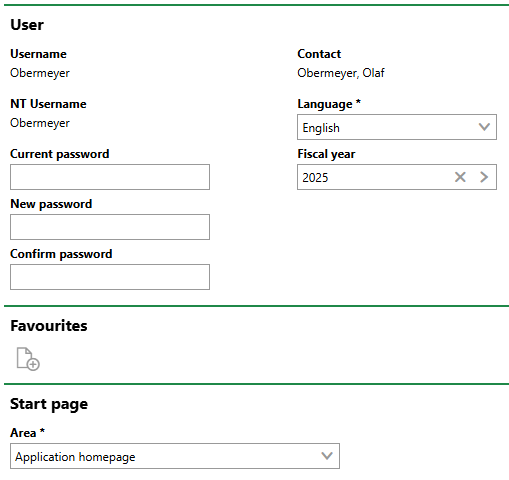
In the Favourites section, you can limit the instances of data object your VertiGIS FM user sees to the ones you work on or are responsible for. You can add items to this section when you click the Edit (![]() ) icon in the User section on the Administration > Roles/Permissions > User Management page, and then click the Add (
) icon in the User section on the Administration > Roles/Permissions > User Management page, and then click the Add (![]() ) icon under Favourites.
) icon under Favourites.
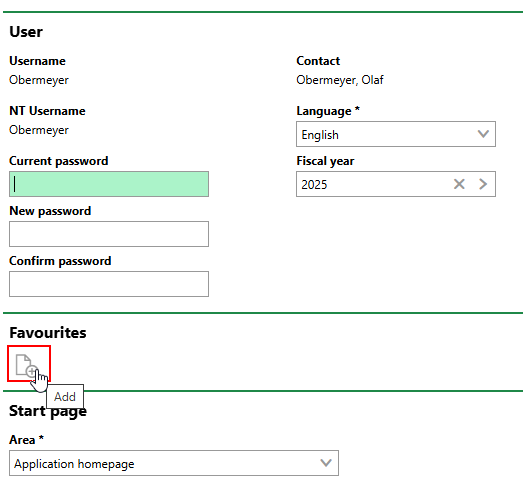
Adding Favourites
You can then select a type of data object and, select the instances of the data object relevant to your duties, and click Apply. If you add at least one instance of a data object, your VertiGIS FM user will not see other instances of the data objects.
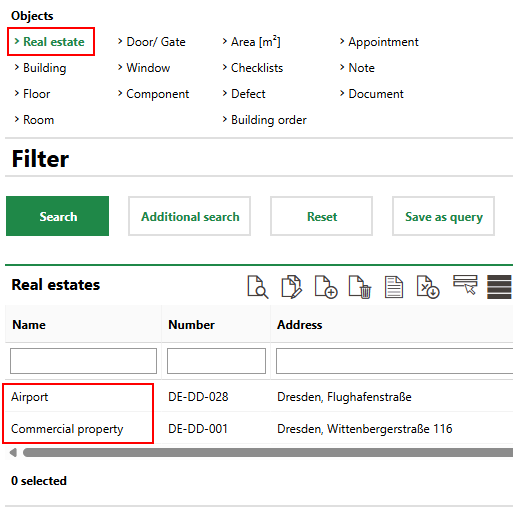
For example, you if your duties involve maintenance tasks on only two real estates, you can add them in this section. Other real estates in your database will not appear on the search page or in any menus in which you select a real estate, preventing you from needing to sort through a long list to find and select the real estates you work on.
1.1 User with no Favourites |
1.2 Real Estate Search with No Favourites |
2.1 User with Two Real Estates in Favourites |
2.2 Real Estate Search with Favourites |

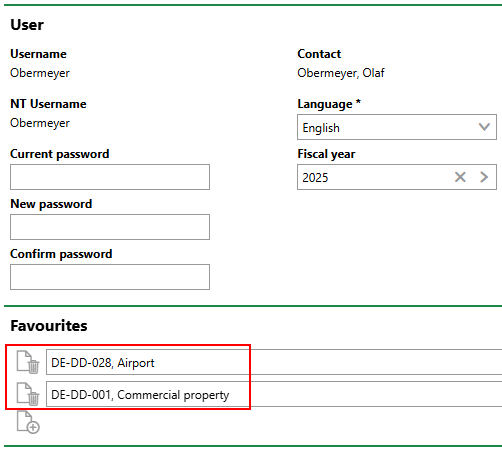
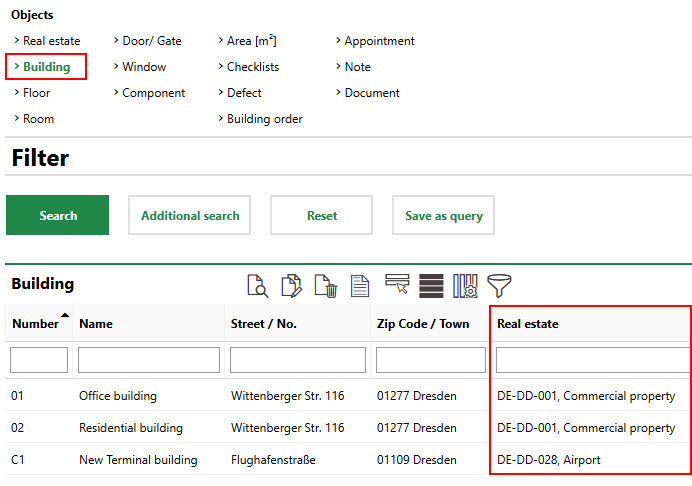
Favourites are manged hierarchically, which means any high-level objects you add to this section will filter out lower-level objects that are not directly beneath it. For example, if you add a real estate as a favourite, you will only see buildings located on that real estate. Buildings located on other real estates will be filtered out from your user's view, like its parent real estate.
User with Two Real Estates in Favourites |
Real Estate Search with Favourites |
You can add data objects lower in a hierarchy by double-clicking its parent in the Favourites selection dialog, instead of selecting it and clicking Apply. To add a building, for example, double-click the real estate in which it is located in the Favourites dialog, and then select one of the building on the real estate and click Apply.
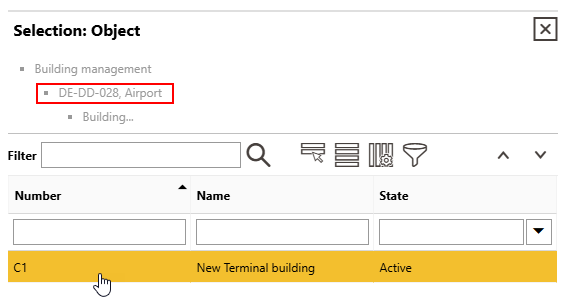
Adding a Building on a Real Estate as a Favourite
When you apply a favourite to your user's settings, a star icon appears in the top-right corner of all the dashboard pages when you are signed in to VertiGIS FM.
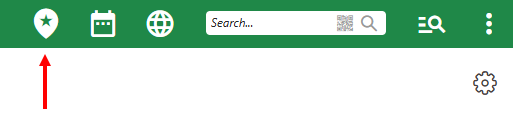
Favourite Indicator Icon
Start Page
A Start Page section appears when you edit your user. Here, you can specify the landing page that appears when you sign in to VertiGIS FM.
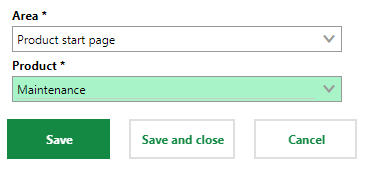
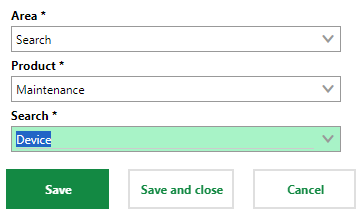
The option selected from the Area menu and dependent fields specify the page that will display when you sign in.
Start Page Options
Option |
Description |
|---|---|
Application Homepage |
The VertiGIS FM home page. |
Dashboard |
A dashboard for any VertiGIS FM product. When you select Dashboard from the Area drop-down menu, a second drop-down menu from which you can select a product appears.
|
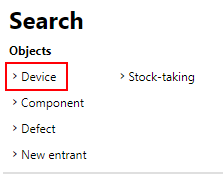
Search |
A search page for any VertiGIS FM product. When you select Search from the Area drop-down menu, •a drop-down menu from which you can select a product appears. •a drop-down menu from which you can select an object to select by default appears.
The option selected in the Search menu determines the object to be selected by default from the Objects section on the search page.
|