The standard app package used to deploy VertiGIS Studio application for integration includes two workflows: View Object and Edit Object. You select these from your ArcGIS portal when you add your web map to VertiGIS FM.
The sections below describe how the workflows are used in VertiGIS FM after you have properly integrated your web map with the application.
View Object
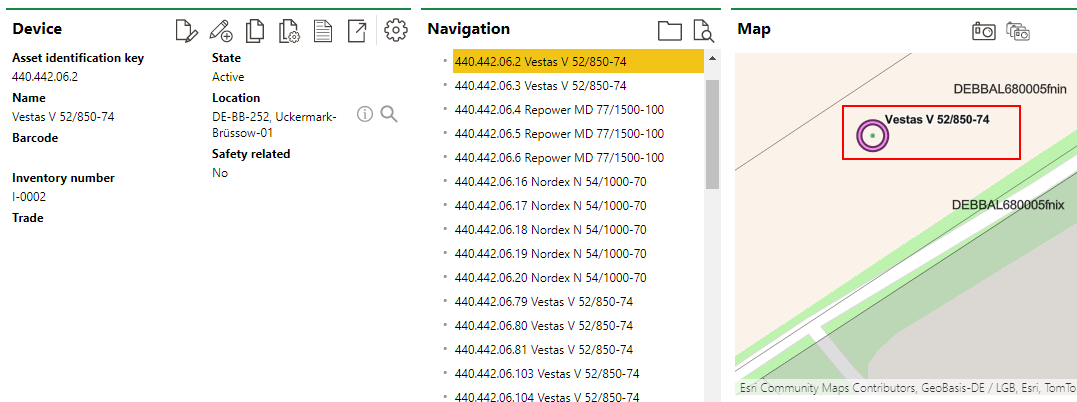
If you have integrated your VertiGIS FM environment with a web map from your ArcGIS portal, selected the workflows from the deployed app package, and associated the layers in your web map with VertiGIS FM data objects, you can zoom to an object on the map by navigating to its details page. The example below shows the details page for a device, which has been linked to the wind turbines layer.
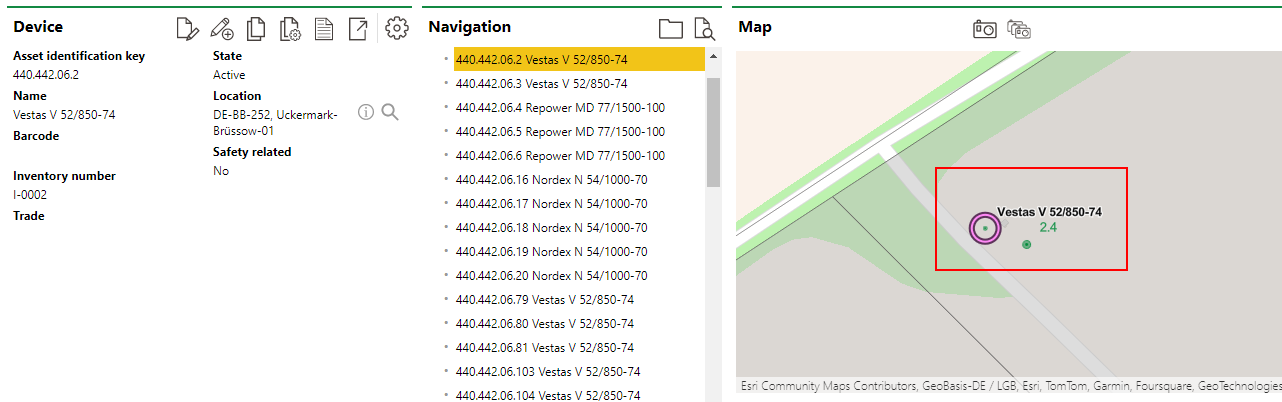
Zoom to Object (View Object) on the Details Page for Linked Object
Edit Object
Functionality associated with the Edit Object workflow are accessed by clicking the Locate (![]() ) icon on the object details page.
) icon on the object details page.
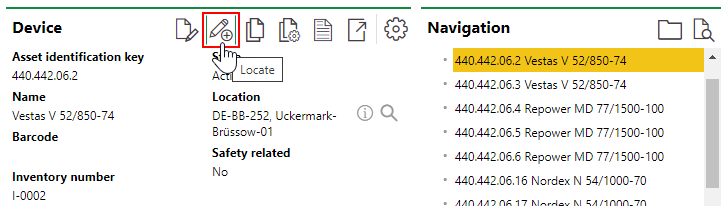
Locate Icon on the Object (Device) Details Page
The page that loads shows the device information and its location on your VertiGIS Studio web map. You can click the buttons on the left side of the screen to edit the GIS object in VertiGIS FM.
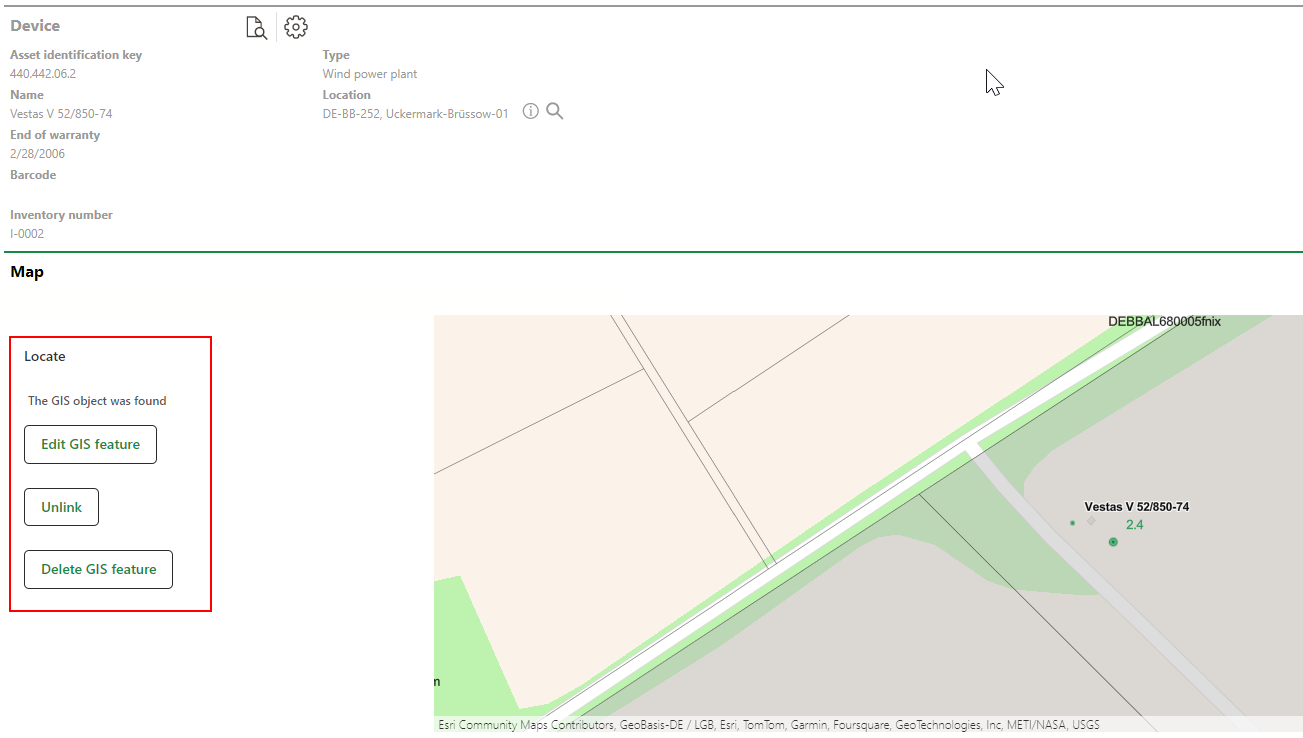
Locate Object Screen
Edit Object Buttons
Button |
Description |
|---|---|
Edit GIS feature |
Change the location of the GIS feature on the web map. |
Unlink |
Disassociate the GIS object and the VertiGIS FM object so that they are stored in both systems in parallel. Changes made to the object in VertiGIS FM will not be reflected in the GIS. |
Delete GIS feature |
Delete the object from the GIS system so that it is no longer displayed on the web map. |
Change the Location of the Object on the Web Map
You can use the Edit Object workflow you have integrated with VertiGIS FM to change the location of a VertiGIS FM object on your web map.
To Change the Location of the Object on the Web Map
1.On the details page for an object that has been linked to a map layer, click the Locate (![]() ) icon.
) icon.
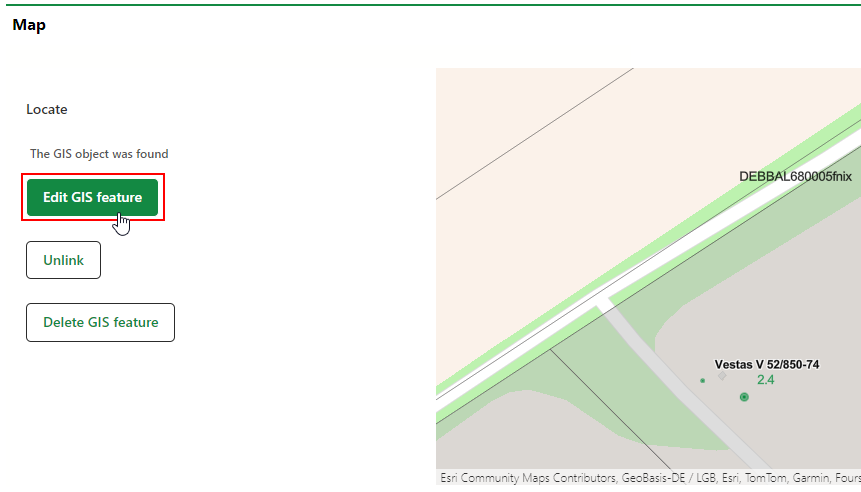
2.In the Map section, click Edit GIS feature.
3.Click the box surrounding the object and drag it to the intended location.
4.Click the check mark icon ![]() .
.
|
|
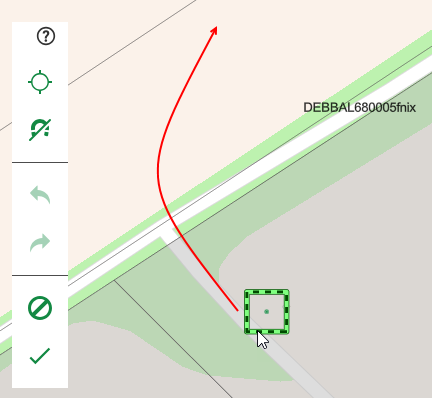

When editing the GIS feature's location, you can click the ![]() icon to undo the last change made by a click on the web map. You can click the
icon to undo the last change made by a click on the web map. You can click the ![]() icon to undo all changes made to the object since you clicked the Edit GIS feature button.
icon to undo all changes made to the object since you clicked the Edit GIS feature button.
The web map now shows the new location of the object on your web map.
Web Map Showing Edited Location for Object in VertiGIS FM