Additional properties allow you to add multiple custom fields that accept specified data types as values to forms or details pages throughout VertiGIS FM. All additional properties you associate with an object appear in the Additional Properties section on the form or details page. Users can enter data in the field when they edit the object or asset.
Custom Details Added to Additional Properties Section on Asset's Details Page
For example, you could create a property called Implementation Date for a group, subgroup, or type and specify that the type of data it accepts is a date. On the details pages for devices within the group, subgroup, or type, users could then pick a date on a calendar to indicate the date that that individual device was implemented.
Additional properties can be applied to most data objects in VertiGIS FM. How you add data fields to an Additional Properties section depends on the type of data object for which you are creating the additional properties:
•For assets managed in a hierarchy in VertiGIS FM Maintenance, like devices (in the Device and Systems Structure hierarchy), components (in the Component Structure hierarchy), and items managed in the Inventory Management Hierarchy, you must create additional properties on the details page for the assets' group, subgroup, or type, depending on the range of assets to which you want the data fields available. This logic also applies to building construction groups.
•For assets managed in other VertiGIS FM products, as well as task-based objects like orders and service desk tickets, you must create additional properties in the administration section (Administration > Master Data > Flexible Properties). Here, you select a VertiGIS FM product and a data object managed within it, and define the data types to which you want to make the data fields available. You can limit the instances of the data object to which the fields are available using conditions and other filters.
Add Additional Properties
The procedures for adding additional properties to both types of data objects (hierarchical assets and other data objects) are outlined below.
Add Additional Properties to Hierarchical Assets (Devices, Components, Building Constructions)
You can add additional properties to devices, components, inventory items, and building construction groups on the details page for the asset's group, subgroup, or type, depending on the range of assets to which you want to make the additional properties available.
To Add Additional Properties to Hierarchical Assets
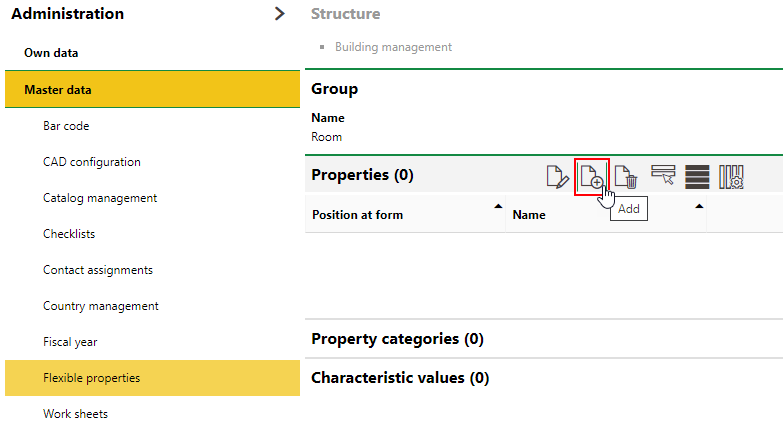
1.Navigate to the details page for the group, subgroup, or type that contains the assets to which you want to make new data fields available.
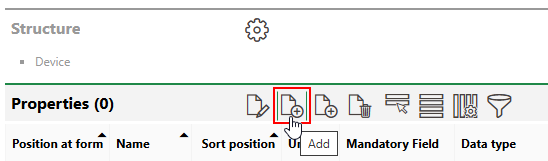
2.Expand the Properties section and click the Add (![]() ) icon.
) icon.
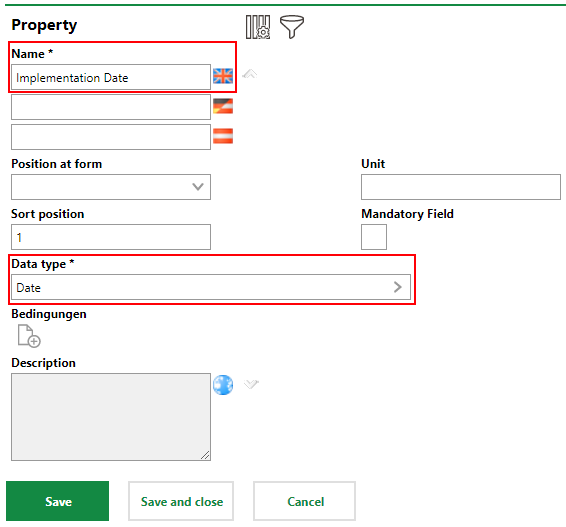
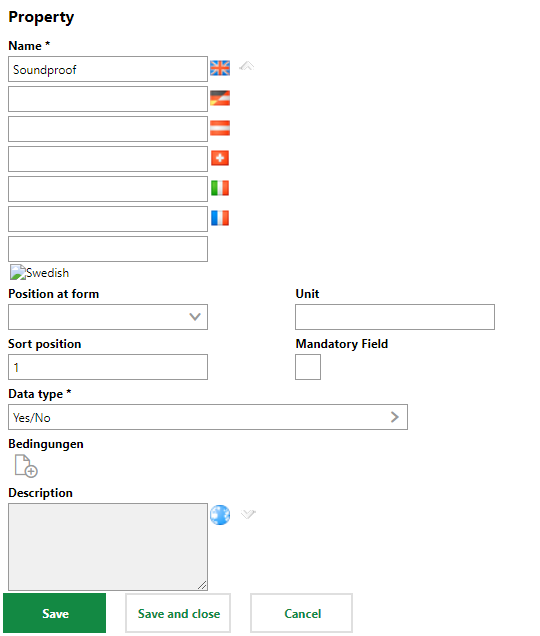
3.At minimum, enter a Name and select a Data Type for the property. Refer to Additional Property Details for descriptions of all fields.
4.Click Save and Close.
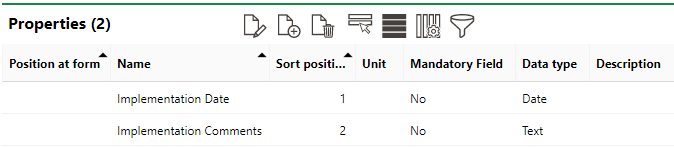
The Properties section now lists the additional property.

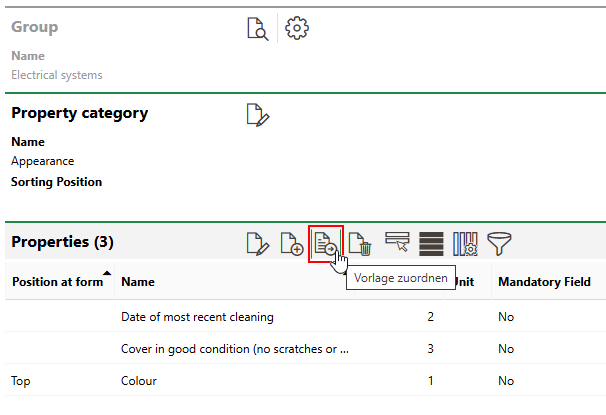
Properties Section on Group Details Page
You can add other properties relevant to the assets to the form. Each property can have a different data type. All properties will appear in the Additional Properties section on the details page of the assets within the group (for example, the device details page or component details page).
Properties Section
Because the additional property above was added to the Properties section on the group's details page in the Device and Systems Structure, the additional property will be available when users edit the details page for any devices in the group.
Add Additional Properties and Property Templates to all Assets in a Group (VertiGIS FM Maintenance)
In VertiGIS FM Maintenance, you can create additional properties or templates that are available for all assets in either the Device and Systems Structure or Component Structure. This allows you to create an additional property or additional property template for each asset in the hierarchy without needing to recreate the same additional property or template for every group.
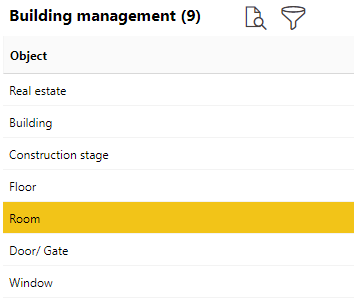
To create an additional property or property templates for all assets in a hierarchy, click Device and Systems Structure or Component Structure under References on the VertiGIS FM Maintenance legacy dashboard.
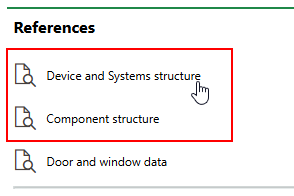
Links to VertiGIS FM Maintenance Hierarchies
To add a new additional property for all assets in the hierarchy, click the Add (![]() ) icon in the Properties section.
) icon in the Properties section.
Adding Additional Properties for All Assets in Hierarchy
You can then follow the normal workflow to add an additional property. The property you add will appear in the Additional Properties section on the details page for all assets in the hierarchy.
To add an additional property template to the hierarchy, click the Add Property as Template (![]() ) icon.
) icon.
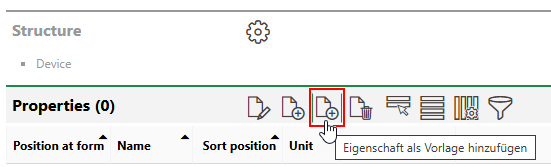
Adding Additional Properties Templates for All Assets
The workflow for adding a property as a template is the same as adding a new property, but the property you create in this process in not automatically assigned to all assets in the hierarchy. Instead, you have the option of applying the it to any group, subgroup, or type within the hierarchy, without needing to recreate it each time.
Whether the additional property is automatically assigned to all assets in the hierarchy or is merely a template is indicated by the Template column in the Properties menu.
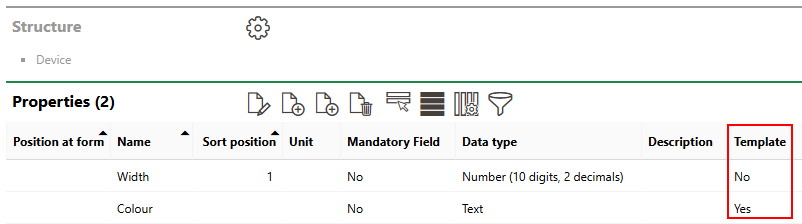
Additional Properties Template Value
Assign a Property Template as an Additional Property
If you created a property template, you can assign it as an additional property in the Properties section on the details page for any group, subgroup, or type within the hierarchy for which it was created. To assign a template, click the Assign Template (![]() ) icon.
) icon.

Assigning a Property Template to a Hierarchy Group
You can then click the Add (![]() ) icon and select a template that has been created. After you click Save and Close, the template becomes an additional property for the assets within the group.
) icon and select a template that has been created. After you click Save and Close, the template becomes an additional property for the assets within the group.
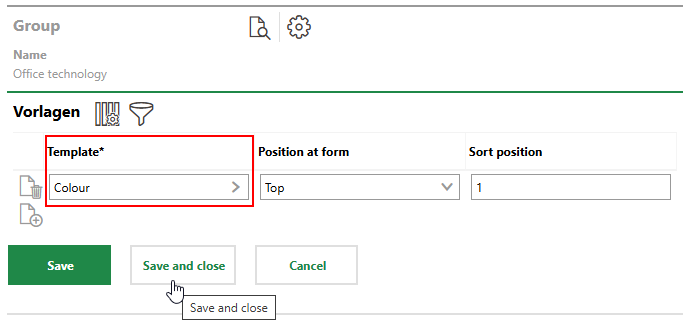
Assigning a Hierarchy Template to a Group as a Property
Assign a Property Template in a Property Category
You can also assign a property template to a property category instead of creating a new property in a category.
Assigning a Property Template to a Category
Refer to Property Categories for more information.
Add Additional Properties for Other Assets and Data Objects
You can add additional properties to other types of assets and data objects, like orders and service desk tickets, on the flexible properties administration page (Administration > Master Data > Flexible Properties).
To Add Additional Properties on the Administration Page
1.Navigate to the Flexible Properties administration page by clicking Administration > Master Data > Flexible Properties from any page in VertiGIS FM.
2.Expand the section for the VertiGIS FM product or module associated with the data object for which you want to add an additional property.
3.Double-click the type of data object for which you want add an additional property.
4.Expand Properties and click the Add (![]() ) icon.
) icon.
5.At minimum, enter a Name and select a Data Type for the property. Refer to Additional Property Details for descriptions of all fields.
6.Click Save and Close.
The additional property is now available for all instances of the data object for which it was created. Click the Add (![]() ) icon under Conditions to limit its availability to instances of the data object that have the properties you specify.
) icon under Conditions to limit its availability to instances of the data object that have the properties you specify.
Field |
Description |
||||||||
|---|---|---|---|---|---|---|---|---|---|
Name |
The name of the data field as it will appear in the Additional Properties section on the details pages or forms for the data objects to which it is assigned. |
||||||||
Position at form |
The additional property's position on the form in which the user accesses the data fields. |
||||||||
Sort position |
The order in which the additional property will appear in the Additional Properties section of the form relative to other additional properties created for the object or asset. |
||||||||
Data Type |
How users enter data in this field.
|
||||||||
Expression |
A check box that, if selected, loads an Expression text box in which you can enter a filter expression to limit the range of objects or assets to which the additional property is available. |
||||||||
Conditions |
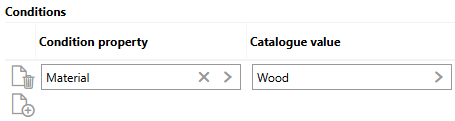
Property values you want to apply to limit the range of assets or objects to which this additional property is available (within a group, subgroup, or type, or within the system). For example, if you are adding an additional property to a group in the Device and Systems Structure, and enter a Condition Property of Material and Condition Value of Wood, the additional property will only be available to assets in the group whose Material value is Wood.
Condition Applied to Additional Property |
||||||||
Headline |
A check box that, if selected, removes the Data Type menu for the additional property. The text you enter in the Name field will appear as a headline within the Additional Properties section for other additional properties you position below it. |
||||||||
Unit |
The unit of measurement that is associated with the data the user enters in the field. The text you enter in this field appears in square brackets after the text entered in the Name field. |
||||||||
Mandatory Field |
Whether the user must enter data in this field in order to save the form. Users will be unable to edit an asset's core properties or update a service desk ticket's status without entering something in the data field if this check box is selected. |
||||||||
Description |
A description of the additional property. |
Enter Data in an Additional Properties Section
After you have created additional properties, users can enter data in the fields when they edit the asset's core details (for example, when they edit a device's details page or an order).
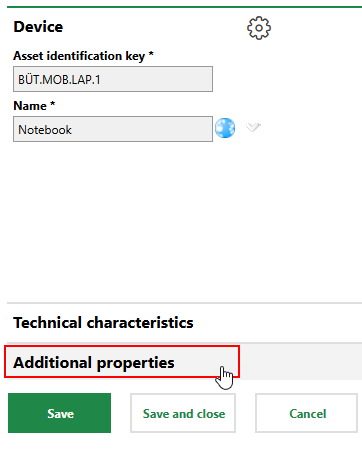
There is no edit button in the Additional Properties section on details pages. You must edit the core properties and expand the Additional Properties section.
To Enter Data in an Additional Properties Section
1.Navigate to the details page for an asset for which you created the additional property.
Ensure the Additional Properties section is visible on the asset's details page. If it is not, edit the section authorization and change Additional Properties to Visible.
2.Click the Edit icon (![]() ) at the top of the details page.
) at the top of the details page.
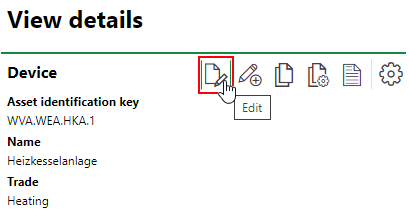
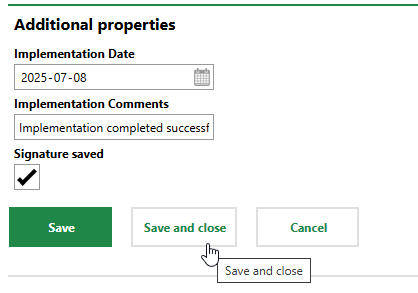
3.Expand Additional Properties.
4.Fill out the additional properties as required. How each field is filled out varies depending on the data type that was selected for each additional property.
5.Click Save and Close.
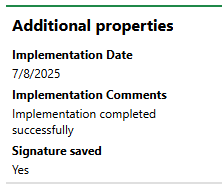
The inputs are now shown in the Additional Properties section on the asset's details page.
Additional Properties Section with Saved Inputs
Entering Data in a Property Category
Section Authorization
Note that you may need to edit the section authorization for the edit form and change the Additional Properties setting to Visible.

Section Authorization for Property Category
You may to separately enable the property category's visibility on the asset's details page so that users can see it when they are not editing the asset.