In VertiGIS FM Buildings, windows can be installed in a building, construction stage, floor, or room. You may have to edit the section authorization on the page you're viewing in order to see the Windows section.
Window Details
The window details page can be accessed by double-clicking a window in the Window section on the building details page, construction stage details page, floor details page, or room details page, depending on where you've installed the window.
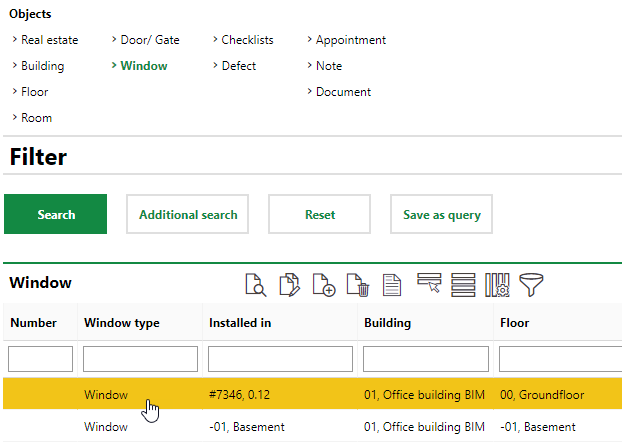
You can also access the window details from the Search page. Under Objects, click Window, and then double-click a window in the search grid.

Search Page Showing All Windows in the System
The window details page includes the following sections and information fields.
Window
The Window section contains general window properties.
Window Details
Detail |
Description |
Example |
|---|---|---|
Number |
The number assigned to the window. |
01 02 |
Window Type |
The type of window. Selectable options are stored in the Window Types section in the Door and Window Data. |
Rotating window Sliding window Composite window |
Installed In |
The number and name of the asset (real estate, building, construction stage, floor, or room) in which the window is installed. |
1, 1st Floor 1, Classroom #1 |
Manufacturer |
The manufacturer of the window. |
Vancouver Island Windows Ltd. |
Comment |
A text box in which you can enter any miscellaneous information about the window. |
Defective window was purchased at discount from manufacturer. |
Areal Data
The Areal Data section measurement information for the window.
Areal Data Details
Detail |
Description |
|---|---|
Width [mm] |
The width of the window in millimeters. |
Arch base height [mm] |
The length of the window in millimeters from the bottom of the pane to the top of the arch, if the window has an arch on top. |
Base height [mm] |
The length of the window in millimeters from the bottom of the pane to the top of the pane. |
Window area calculated [m²] |
The calculated area of the window surface. |
Frame area calculated [m²] |
The calculated area of the frame surface. |
Glass pane calculated [m²] |
The calculated area of the glass pane. |
Characteristics
The additional window properties below can be stored in the Characteristics section of the window details page.
Building Shell
•Wall material
Wing
•Glazing
•Colour
•Width
Frames
•Material
•Colour
•Width [mm]
Binder
•Material
•Colour
•Track application
Miscellaneous
•Fire protection
•Noise protection
•Burglary protection
Basic Data Cleaning
•Glass cleaning area single [m²]
•Number of areas to be cleaned
•Overheight
•Internal Cleaning
•Exterior Cleaning
Add a Window
A window can be added on the building details page, construction stage details page, floor details page, or room details page.
To Add a Window
1.Navigate to the details page for the real estate, building, construction stage, floor, or room to which you want to add the window.
2.Expand the Window section and click the Add (![]() ) icon.
) icon.

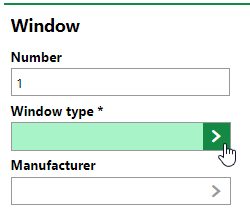
3.Click the arrow button (![]() ) in the Window Type box, select the type of the window being added, and click Apply.
) in the Window Type box, select the type of the window being added, and click Apply.
Selectable Window Types are stored in the Window Types section in the Door and Window Data.

4.Enter any other relevant information for the window. Expand the Characteristics and Basic Data Cleaning tabs to add additional window information.
5.Click Save and Close.
Edit a Window
You can edit existing windows on the details page for the building, construction stage, floor, or room in which the window is installed.
To Edit a Window
1.Navigate to the details page for the building, construction stage, floor, or room that contains the window you want to edit.
2.Expand the Windows section and double-click the window you want to edit. Alternatively, you can select the window and click the View Details (![]() ) icon.
) icon.
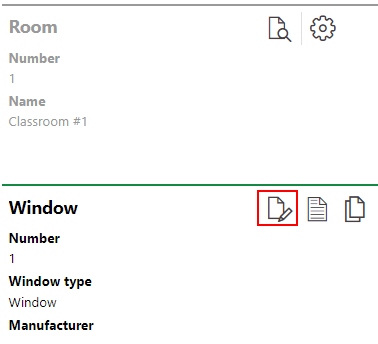
3.On the window details page, click the Edit (![]() ) icon.
) icon.

4.Edit the window's details as required.
5.Click Save and Close.
Delete a Window
You can delete existing windows on the details page for the building, construction stage, floor, or room in which the window is installed.
To Delete a Window
1.Navigate to the details page for the building, construction stage, floor, or room that contains the window you want to delete.
2.Expand the Windows section.
3.Select the window you want to delete and click the Delete (![]() ) icon.
) icon.
4.Click OK.