Checklist items are tasks or conditions in a checklist a user must mark as checked or unable to be checked when they complete a checklist. Depending on how each task is configured, they can require the user to enter additional information as they complete the checklist.
In VertiGIS FM Buildings, checklist items can simply require the user to mark an item as Ok or Not ok when they complete the checklist but can also include other data entry components:
•you can add conditions and flexible properties to order checklists in VertiGIS FM Buildings.
•you can add scores, conditions, and flexible properties to asset checklists in VertiGIS FM Buildings.
Add Items to a Buildings Checklist
After you have saved a new order checklist, you can add items (individual tasks or conditions that must be checked) to it. You can complete the procedure below whenever you need to add items to an existing checklist.
You cannot add items to a checklist if you have assigned the checklist a Kind of Inspection property in the checklist details.
To Add Items to a Global Order Checklist
1.On the checklist administration page, double-click the checklist to which you want to add items.
▪to add items to an order checklist, double-click a checklist in the Order Checklists section.
▪to add items to an asset checklist, double-click a checklist in the Checklists section.
2.Expand the Items section and click the Add (![]() ) icon.
) icon.
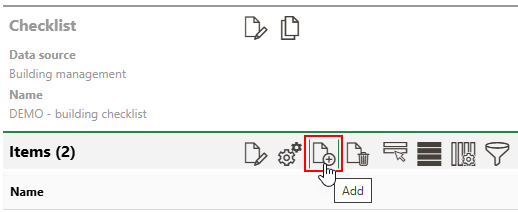
3.Enter a name for new item in the Name field and attach any data objects in the appropriate sections.
Select the Required check box if you are adding a checklist item whose completion is mandatory.
4.Repeat steps 2-3 as required to add addition items to the checklist.
Add Scores to Checklist Items
You can include scores in items you add to an asset checklist in VertiGIS FM Buildings.
Scores represent the options your users can select from the Valuation drop-down menu for each item included in an asset checklist. A set of options you add to a single checklist item is applied to all items in the checklist.

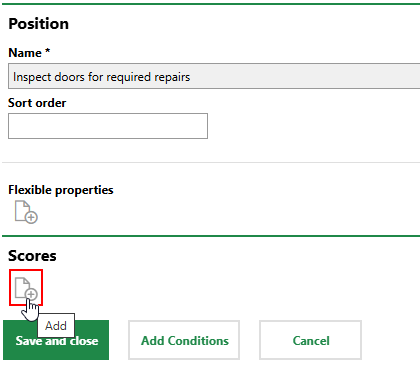
You can add scores to a checklist's items by clicking the Add (![]() ) icon under Scores when you are adding or editing one of the checklist items.
) icon under Scores when you are adding or editing one of the checklist items.
Adding a Score to a Checklist Item (1/2)
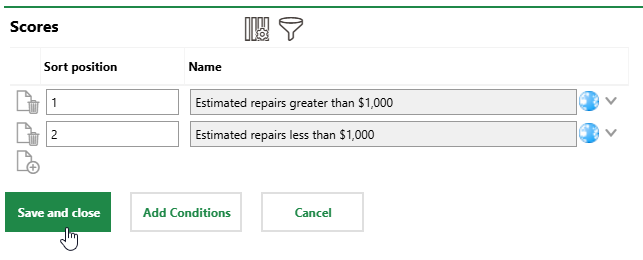
Enter the text for an option a user completing the checklist can select, and then click the Add (![]() ) icon again to add another option. When you are done adding options, click Save and Close.
) icon again to add another option. When you are done adding options, click Save and Close.
Adding a Score to a Checklist Item (2/2)
The Sort Order indicates the order in which the options will appear in the drop-down menu.
Users can now select these options when they complete the asset checklist.
Add Conditions to Checklist Items
Conditions allow or require users who complete an order checklist to select an option from a predefined list in a menu based on whether they mark a checklist item as Ok or Not ok.
Conditions can only be added to items for order checklists. You cannot add a condition to an asset checklist. Refer to Checklist Types.
For example, a checklist item could require that users ensure an asset is in good working condition. If they select Not ok to record that it is not, you could require the user to select an option from a menu that specifies the issue with the asset.
Checklist Item with a Condition
To create a checklist condition, you must create a catalog that stores the options you want your users to choose from, attach the catalog to the checklist item you want to associate it with, and then outline the conditions under which users can (or must) select an option from the catalog.
To Add Conditions to a Checklist Item
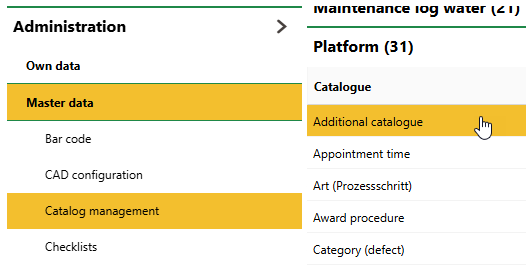
1.Navigate to the catalog administration (Administration > Catalog Management). Expand Platform and double-click the Additional Catalogue entry.
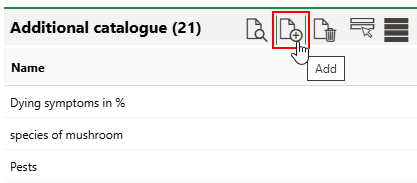
2.Click the Add (![]() ) icon.
) icon.
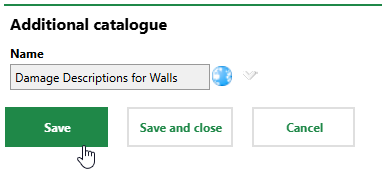
3.Enter the name of the set of condition options and click Save.
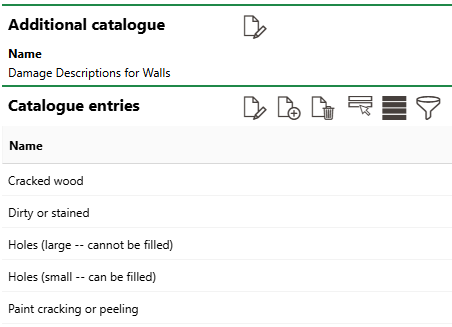
4.In the Catalogue Entries section, click the Add (![]() ) icon.
) icon.
5.In the Name text box, enter the text for one of the options you want users who complete the checklist to select from the drop-down menu. Enter a number in the Sorting Position text box to indicate the order in which you want it to appear releative to the other options.
6.Repeat steps 4-5 until the catalog includes entries for all the options you want users to be able to select from the drop-down menu.
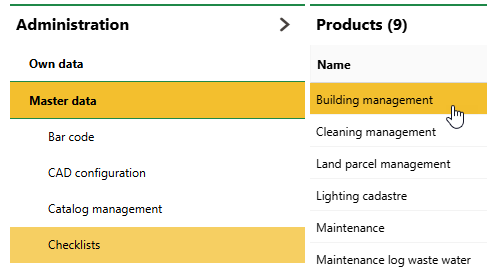
7.Navigate to the checklist administration page (Administration > Master Data > Checklists) and double-click the VertiGIS FM product or module associated with the checklist whose items you want to add a condition to.
8.In the Checklists or Order Checklists section, double-click the checklist whose items you want to add a condition to.
9.Expand the Items section and double-click the checklist item to which you want to add a condition. Alternatively, you can select the item and click the Edit (![]() ) icon. If the checklist does not have any items yet, add one.
) icon. If the checklist does not have any items yet, add one.

10.Under Catalogues, click the Add (![]() ) icon. Select the catalog you created in steps 1-6 of this procedure and click Apply, or double-click the catalog.
) icon. Select the catalog you created in steps 1-6 of this procedure and click Apply, or double-click the catalog.
11.Scroll to the bottom of the page and click Add Conditions.
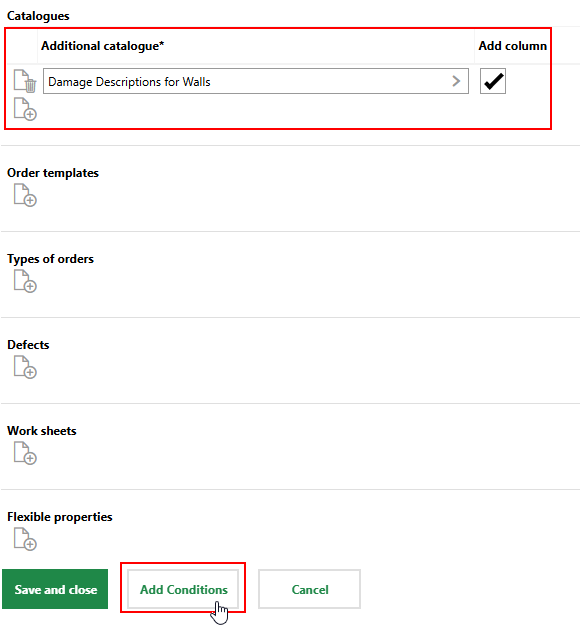
Select the Add Column check box if you want the drop-down menu to appear in its own column in the checklist. Otherwise, users who complete the checklist will access the drop-down menu in the Catalogue Entry column.
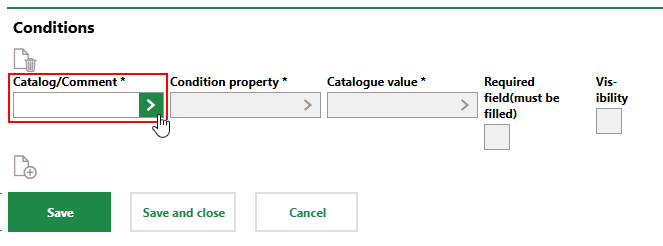
12.Under Conditions, click the Add (![]() ) icon.
) icon.
13.Click the > button in the Catalog/Comment menu, select the additional catalog you applied to the checklist item in step 9, and click Apply.
14.Click the > button in the Condition Property menu, select Evaluation, and click Apply.
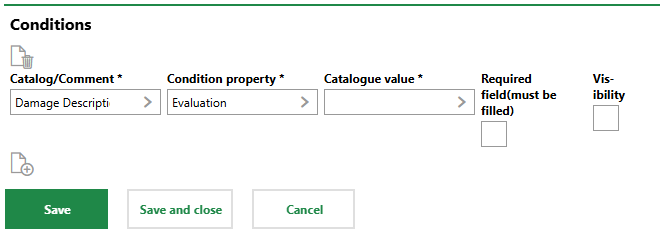
15.Fill out the remainder of the condition properties as required. Refer to Checklist Condition Details for descriptions of each menu.
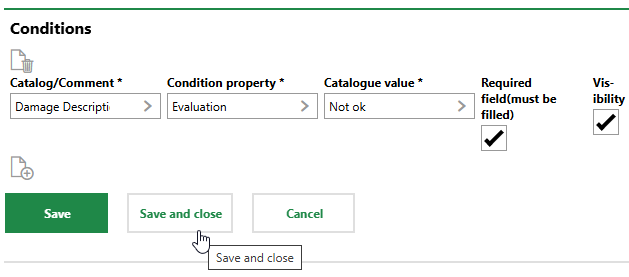
16.Click Save or Save and Close.
Field |
Description |
|---|---|
Catalog/Comment |
The catalog that whose entry stores the options your users can select from in the menu. Selectable options are stored in the Additional Catalogue catalog. |
Condition property |
|
Catalogue value |
The checklist item value selected by the user that will allow or require them to select an option from the catalog in the menu. |
Required |
A check box that, if selected, requires the user to select an option from the catalog in the menu when they select the value indicated in the Catalogue Value field. If the user selects the value indicated in the Catalogue Value field (for example, Not ok) and the Required check box is selected, they will be unable to save the checklist without selecting an option from the additional catalog. |
Visibility |
A check box that, if selected, hides the menu with the catalog options on the checklist. The checklist will appear when the user selects the value indicated in the Catalogue Value field (for example, Not ok). |
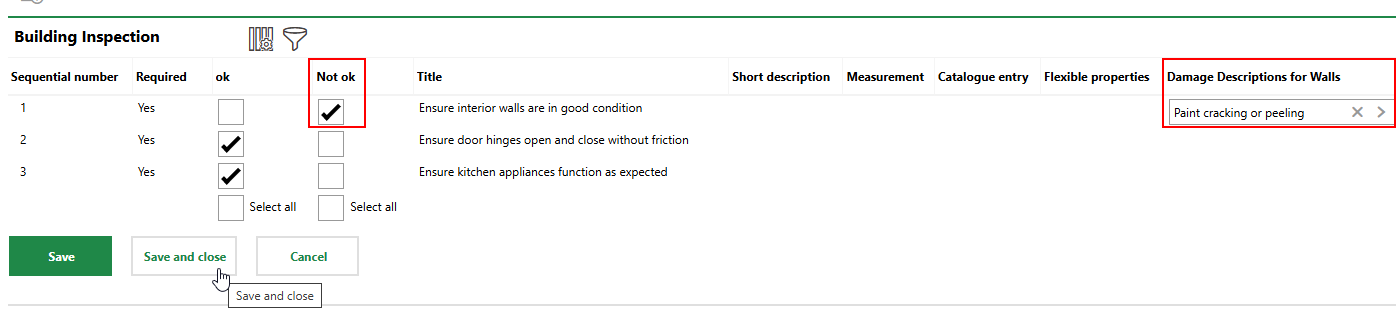
In the condition created in the procedure above, the condition is added to the "Ensure interior walls are in good condition" checklist item, the Catalogue Value is Not ok, and the Required and Visibility check boxes are both selected.

Completing a Checklist Item with a Condition (1/3)
This means that if a user completing the checklist selects Not ok for the checklist item, the menu with the catalog entries will appear.

Completing a Checklist Item with a Condition (2/3)
Because the Required check box is selected, the user cannot select Not ok and save the checklist without selecting an option from the Damage Description for Walls menu.

Completing a Checklist Item with a Condition (3/3)
You can attach flexible properties to checklist items if you want users who complete the checklist to enter data using additional properties in your system. You attach additional properties and individual properties within a property category to a checklist item, but you cannot attach property categories themselves or characteristic values to a checklist item.
To attach a flexible property to a checklist item, edit the checklist item.

Edit Checklist Item Button
Click the Add (![]() ) icon under Flexible Properties, select the additional properties you want to attach to the checklist item, and then click Save and Close. If you select the Add Column check box for a additional property, it will have its own column in the checklist.
) icon under Flexible Properties, select the additional properties you want to attach to the checklist item, and then click Save and Close. If you select the Add Column check box for a additional property, it will have its own column in the checklist.
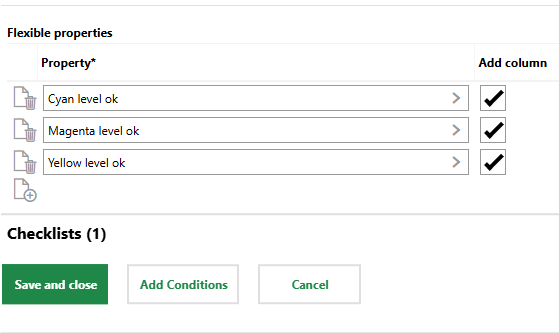
Flexible Property Selection for Checklist Item
When you apply the checklist to a maintenance strategy, users who complete orders generated by the maintenance strategy can enter data in the additional property on the line for the checklist item.
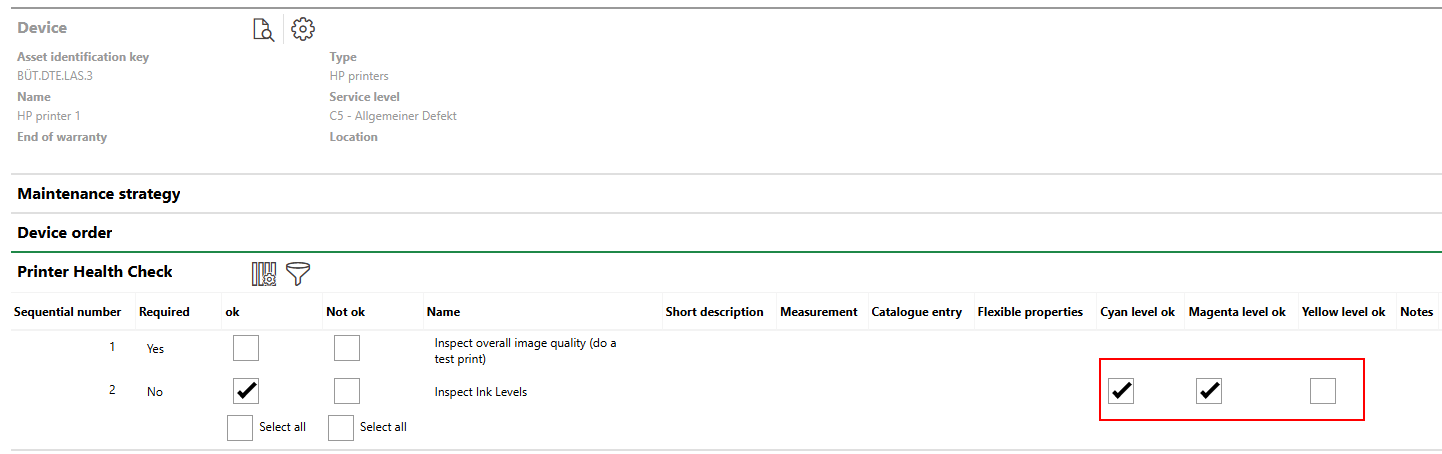
Checklist with Yes/No Additional Properties in Respective Columns
If you leave the Add Column check box unselected when you select additional properties for a checklist item, the additional properties appear in a single Flexible Properties column in the checklist.
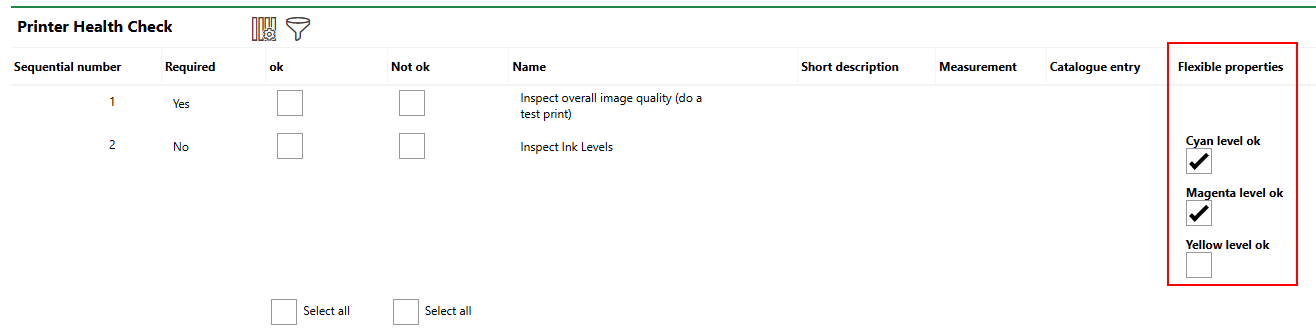
Checklist with Yes/No Additional Properties in One Column
In the example above, the data type for the additional properties is yes/no (i.e., check boxes). Users can also enter text, numbers, or a date in the additional property fields, depending on how the additional property is configured.
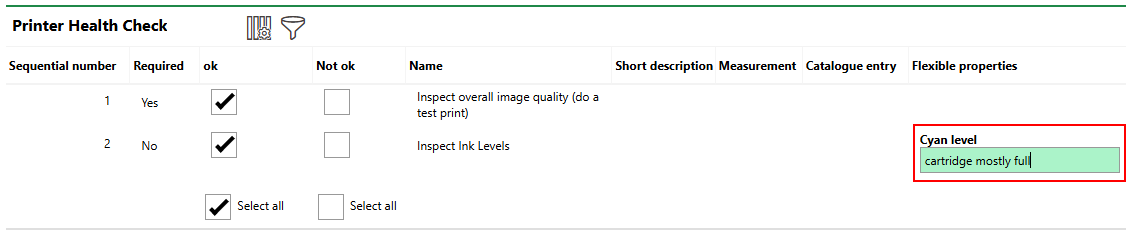
Checklist with Text Additional Property
Flexible Property Assignment for Non-Maintenance Checklists
You can assign any flexible properties in your system to checklist items, but they will only appear
•in asset checklists when you assign them to the same type of asset for which the flexible property was created.
•in order checklists associated maintenance strategies that generate orders for the same type of asset for which the flexible property was created.
For example, if you create an additional property for real estates and attach it to an asset checklist that you assign to a building, or to an order checklist that you assign to a maintenance strategy that generates orders for a building, users who complete the checklist will not see the flexible property. You must create the flexible property for the Buildings group in the flexible property administration if you want an asset checklist assigned to a building or order checklist generated for a building to include the flexible property.