In Networks Editor, you can use the Replace Geometry tool to update the geometry of an existing feature without having to recreate the feature or manually edit each vertex. This tool allows you to replace the current shape of a feature with a newly drawn geometry by using Update By Sketch, or with the geometry of another existing feature by using Update By Selection.
The feature retains its attributes, associations, relationships, IDs, and all other links when you change its geometry.
In our example below, a planned utility line needs to be adjusted after receiving more accurate survey data. We select the original line and replace its geometry with the surveyed line route; the feature attributes remain on the original feature while only the geometry is updated.
To replace the geometry of a feature:
1.Go to Edit > Advanced Editing > Replace Geometry.
2.Select the network features you want to copy.
The selected utility line is highlighted as shown below.
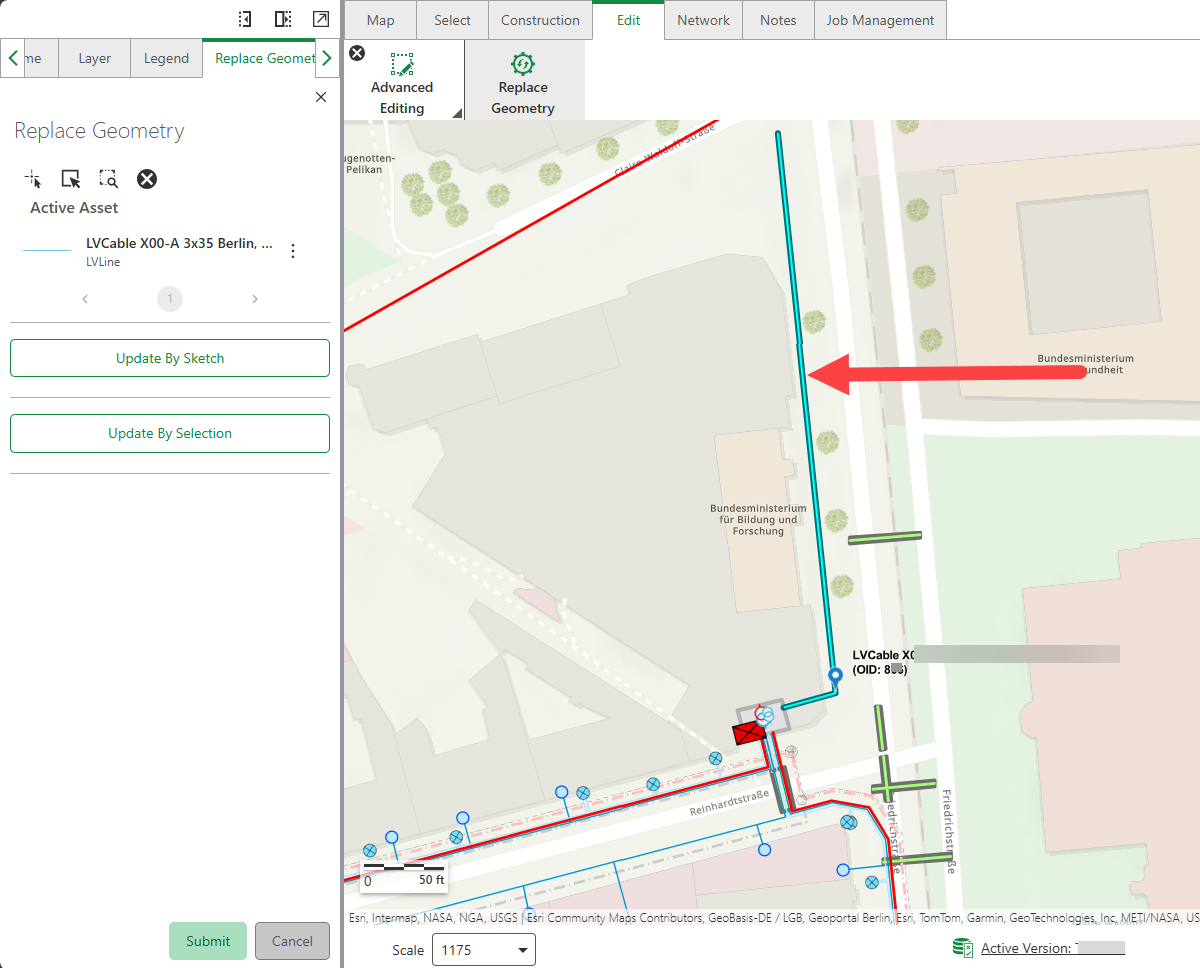
3.Click Update By Sketch to update the geometry of the utility line, then draw the polyline on the map, a preview of your drawing is shown.
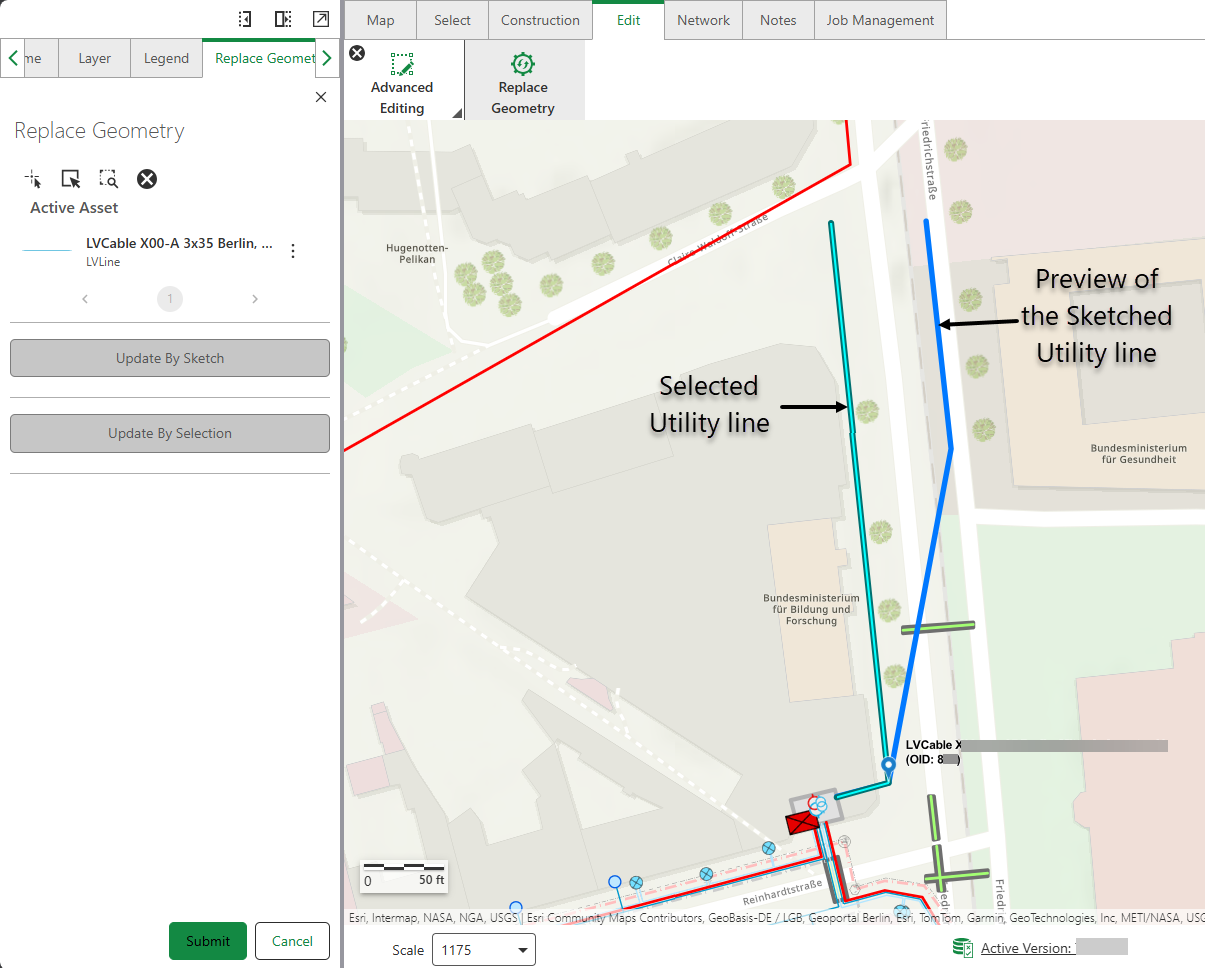
4.Click Submit.
The geometry of the selected utility line is changed to your newly drawn polyline and saved as shown below.
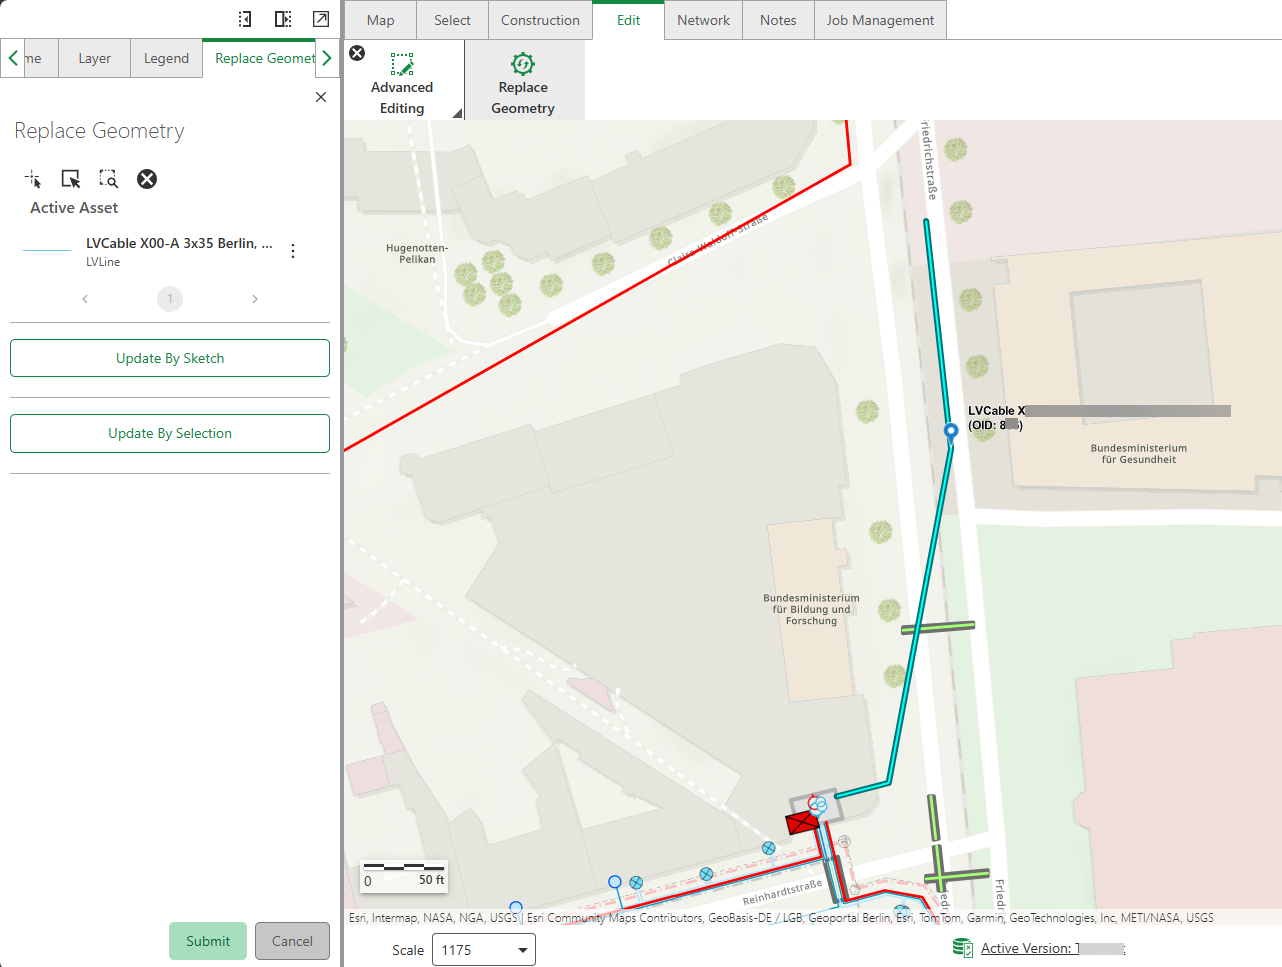
The Update by Sketch respects the feature's geometry (point, line, or areas) and sketches accordingly.
5.Similarly, click on Update By Selection to update the geometry of the utility line by selecting a comparable feature to copy over its geometry to your utility line, then click Submit.
The geometry of the selected utility line is changed to your selected feature's geometry and saved on the map.
Press Esc to cancel the Replace Geometry operation after selecting Update by Sketch or Update by Selection.
6.You can perform the following actions on the selected features using the functions available in the Action menu.
Button |
Description |
|---|---|
|
Zoom to the selected feature on the map. |
|
Pan to the selected feature on the map. |
|
Remove the selected feature from your current selection. |
|
Briefly highlight the selected feature on the map. |