An import transfers data from a third-party system into VertiGIS FM.
Imports are set up in two phases: first, add the import on the Settings tab. Then, set up the field mapping and configure other import settings on the Flexible Imports tab. After you've added and configured the import, you can execute it on the Execute tab.
Add an Import
Server information and credentials are required to add a database as an import.
To Add an Import
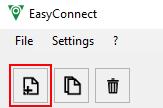
1.In the top-right corner of the application, click the ![]() icon.
icon.
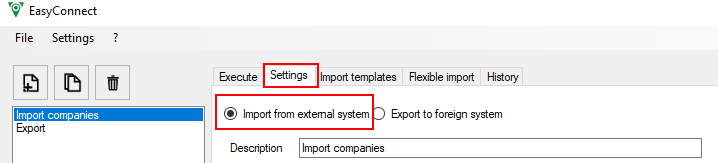
2.In the Settings tab, select Import from an external system.
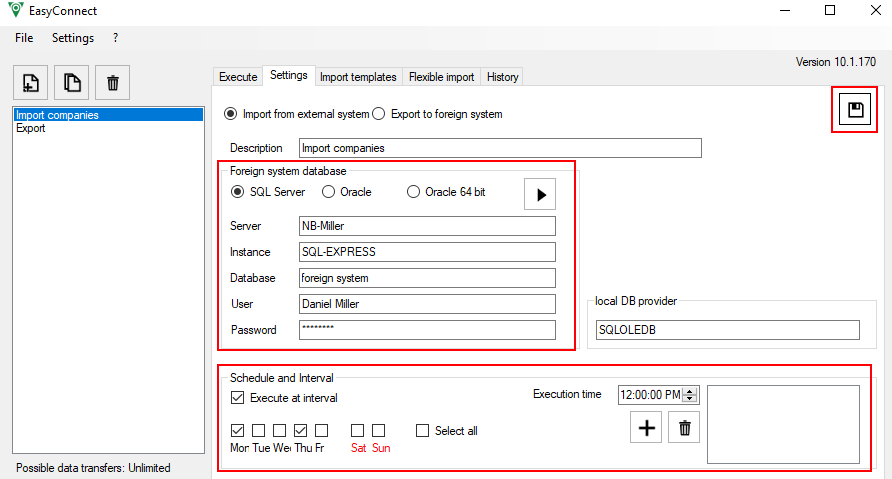
3.Enter the import settings outlined in the table below.
4.Click the ![]() icon in the top-right corner.
icon in the top-right corner.
5.Open the Flexible Import tab. On this tab, you can enter an SQL query and expressions, specify a CSV or text file from which you want to import data into VertiGIS FM, and set up the mapping between the third-party database and VertiGIS FM fields. Refer to Flexible Import for more information.
Setting |
Input |
|||||||||||||||
|---|---|---|---|---|---|---|---|---|---|---|---|---|---|---|---|---|
Description |
Enter a description for the import. |
|||||||||||||||
Foreign system database |
Select SQL-Server, Oracle, or Oracle 64 bit, depending on the type of database from which you are importing data. If you want to import data from a CSV file, you can leave the database fields below empty and select the CSV file on the Flexible Import tab.
Sample Database in SQL Server |
|||||||||||||||
Schedule and Interval |
Select the Execute at Interval check box if you want the import to occur programmatically without having to trigger it manually. In the Execution Time field, enter the time using a 24-hour clock at which you want the import to run on the selected days. Click the
Schedule and Interval Section of Import Setup You cannot configure an import to execute at different times on different days. You must create multiple separate imports to achieve this. |
|||||||||||||||
Log files storage location |
Select this check box if you want to save a log file that captures this import. Click the |
|||||||||||||||
Save transfer protocol location |
Select this check box if you want to save a file that outlines the datasets that were transferred to VertiGIS FM during the import. Click the |

Flexible Import
On the Flexible Import tab, you can detail an import so data data is only transferred into the fields for the VertiGIS FM products and objects that you specify. Complete the sections below when creating a flexible import.
Ensure the import you want to configure is selected in the left pane when setting up the import.
Select Data Type
On the Field Mapping tab, select the source of the data you want to import in the Data Type section.
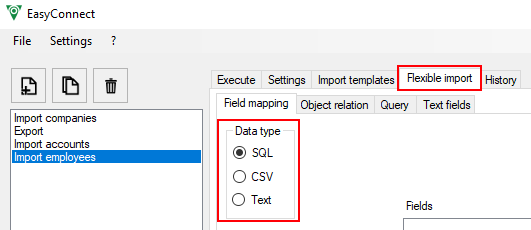
Data Type Menu
Flexible Import Data Types
Data Type |
Instruction |
|---|---|
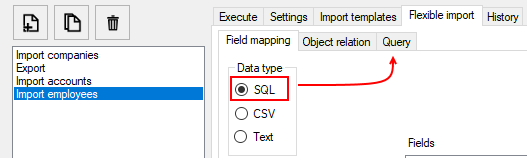
SQL |
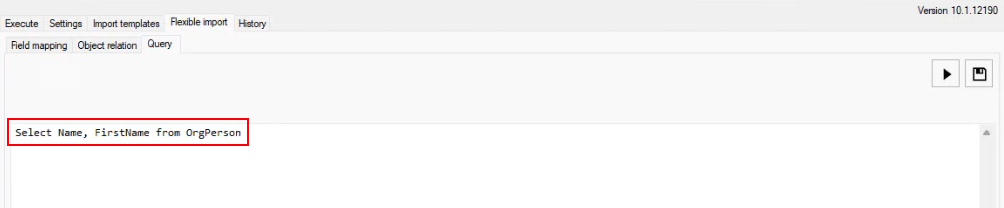
To retrieve data from an SQL database, select SQL and then open the Query tab.
SQL Data Type Type an SQL query in the text box.
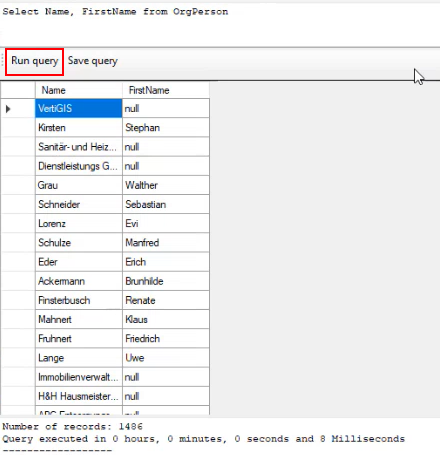
Query Tab in Flexible Import Tab To test the query, click the
Test Query Dialog Click the After saving the query, you can set the field mapping. On the Field Mapping tab, the data specified in the query you typed can be selected from the drop-down menu and mapped to the field specified with the product and object you selected.
Mapping Fields to Data in SQL Query |
CSV |
To retrieve data from a CSV file, select CSV. Click to
EasyConnect Folder In the CSV separator text box, enter a delimiter (: / , / > / Tabstop) to separate the columns in the file. In the Lines text boxes, you can enter numbers to limit the import to data stored in the specified lines.
Separator Menu and Lines Text Boxes for CSV File You can click the |
Text |
To retrieve data from a text file, select Text. Click to
Text Data Type You can specify the lines you want to import in the Lines text boxes. |


Select Product and Object
Select the VertiGIS FM product that contains the type of object you're importing into VertiGIS FM from the Module menu, then select the product you're importing from the Entity menu.
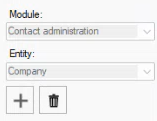
VertiGIS FM Product and Object Associated
After selecting the product and object you're importing into VertiGIS FM, click the ![]() icon. A list of the property fields associated with the object you selected opens in the Fields section.
icon. A list of the property fields associated with the object you selected opens in the Fields section.
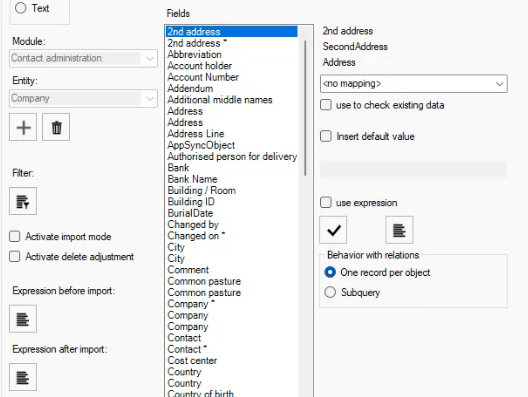
Property Fields Associated with Selected Object (Entity)
Set Field Mapping
After you've set up the third-party database and selected the type of object you're importing, you can map fields in the database with a field associated with the object specified in VertiGIS FM.
Select a field associated with a VertiGIS FM object from the list in the Fields section and then select a field you want to map it to from the drop-down menu shown below.
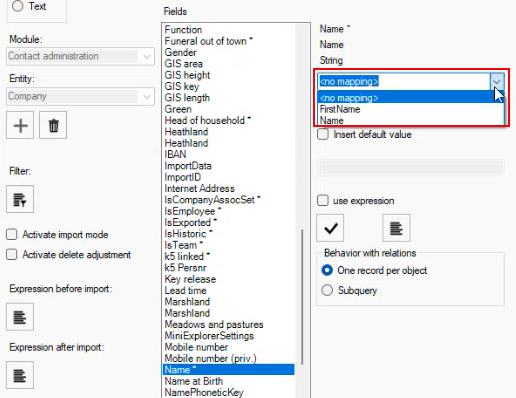
Selecting Data to Map to VertiGIS FM Field
After you've selected a field to map to the one selected in the Fields list, click the ![]() icon to set the mapping.
icon to set the mapping.
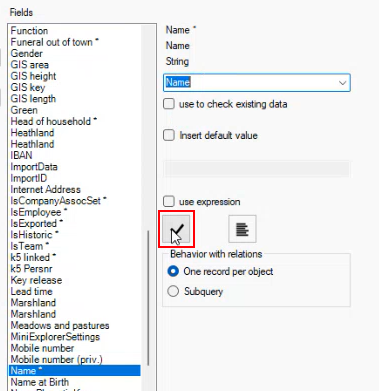
Set Field Mapping Icon
The mapped field should appear in green text in the list after you set the mapping.
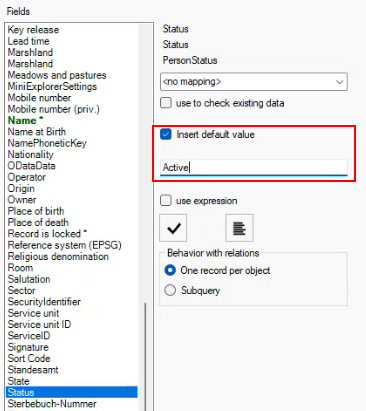
Default Value
You can assign a default value to the selected field for each object you import into VertiGIS FM. To do this, select the Insert Default Value check box and type the value you want to assign each object in the text box. In the example below, each contact being imported will have a Status of Active.
EasyConnect Status
After you type the default value, click the ![]() icon to set the default value for the selected field.
icon to set the default value for the selected field.
Expressions
For SQL imports, you can add expressions to an import if you want to incorporate other values, operators, and functions. You can open an expression editor by selecting a field from the list, selecting the Use Expression check box, and then clicking the ![]() icon.
icon.
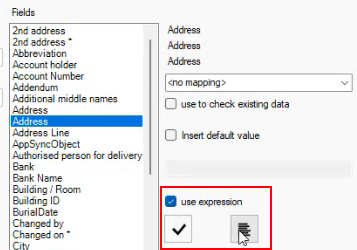
Use Expression Buttons
In the expression editor, you can select fields from the database and enter string operations. Click the ![]() again to select expression templates.
again to select expression templates.
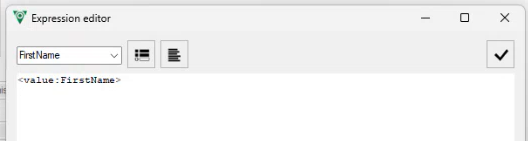
Expression Editor
You can also open expression editors by clicking the Expression before import and Expression after import icons on the Field Mapping tab. In these expression editors, you can enter scripts that update the data before or after you import it.
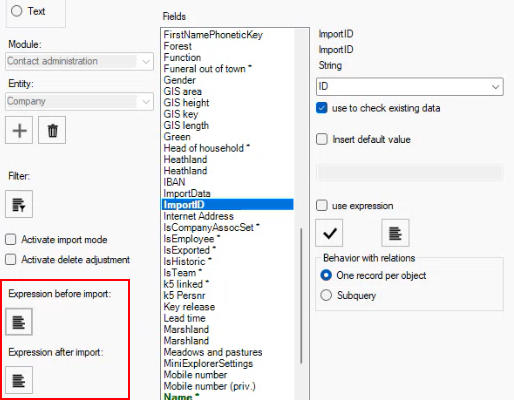
Before and After Expression Editors
These expressions can be used to track which data sets in VertiGIS FM were imported. For example, if a user deleted a data set from the third-party database, an expression could delete it from VertiGIS FM during the next import.
Use of the expression editors is intended for software developers or professional services users only.
If you want to execute a simple deletion of data after an import based on changes to the third-party system database, you can also select the Activate delete adjustment check box. This feature works for VertiGIS FM objects (or entities) whose properties do not have complex relationships within the VertiGIS FM database.
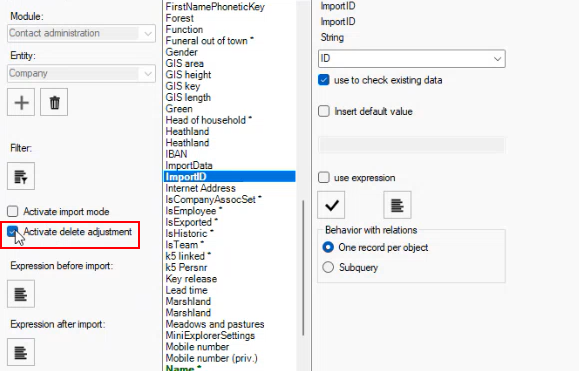
Activate Delete Adjustment
Import Mode
You can activate the import mode for an import to prevent background processes that would typically occur during an import. For example, if the data set you're importing includes data for thousands of buildings, and you've configured VertiGIS FM to send email updates each time a building is updated, the system might send users thousands of emails. You can select the Activate Import Mode check box to prevent this from happening.
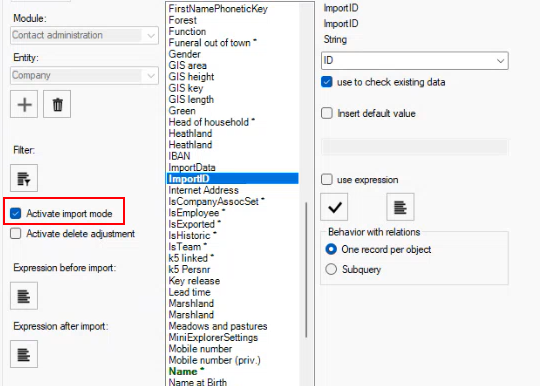
Activate Import Mode Check Box
Import Identifiers
It's recommended you configure an import identifier in your field mapping so that EasyConnect can tell whether a data set has already been imported. If the field designated as the identifier has already been imported, the data only requires updating.
To configure an identifier, ensure your query or CSV file has an ID field.
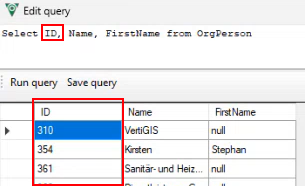
ID Field in SQL Query
On the Field Mapping tab, you can then select the ImportID field that is associated with all objects in VertiGIS FM. From the data mapping drop-down menu, select the ID field you included, and then select the Use to check existing data check box.

ImportID Field
When the import is run, EasyConnect will determine whether a data set with the ImportID already exists. If it does, EasyConnect updates the data. If it does not, EasyConnect creates the data set.
Execute
When the import is configured as desired, you can navigate to the Execute tab and run it.