Use Loop In to connect a lighting cable to nearby streetlight devices or lighting points along the cable’s route. The tool reduces manual work by automatically identifying nearby lighting points using the selected cable geometry and your search settings, then creating loop connections when you submit.
Workflow: Loop In Lighting Points for a Lighting Cable
Requirements
To use Loop In successfully, the following must be true:
•The lighting cable and lighting points already exist in the active version you are editing.
•Loop-in is configured via Designer to use the correct line layer/type and point layer/type so the selection and identification behave as expected.
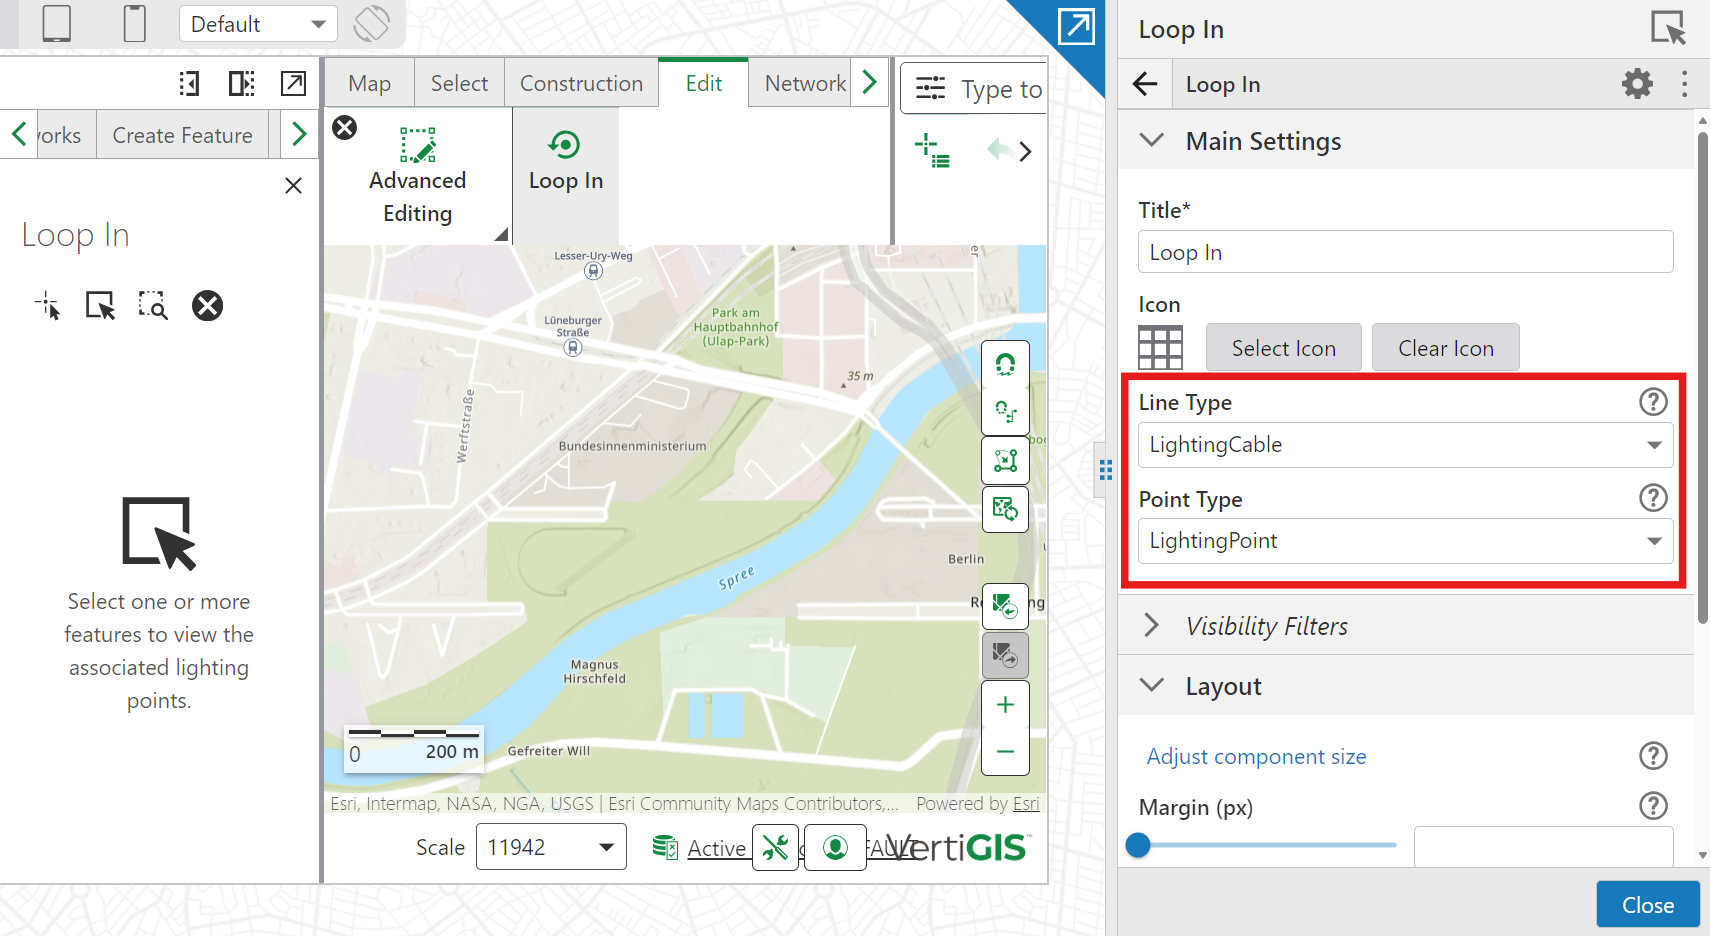
Only points of the configured feature type are eligible for identification and selection.
To loop in features:
1.Go to Edit > Advanced Editing > Loop In.
The loop in panel opens.
2.Select the features you want to edit.
3.After a line type is identified:
oThe tool searches for nearby lighting points (based on Gap and Buffer settings).
oReview the results in Identified Lightings.
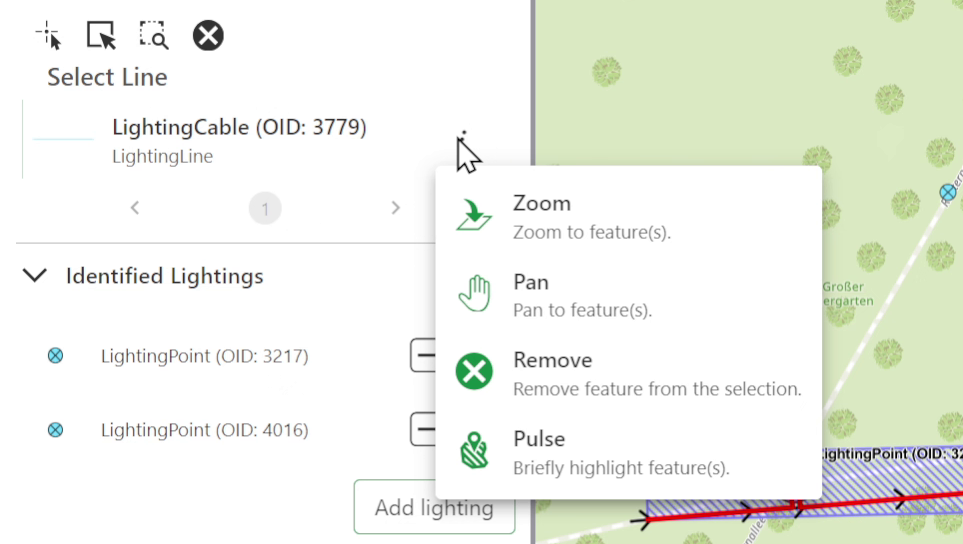
4.Refine the list as needed using one or more of the following actions:
oTo locate a light, open the item’s context menu and select Zoom, Pan, or Pulse.
oTo remove a light, click the minus (-) icon next to the point.
oTo add a light manually, select Add lighting, then highlight an area from which to identify the lighting points.
5.Adjust the following settings if required:
oBuffer: the radius around the cable used to detect nearby lighting points. (Default 10 meters)
oGap: the interval along the cable at which the search is applied. (Default 1 meter)
6.Click Preview to inspect the expected loop geometry before saving changes.
If the preview is not correct, you can adjust Gap and Buffer, remove or add points, or use manual loop-in for specific points for which you need explicit control of the connection path.
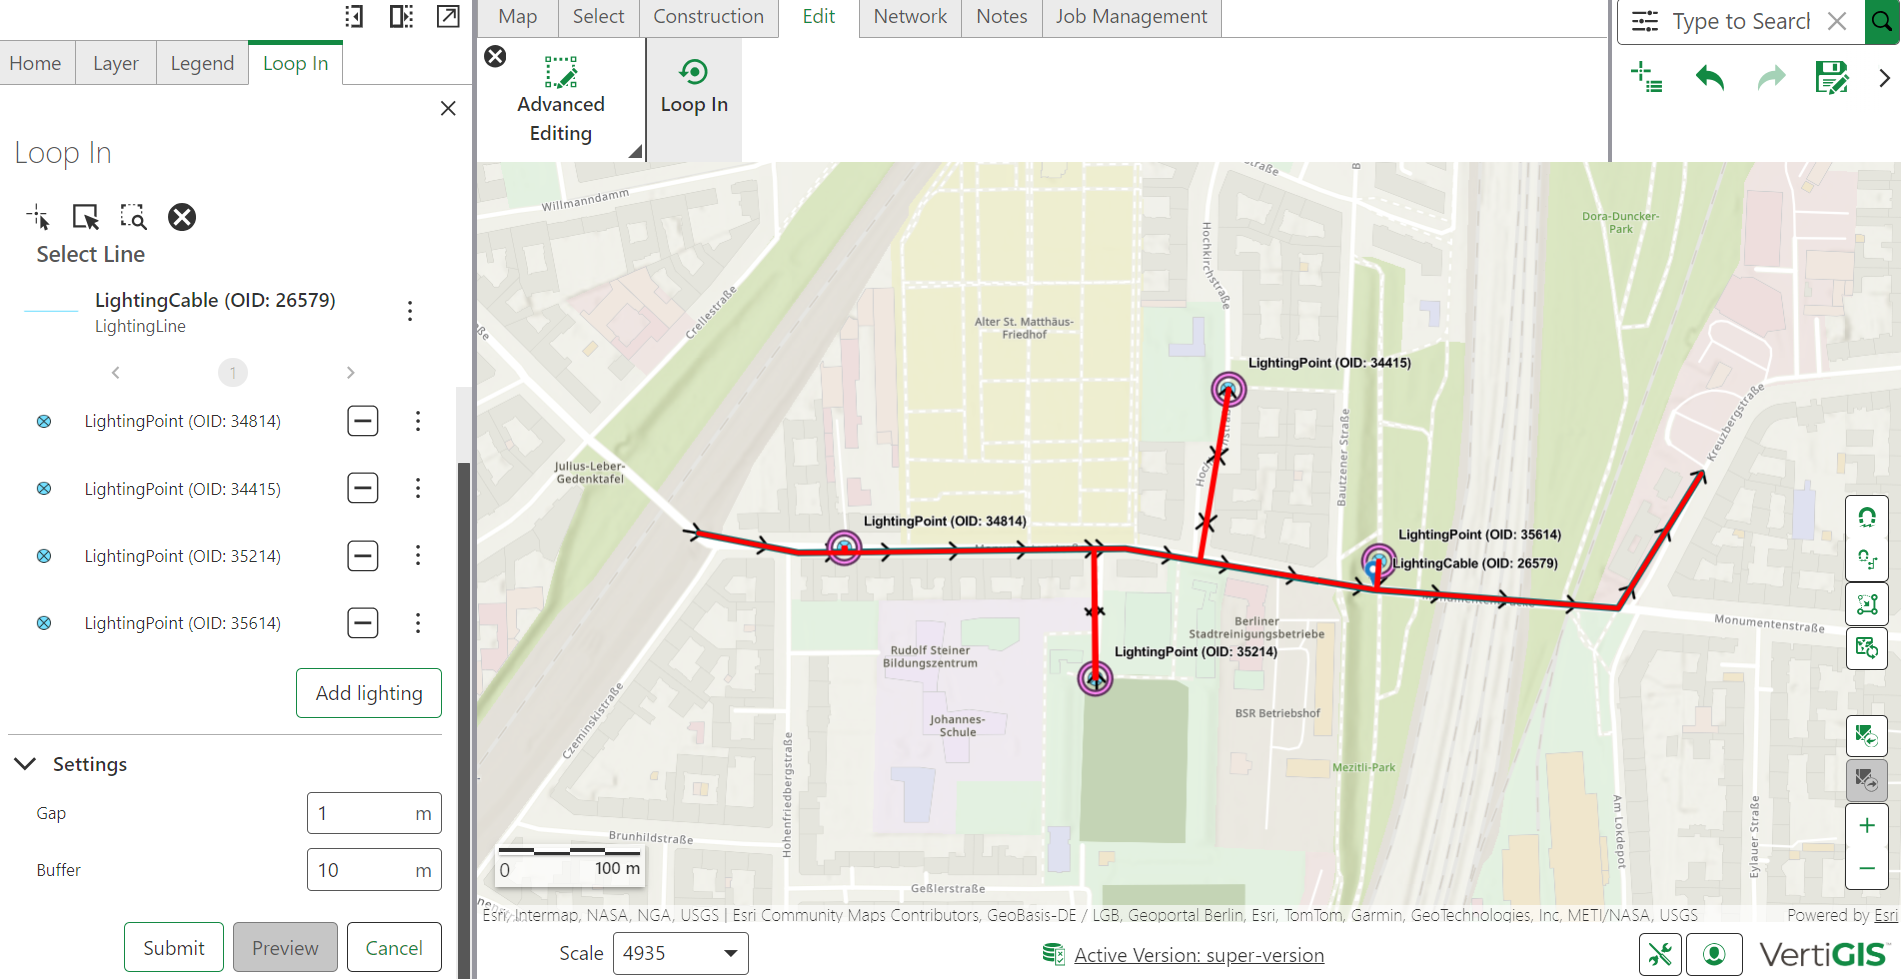
7.Click Submit to create the cable loops.
You can change the measurement system in user settings.
Manually loop in a point
Manual loop-in is used when the automatic connection geometry is not suitable for a specific point feature.
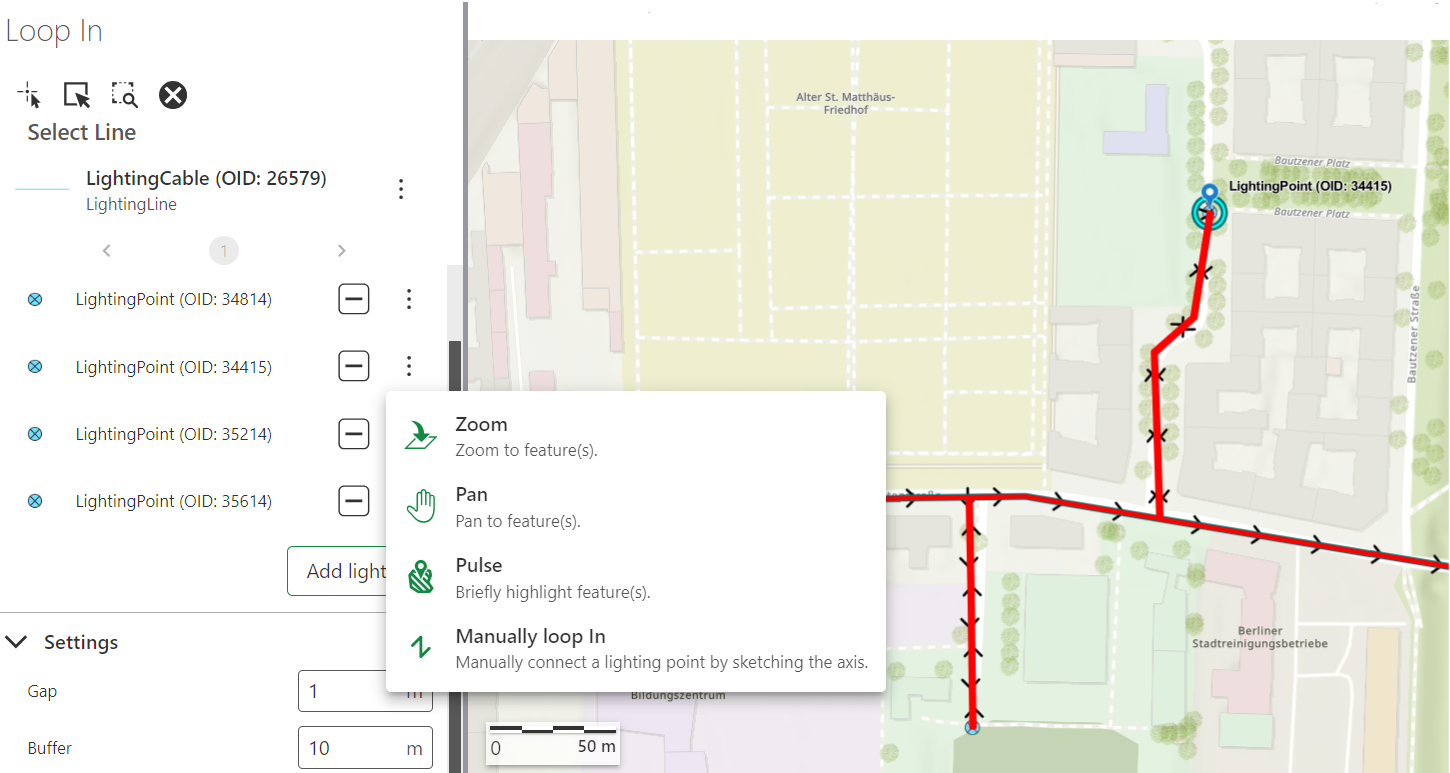
You can manually loop in a point by opening a point’s context menu in Identified Lightings. Then:
1.Choose Manually loop in for the point.
2.Manually sketch an axis that connects the point feature to the cable feature.
If a light already has a loop connection, manual loop-in removes the old extension geometry and replaces it with the newly sketched connection.
What gets created
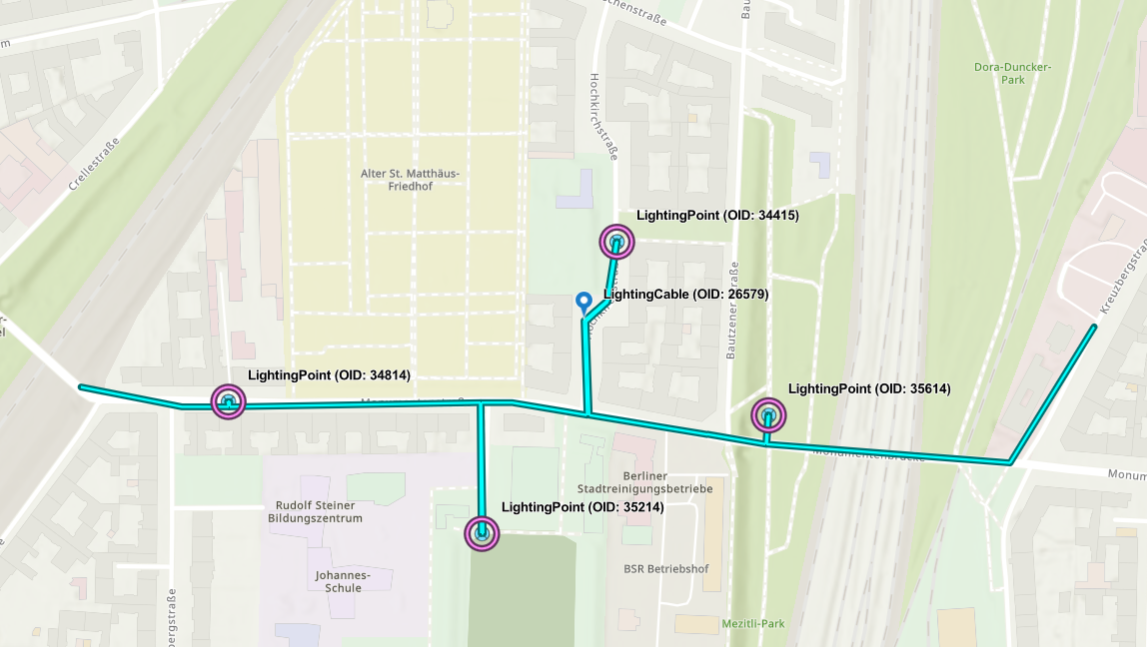
On Submit, the tool creates a new connection line (the "loop") from the cable to each identified lighting point.
•By default, that connection is a straight, perpendicular line from the light to the cable.
•If required and allowed by Utility Network split rules, the cable is split at the exact point where the connection touches it.
•If you used Manually loop in for any light, that connection will follow the custom path you sketched instead of the automatic perpendicular line.