A Simple Mail Transfer Protocol (SMTP) server can be connected to VertiGIS FM for transmitting notifications by email.
You can configure your SMTP server on the Administration > Interfaces > Groupware page. To add your server, click the Add () icon in the Server section.
Groupware Administration Page
Enter your server's details in the form that opens. The server you configure here is the sender of the notifications. You will need to obtain the server's SMTP settings from your email provider.
Server Details
Server Details
Field |
Description |
---|---|
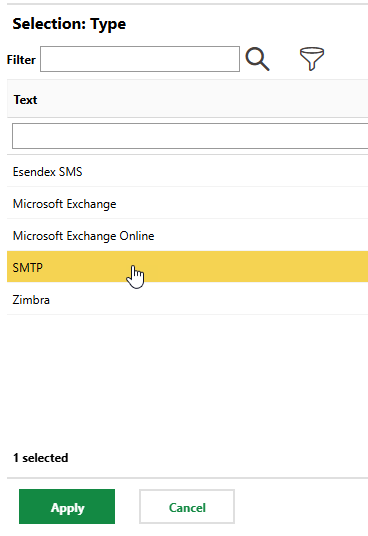
Type |
The type of server. Select SMTP. |
E-mail address |
The email address of the person who will be identified as the sender. |
Test e-mail to |
|
Username |
The user name of the sender of emails sent through the server. |
Password |
The user's password. |
Confirm Password |
The user's password re-entered. |
Domain |
Your company's accepted domain in the server. |
SMTP Server |
|
SSL |
|
Port |
|
Permitted email domains |
The domains to which email or appointment messages are restricted. For example, if the event notified users when a work order is assigned to them, and you assigned the work order to an external contractor whose email address is not in a domain specified in this section, they would not receive an email. You can click the Add () icon to add permitted domains, or click the Delete () icon next to a previously saved domain to remove it. |
Click Save and Close when you've completed the form. You can then configure the events that will trigger the notifications.
Events describe the conditions under which the server will generate email or appointment notifications. In the Events section on the Groupware administration page, you specify the changes users can make in VertiGIS FM that will trigger emails or appointments.
Exchange Server
When you create an event, you specify the criteria based on which you want users to receive emails or appointments from the server. Some questions you'll need to specify in the event include
•should users receive an email or an appointment message in their inbox?
•should users receive messages based on changes to an object or asset managed in VertiGIS FM, or should they receive an email with a query at a regular interval?
•which users do you want to receive the email or appointment?
•which data from VertiGIS FM do you want to appear in the message subject or body?
The procedure below covers how to address these questions when you create the event.
To Create an Event
1.Navigate to the Groupware administration page (Administration > Interfaces > Groupware).
2.In the Events section, click the Add () icon.
3.In the form that displays, fill out the Name, Active, and Server fields. Refer to Event Details for more information.
4.After you select a server, you can fill the Type, Product, and Object or Interval fields. If you select the Interval check box, you will specify the interval at which you want to send emails with a query and will therefore not select an object. Refer to Event Details for more information.
The Type, Product, Interval, and Object fields cannot be edited after you save the event.
5.Click Save and Close.
Clicking Save and Close creates the event and returns you to the Groupware administration page. Additional fields associated with the event are now available when you edit the event.
6.In the Events section on the Groupware administration page, select the event you just created and click the Edit () icon.
7.Use the Add, Edit, Delete, and Change in Value fields to specify the action(s) that you want to generate the notification for this event. For example, if you want the system to generate a notification when a value is edited or updated in one of the details for the object you selected in the Objects field, select the Change in Value check box. Then click the Add () icon under Change in Value and select the value whose change you want to trigger the event. If you wanted to send an email or appointment whenever an instance of the specified object (e.g., a device order) is added to the system, select the Add () check box and then specify the object.
8.Enter the Subject and Text you want to be included in the message generated by the event. If you selected Email in the Type field, and E-mail heading and HTML Email check box are also shown.
9.Under Recipient, click the Add () icon and type the email address of the person you want to receive the email or appointment.
10.In the Parameter section, you can create variables that display a value from the object or asset whose change will generate the email or appointment in the message Subject or Text. Refer to Event Details for more information. After you create the parameter, you can type the Parameter name where you want the variable to appear in the Subject or Text text boxes.
11.Click Save and Close.
Field |
Description |
Example |
---|---|---|
Name |
A descriptive name for the event |
Update order Sensor deviation Sensor failure |
Active |
A check box that, if selected, means the event will be active when you save the event form. |
Yes No |
Server |
The server that will send the emails or appointments generated by the event. You can select any servers that have been added to the Server section of the Groupware administration page. |
Microsoft Exchange SMTP Esendex SMS |
Type |
Whether the event should generate email or appointment notifications. If you select Email, the form displays an optional Interval field. |
Appointment SMS |
Product |
The VertiGIS FM product in which the object whose changes will generate the email or appointment is managed. The product selected here determines which objects you can select from the Objects menu. |
VertiGIS FM Maintenance VertiGIS FM Buildings VertiGIS FM Contracts |
Interval |
The interval at which you want an email to be set in terms of days, weeks, months, or years. Use the Interval field when you want recipients to receive an email with a query on a regular basis instead of when changes to an object or asset occur. You can only specify an interval if you select Email from the Type menu. When you select the Interval check box, the Object menu disappears from the form, and you are required to select a query to be sent with the email. Refer to Report and Query Administration for more information. |
Every 2 days Every 3 months Every 1 year |
Query |
The query you want to be sent with an email on a recurring basis. Query emails are an alternative to emails generated based on changes made to an object's data. This field is only visible when you select Email from the Type menu and select the Interval check box. You must select a query associated with the product selected in the Product field. |
Open tickets Device list Device orders |
Object |
The object or asset that will generate the email or appointment when edited or updated. |
Device order (VertiGIS FM Maintenance) Room (VertiGIS FM Buildings) Contract (VertiGIS FM Contracts) |
Report |
A report associated with the object or asset selected in the Object menu that is attached to the email or appointment. |
|
Add, Edit, Delete |
Check boxes that, when selected, will cause an email or appointment to be generated when the object or asset specified in the Object field is added, edited, or deleted, respectively. |
Yes No |
Change in Value (check box) |
A check box that, when selected, means you want an email or appointment to be generated when the |
Yes No |
Change in Value (list) |
When the Change in Value check box is selected, this field contains the field associated with the object or asset specified in the Object field that, when changed, will generate the email or appointment. |
State (Status) Person responsible (RespPersonTable) |
Subject |
For email notifications, the subject line of the email or appointment that will be sent to the recipients. |
The status of the following order was changed |
Text |
The text for the message delivered in the notification, for emails, appointments, or SMS messages. You can include variables defined in the Parameters field if you want the message to include data from the VertiGIS FM database. |
ID: Order ID An order that has been assigned to you in VertiGIS FM has had its status changed by another user. |
Recipient |
The people you want to receive the notification. For emails and appointments, in the drop-down menu to the right of the text box, you can indicate whether you want the recipient to receive the item as a main recipient, or whether you want them to receive a carbon copy (cc). If you're configuring an SMS service, you can enter the recipients' phone numbers. |
12505555555 |
Parameters |
Variables that can be typed in the notification's Subject or Text fields to populate them with data from a field associated with the object selected in the Object field. •Parameter name: a name for the parameter. This is what you'll type in the Subject or Text where you want the data to appear. •Parameter value: the data field whose value you want to appear in the message. You can select any field associated with the object or asset selected in the Object field. •Parameter content: Whether you want the original value or updated value to appear in the email or appointment message. |
•Parameter name: OrderID •Parameter value: Number (OrderID) •Parameter content: After change |
Documents |
Documents you want to attach to the email or appointment message. |
|
Filter |
Filter expressions that can restrict the event's triggering to specified values in data fields. You can click the Add () icon to add an expression. |
|
User your own filter expression ("Eigenen Filterausdruck verwenden")
|
An alternative to filter expressions. A developer can provide a script that filters notifications for the event that you can enter in the text box that opens when you select the check box. |
Yes No |
Update expression active |
A check box that, when selected, opens a text box in which you can enter a script that updates objects in VertiGIS FM when the event is triggered. |
Yes No |
You can generate logs of when emails or appointments were sent for each event created for the server.
To Generate Logs for an Event
1.In the Events section on the Groupware administration page (Administration > Interfaces > Groupware), select the event for which you want to generate a log of when messages were sent.
2.Click the Protocol () icon.
3.In the Protocol section on the page that opens, click the Update () icon.
The updated log is shown in the Protocol section.