Installing structures are created by adding component types to the Extended Installing Structure or Installing Structure section of the device's type details page. A type can have an extended installing structure or a simple installing structure, but not both. When you create an installing structure for a type, the structure is automatically inherited by all existing devices in the type and by any devices you add to the type. You can then install objects from the component inventory in these devices.
The steps for managing installing structures vary depending on whether you are creating an extended or simple installing structure and, in the former's case, the type of part you are adding to the structure.
The Extended Installing Structure value for a type cannot be selected or deselected after parts have been saved in the Extended Installing Structure or Simple Installing Structure section on the type details page. To change a type's installing structure from extended to simple (or vice-versa), you must first remove all components from the existing installing structure.
Add Component Types to an Extended Installing Structure
You can create an extended installing structure on the type details page in the Device and Systems Structure. Installing structures are created by repeating the procedure below until the installing structure contains all the required component types.
To Add a Component to an Extended Installing Structure
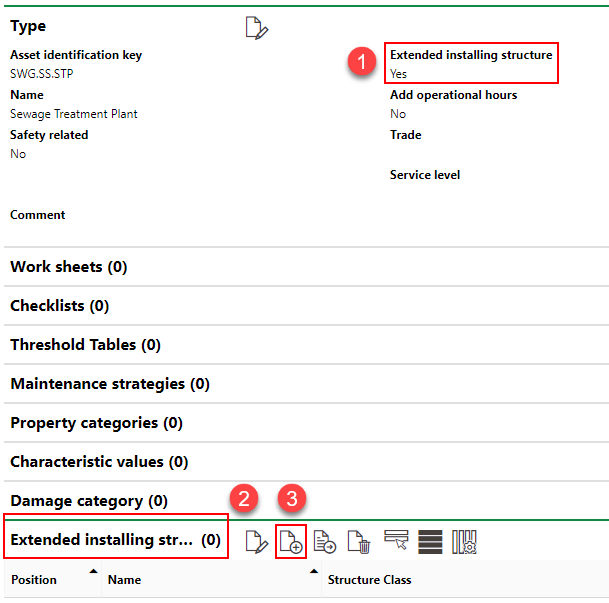
1.On the type details page, ensure the Extended Installing Structure property is set to Yes. If it's not, edit it.
2.Click the Extended Installing Structure section to expand it.
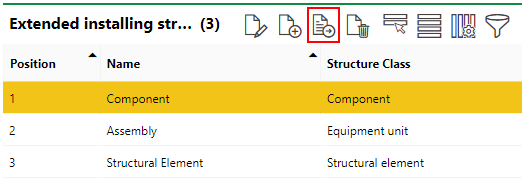
3.Click the Add (![]() ) icon.
) icon.
4.Enter a number in the Install Position text box. The lowest positive integer available in the installing structure can be used.
5.Enter a name for the part in the Name text box for the appropriate language(s). A name for at least one language must be entered.
6.Click the arrow (![]() ) in the Structure Class box.
) in the Structure Class box.
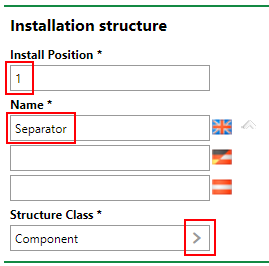
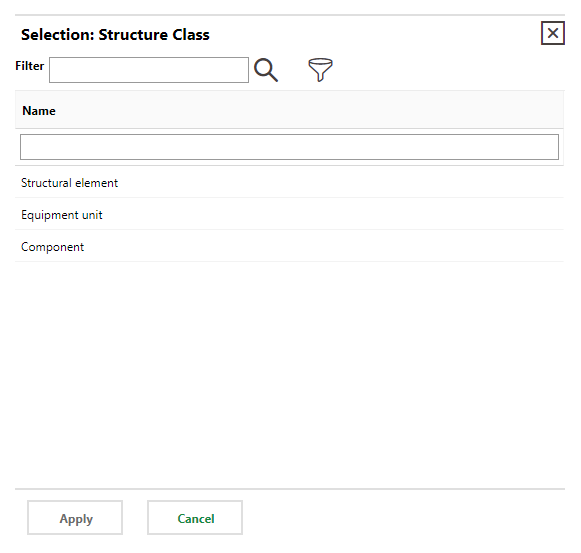
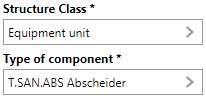
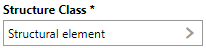
7.Select Structural Element, Equipment Unit, or Component based on the structure class for the part, and then click Apply.
8.Complete the form based on the Structure Class selected in the previous step.
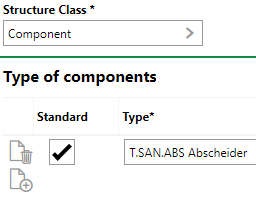
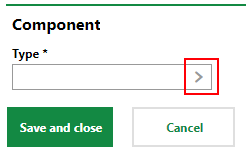
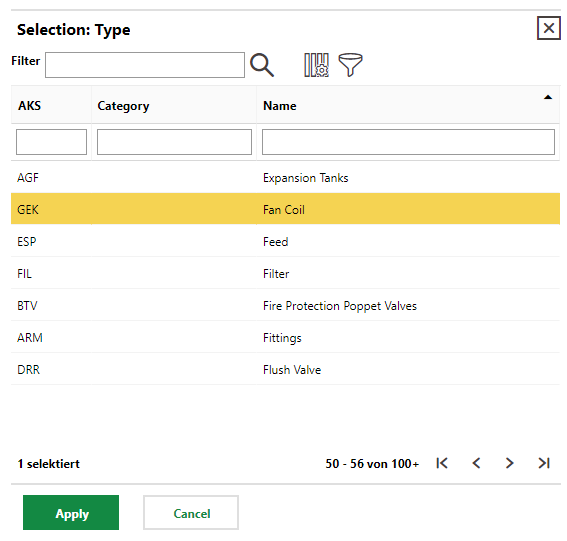
▪For a Component, click the ![]() icon under Type of components and select a component type. The dialog that opens lists all component types in the Device and Systems Structure and Component Structure alphabetically by their identification key.
icon under Type of components and select a component type. The dialog that opens lists all component types in the Device and Systems Structure and Component Structure alphabetically by their identification key.
▪For an Equipment Unit, click the arrow (![]() ) in the Type of component box and select a component type.
) in the Type of component box and select a component type.
▪For a Structural Element, simply proceed to the next step. This part type is informational only and does not need to be associated with a component entry in the system.
9.Click Save and Close.
Add a Sub-Element to an Extended Installation Structure
You can add a component type to an extended installing structure as a sub-element. A sub-element can be added to the structure on the device's type details page after its parent part has been added.
1.On the type details page, ensure the Extended Installing Structure property is set to Yes. If it's not, edit it.
2.Click the Extended Installing Structure section to expand it.
3.In the Extended Installing Structure table, select the row for the part or element to which you want to add a sub-element.
4.Click the Add Sub-item (![]() ) icon.
) icon.
5.In the Installation Structure form, enter a number in the Install Position text box. The number should be the number associated with the parent element. If the Install Position is 1, and the sub-element is the first sub-element to be added to the part, the sub-element will automatically inherit a position of 1.1.
6.Enter a name for the part in the Name text box for the appropriate language(s). A name for at least one language must be entered.
7.Click the arrow (![]() ) in the Structure Class box.
) in the Structure Class box.
8.Select Structural Element, Equipment Unit, or Component based on the structure class for the part, and then click Apply.
9.Complete the form based on the Structure Class selected in step 7.
▪For a Component, click the ![]() icon under Type of components and select a component type.
icon under Type of components and select a component type.
▪For an Equipment Unit, click the arrow (![]() ) in the Type of component box and select a component type.
) in the Type of component box and select a component type.
▪For a Structural Element, simply proceed to the next step. This part type is informational only and does not need to be associated with a component entry in the system.
10.Click Save and close.
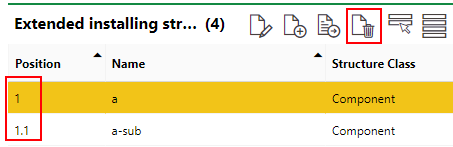
The Extended Installing Structure now includes a sub-element. The decimal point in the Position column indicates that it is the sub-element of the parent element with the same whole number.
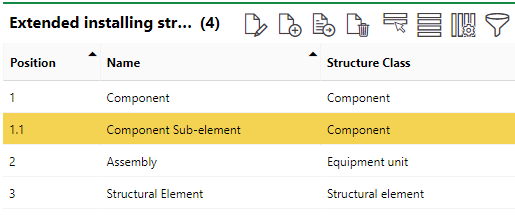
Sub-element Added to Extended Installing Structure
Add a Component Type to a Simple Installation Structure
Like with an extended installing structure, you can add component types to a simple installing structure on the type details page for the device.
To Add a Component Type to a Simple Installing Structure
1.On the type details page, ensure the Extended Installing Structure property is set to No. If it's not, edit it.
2.Click the Installation Structure section to expand it.
3.Click the Add (![]() ) icon.
) icon.

4.In the Component form, click the arrow (![]() ) in the Type box.
) in the Type box.
5.Select a Component Type from the catalog and click Apply.
6.Click Save and close.
The new component is now included in the simple installing structure.
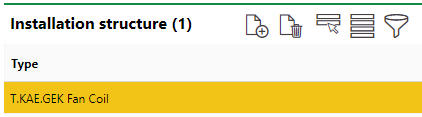
Component Added to Simple Installing Structure
Remove a Component Type from an Installing Structure
To remove a component from an extended installing structure or a simple installing structure, select the component you want to remove from the structure on the verison details page and click the Delete (![]() ) icon.
) icon.
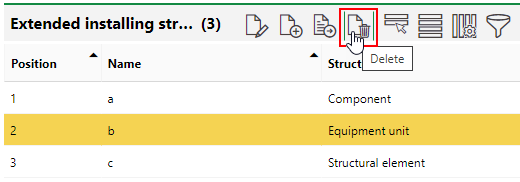
Remove Component from Installing Structure on Type Details Page
If you are removing a hierarchical elements from an Extended Installing Structure, you must remove the child element first.
Parent-Child Relationship for Components in an Installing Structure
You cannot delete a component that has a sub-item attached before removing the sub-item.