A collective order is a work order or subcontraction that is associated with multiple orders. The orders associated with the collective order do not themselves have to be associated with the same device or object. This reduces the amount of data input required from a user when they complete a work item that is a requirement for multiple orders.
Create a Collective Order
Collective orders can be created when you're viewing all orders on the search page.
To Create a Collective Order
1.Navigate to the VertiGIS FM Maintenance search page.
2.Under Objects, click Orders.
3.Select the orders under which you want to add a collective order. Using the Windows operating systems, you can select multiple rows in the table by holding the ctrl key and clicking.
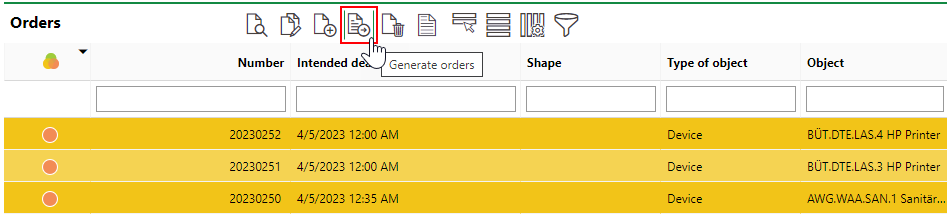
4.Click the Generate Orders (![]() ) icon.
) icon.
5.Click the arrow in the Executing Person box, select a person or company in the Selection: Executing person dialog, and click Apply.
6.In the Target Date field, specify the date and time by which the collective work order or subcontraction should be completed.
7.In the Planned time [h] text box, enter the number of hours the collective work order or subcontraction is expected to take to complete.
If you select an external company or contact as the executing person, a collective subcontraction is created. If you select a person inside your organization as the executing person, a collective work order is created.
8.Select the check boxes on the right side of the form, as required.
▪Add collective orders: creates a single collective work order or subcontraction for all selected orders.
▪Collective order per object: creates a collective work order or subcontraction for each object associated with the selected orders. For example, if you selected three orders for two devices (two for the first device and one for the second device), two separate collective orders would be created.
▪Include existing jobs from selected orders: includes existing work orders or subcontractions associated with the selected orders that have the same target date and executing person.
The form only displays the Include Existing Jobs from Selected Orders check box when the Add Collective Orders check box is selected.
9.Click Apply to All.
When you click Apply To All, a collective work order is added to the orders for the orders shown in the Orders section on the form to create a collective work item. If you selected the Collective Order Per Object check box, one collective order for each order for a different device will be created. In the example below, two collective orders will be created because three orders for two different devices were selected.

Object Associations for Orders Selected for a Collective Order
View Collective Orders
When you navigate to the order details page for the order associated with the work order or subcontraction, the work order or subcontraction will be shown in the Work Orders or Subcontractions section, respectively.
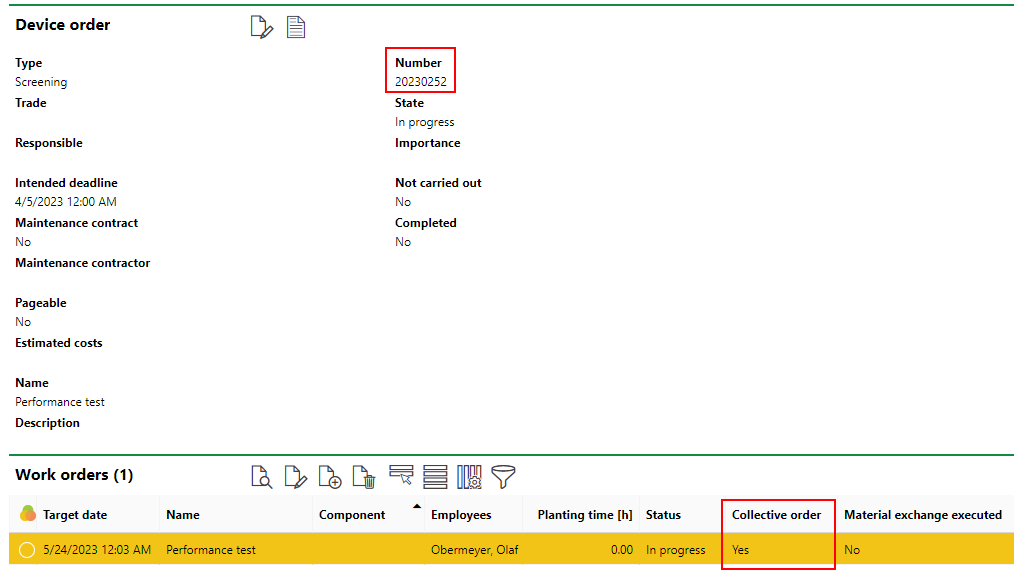
Collective Order Shown on the Order Details Page
Change the Status of a Collective Order
A collective work order or subcontraction can be marked as complete on the order details page for any of the orders it is associated with. The action only needs to be done once.
To Change the Status of a Collective Order
1.Navigate to the order details page for one of the orders associated with the collective order.
2.In the Work Orders section, select the collective order and click the Edit (![]() ) icon.
) icon.
3.From the Status drop-down menu, select Finished (or the appropriate status).
4.Click Save and Close.
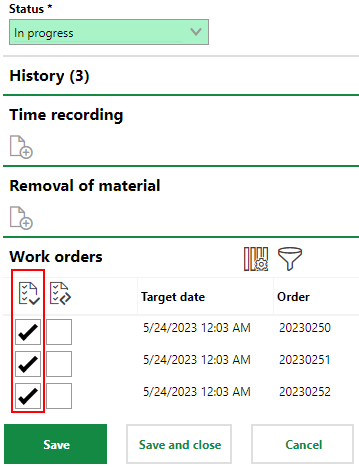
The status of the work orders for all items in the Work Orders section will be changed to Finished, even if you do not select any check boxes.

Work Orders Section on Edit Collective Order Form
However, when you edit the status of a collective order item from Finished to another status, you must deselect the leftmost check boxes. The work orders will retain a status of Finished as long as the check boxes are selected.
Finished Work Orders on Edit Collective Order Form