The georeferencing function allows you to align raster images (e.g., scanned maps or drawings) with real world coordinates on the map. This tool is especially useful for overlaying external visuals onto your map for analysis or comparison.
To add a raster dataset:
1.Go to Construction < Georeference.
A pop-up window appears allowing you to upload the image from your machine.
2.Click on Upload to upload your image, then click OK to confirm.
Your image is uploaded onto the map.
You can upload files in the formats JPG, JPEG, and PNG.
3.Adjust the transparency percentage of your image on the map by dragging the slider, or by manually inputting the percentage value.
4.Click Adjust roughly to place the uploaded raster image onto the desired location in the map. You can also adjust the aspect ratio, and the size of the uploaded image.
Refer to the keyboard shortcuts for more information on resizing the uploaded raster image.
5.Click on Add in the Control points section to adjust the position of the image. Next, click the location of the raster you want to georeference. Then, choose the corresponding location on the map.
The xy-coordinates of the pair of added points are shown in the panel.
6.Adjust the Control points if needed by clicking the Reposition button next to your added points, then re-choosing their locations on the map. You can also delete any unnecessary added points that decrease accuracy.
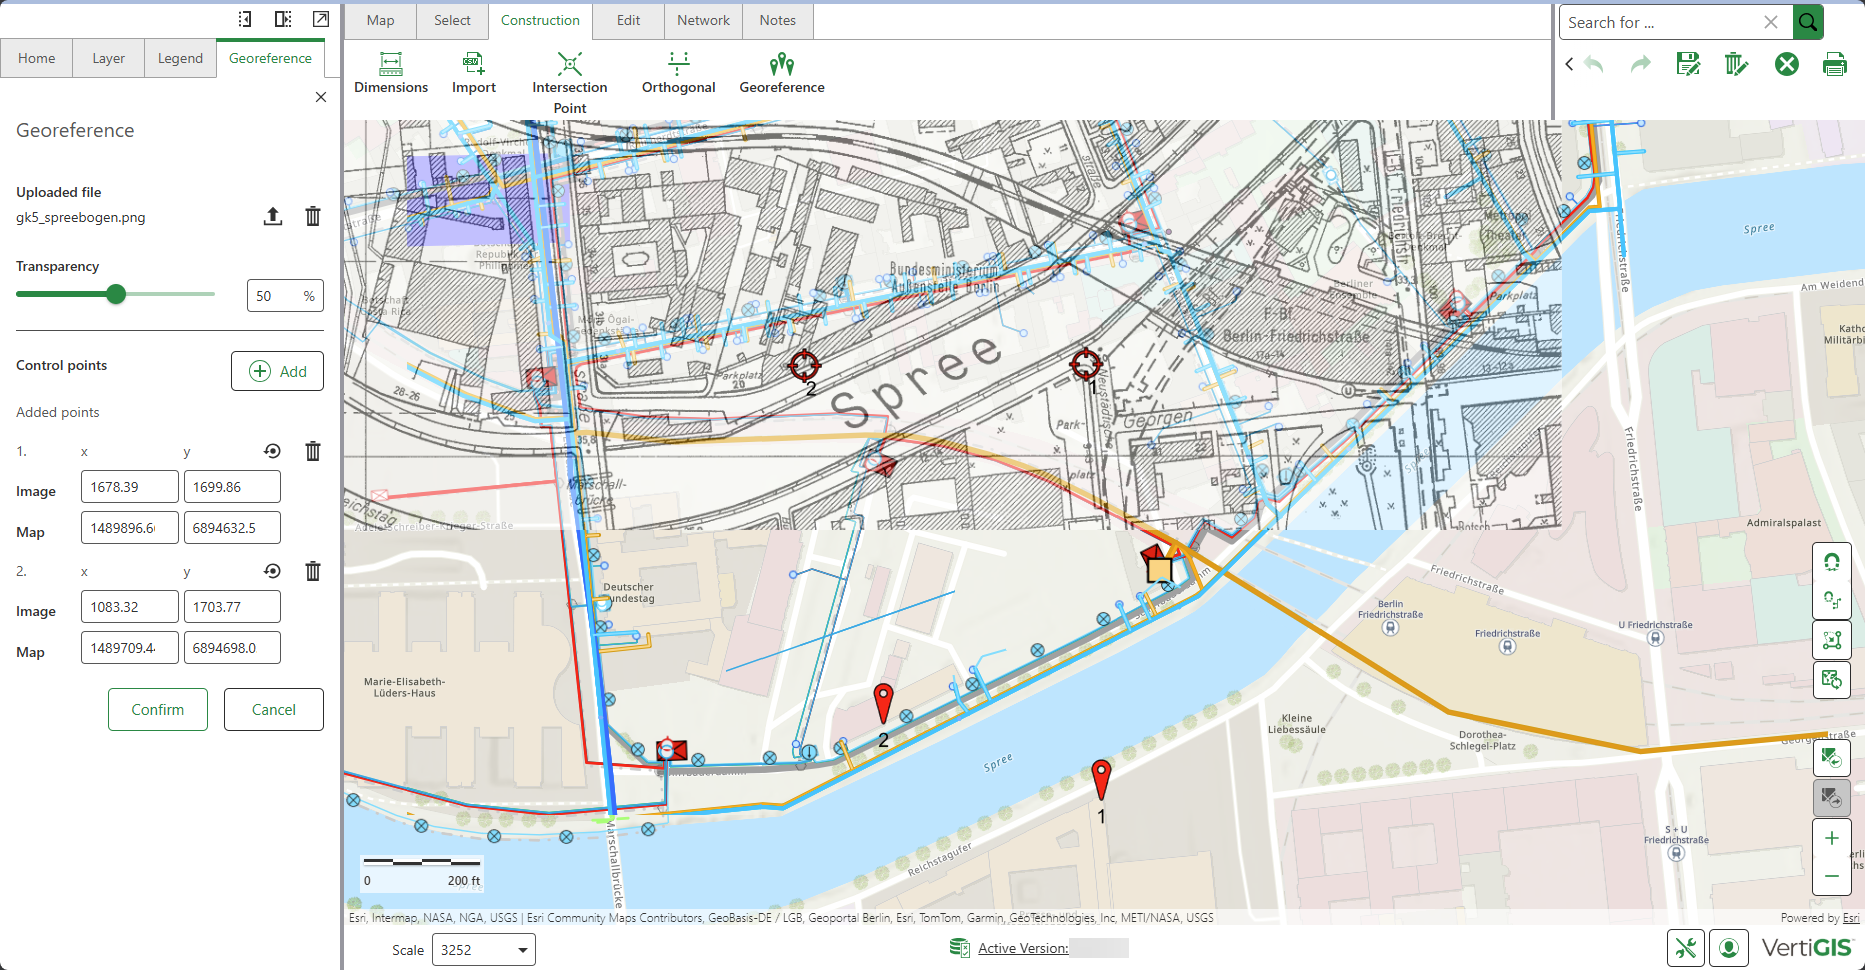
7.Click Confirm when you are done placing points.
Your raster image is now positioned accordingly on the map.
To ensure accurate placement of your image on the map, select a minimum of two pairs, and a maximum of four pairs of Control Points.
You can upload another image, or delete the current one using the control buttons of the Uploaded file section.
8.Optional: Under Control points panel, click Save Image to save your raster data for reuse.
Your saved raster image is now saved as a Media Layer in the portal, and is shown under the panel saved files.
Your saved raster data are marked with a personal user icon. Shared layers from other users are visible according to their sharing permissions under the panel saved files.
9.Optional: you can choose to remove any saved files by clicking Delete, or you can further customize/edit it in the portal by clicking on Open portal item.
Since Media Layers are an Esri item, you can open them in most Esri applications such as Map Viewer, and ArcGIS Pro for advanced raster adjustments and effects.
You can adjust the sharing level in the ArcGIS portal, by clicking on Open portal item, to control who can view your saved raster data. The sharing level is set to Owner (meaning private) by default.