This guide provides instructions for deploying the VertiGIS DXFExport backend API using Docker containers in an on-premises environment. The deployment process involves setting up Docker and PostgreSQL, then deploying the application as containers on either Ubuntu Linux or Windows systems.
Technology Stack
Category |
Tool |
Version |
|---|---|---|
OS |
Ubuntu |
22.04.2 |
Containerization |
Docker |
28.0.1 |
Database |
PostgreSQL |
17.4-1 |
SCM Client |
Git |
2.34.1 |
Prerequisites and Assumptions
•Operating System Requirements: Ubuntu 22.04.2 LTS
•User account with sudo privileges is required
•Software requirements
oDocker:
▪Must be installed on the server
▪Docker service must be enabled and running
oDatabase:
▪PostgreSQL should be installed and configured on the server
oNetwork configuration:
▪Server IP address should be static and ideally bound to the MAC address
▪Both server and network firewalls must allow inbound and outbound traffic on application ports:
•Port 5000
•Port 5001
Deployment Setup
Step 1: Download Deployment Script
Download the deployment script from the VertiGIS GitHub Repo:
Script Name: dxfexport_linux.sh
Step 2: Grant Executable Permissions
sudo chmod +x <filename>
Step 3: Prepare Required Information
Keep the following details ready before running the script:
•Database host
•Database user
•Database password
•Database name
•ACR (Azure Container Registry) user
•ACR password
•Application ports
Step 4: Execute Deployment Script
./<filename>
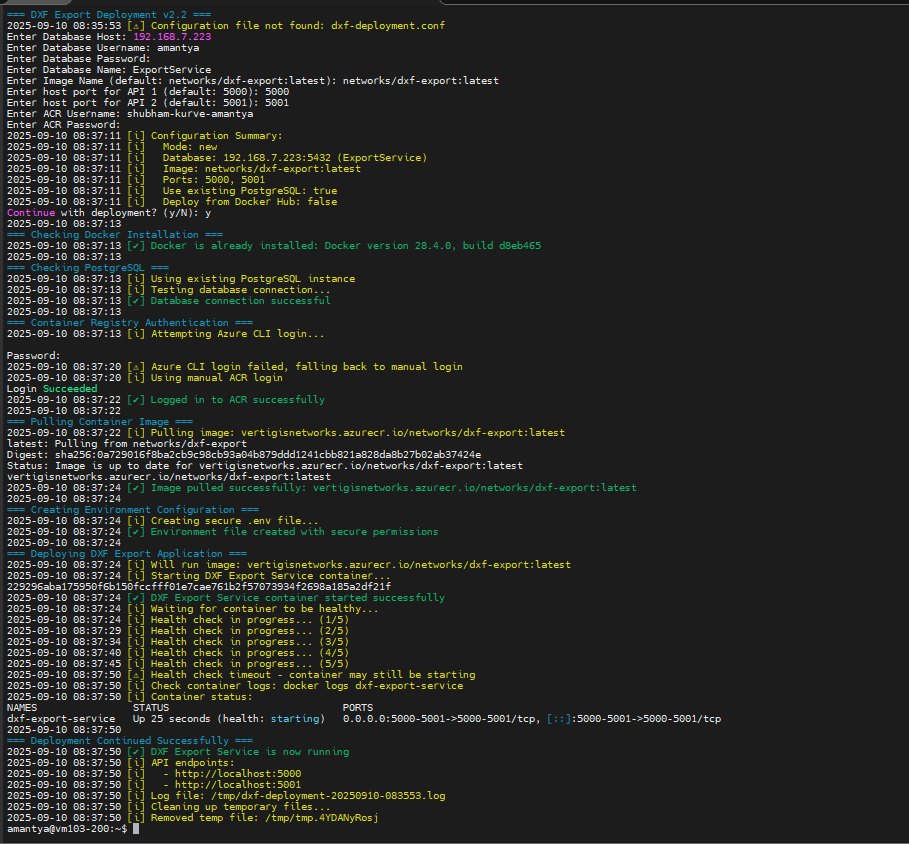
Success Indicators
The deployment is successful when:
•Container status shows as "Up" and healthy
•Health checks pass successfully
•Application endpoints are accessible on configured ports (5000 and 5001)
•No error messages appear in container logs
Refer to the screenshot below to verify the output: