Lightsail Containers is the simplified AWS container hosting: load balancing, HTTPS and networking are built in and require no configuration.
The DXF Export image is pushed to the container service from a local machine.
To create a container on Amazon Lightsail:
1.Open the Amazon Lightsail console
2.Create the container service
3.Push the DXF Export image from a local machine
4.Create the deployment
Prerequisites
•Docker installed on a local machine
•AWS CLI version 2 with the lightsailctl plugin installed
•The VertiGIS container registry username and password that you get from your VertiGIS vendor
Create the container service
Navigate to Lightsail, select Containers and click on Create container service.
Setting |
Description |
Minimum value |
|---|---|---|
Container service location |
Select the AWS Region via Change AWS Region. The container service is created in all Availability Zones of the selected Region. |
- |
Power |
Select memory and vCPUs per node. |
0.5 vCPUs, 1 GB RAM |
Scale |
Select the number of compute nodes. |
1 |
Start with 0.5 vCPU and 1 GiB of memory, which has been sufficient for typical deployments. If the service experiences sustained high CPU or memory utilization, increase the allocated resources accordingly. The optimal sizing depends on workload characteristics and should be determined through monitoring in your environment.
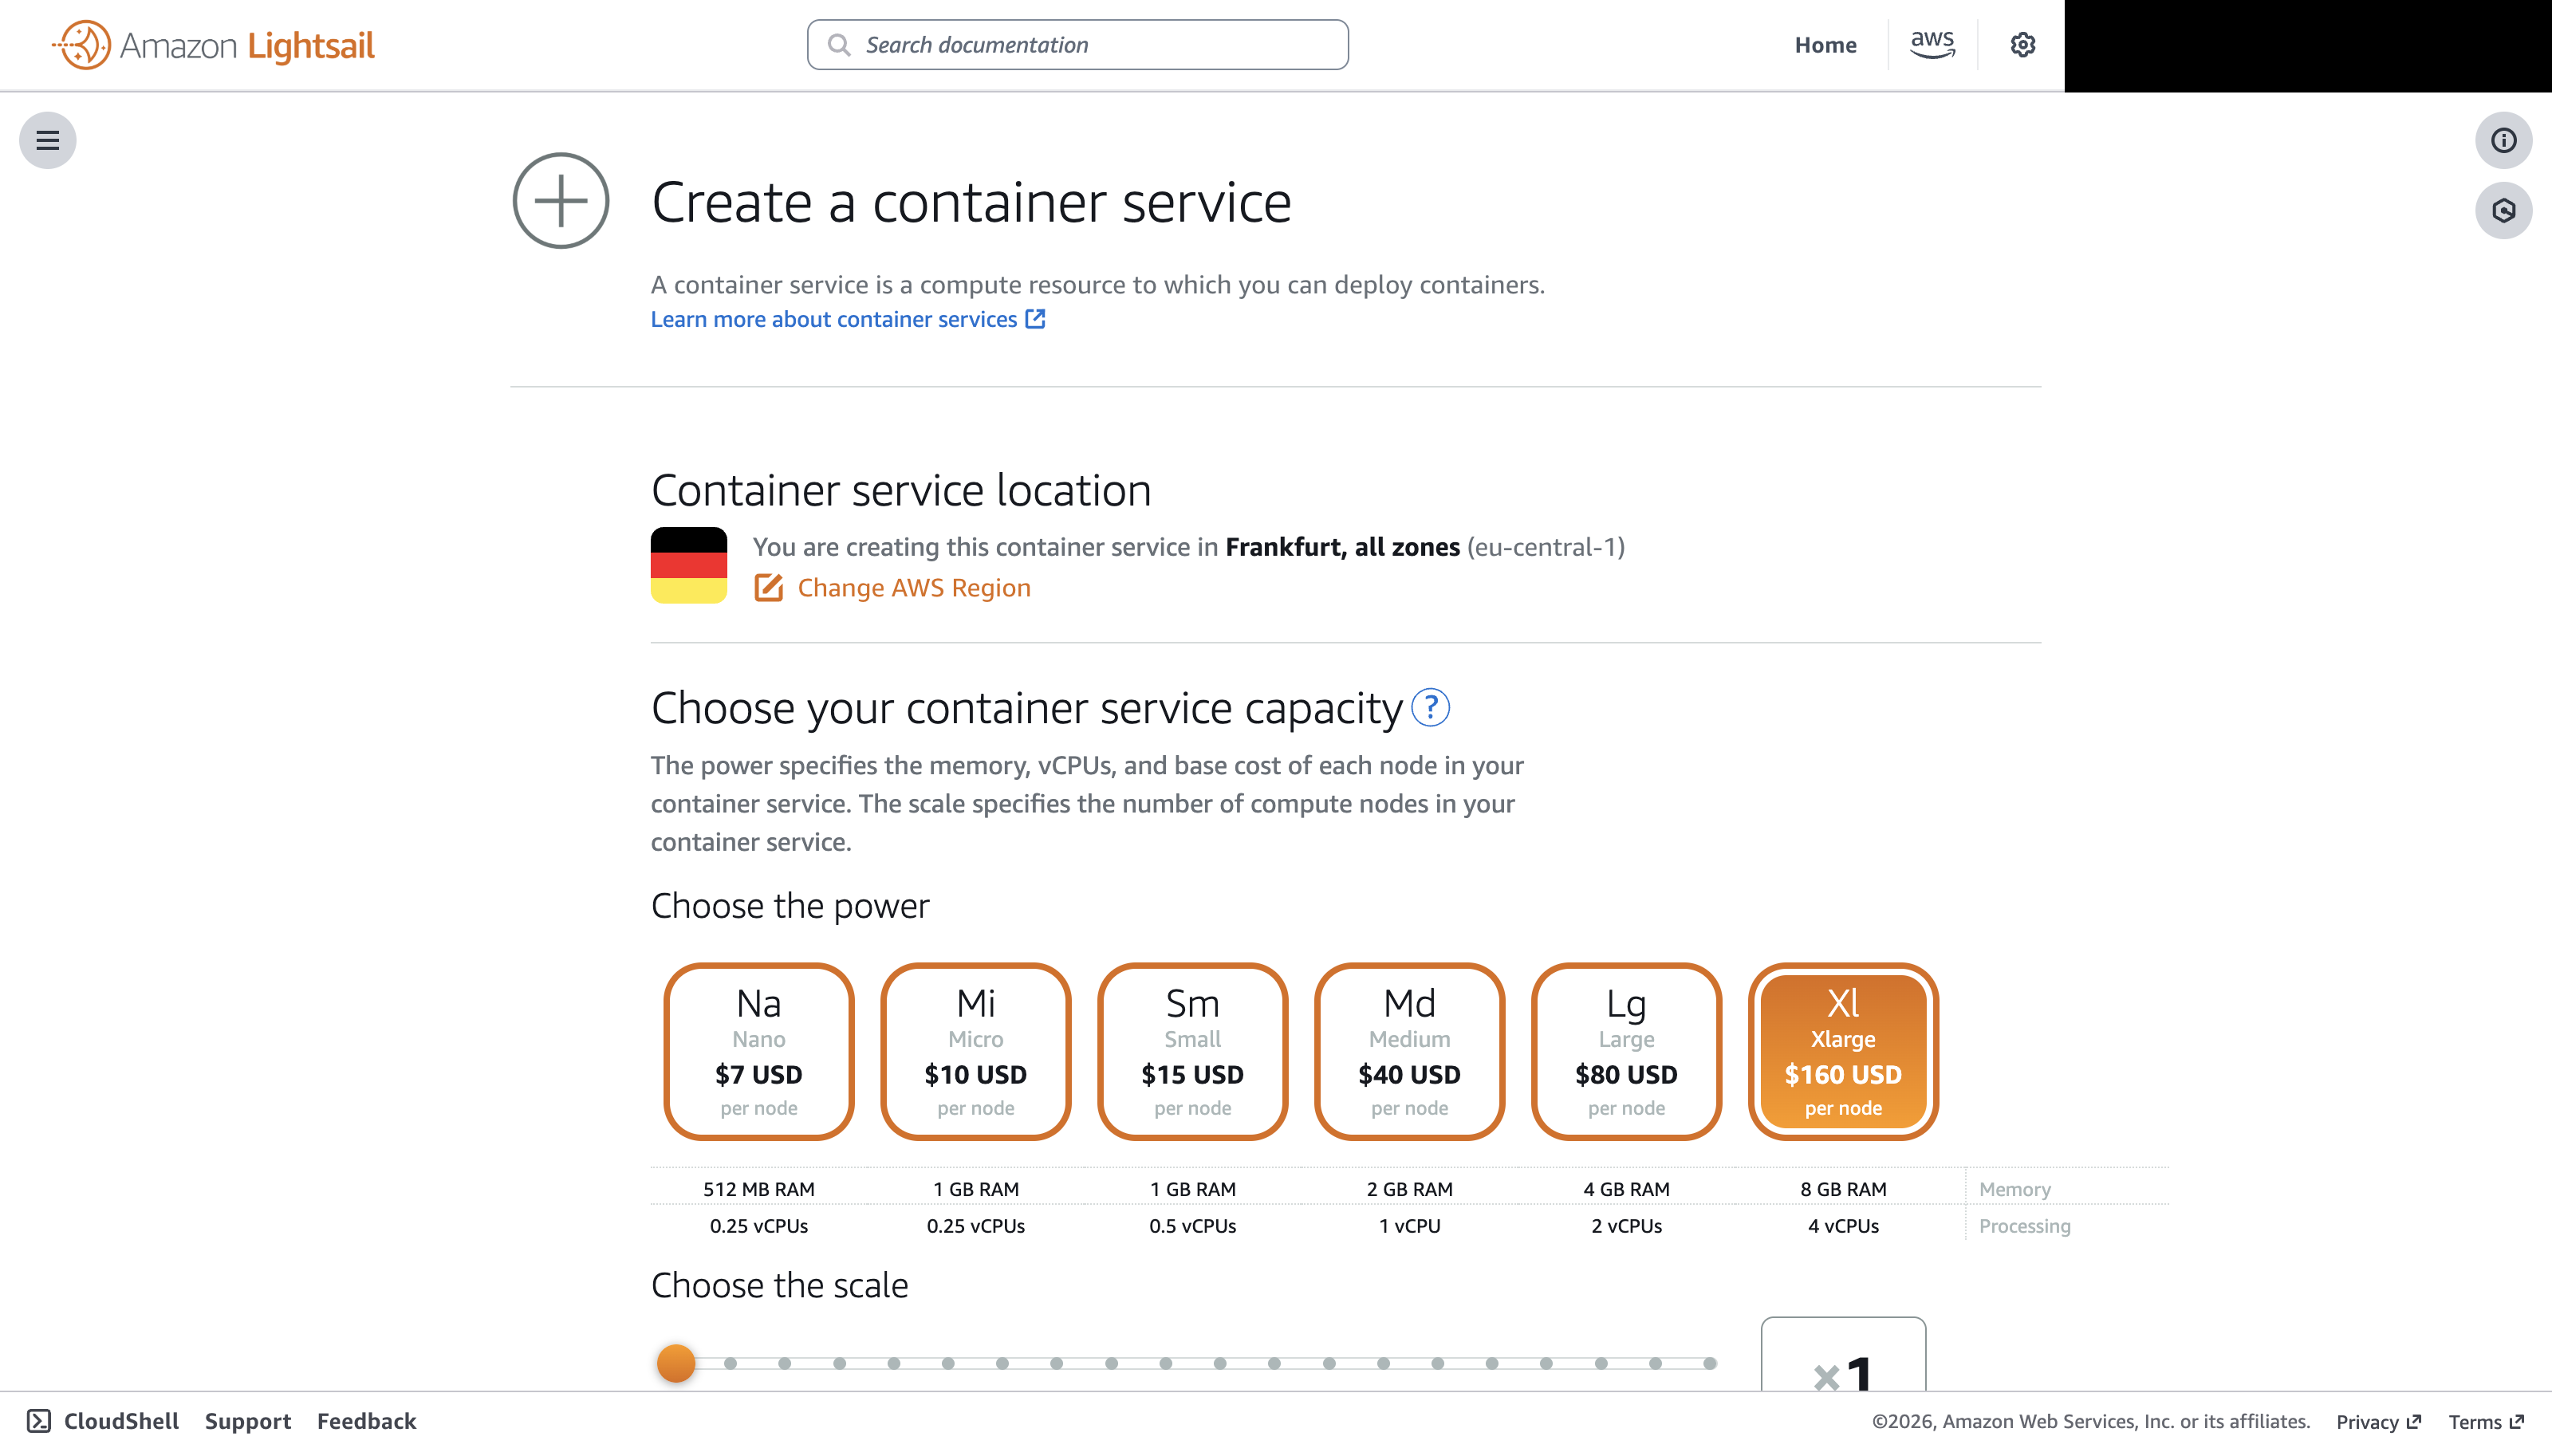
If creating the container service fails with the error "you've either reached or will exceed your maximum limit of Lightsail Container Services", the Lightsail limit of the AWS account must be raised first - see Request a Lightsail limit increase.
Setting |
Description |
Recommended value |
|---|---|---|
Service name |
Specify a name for the container service to be created. It becomes part of the public URL of the service. |
vertigis-dxf-export-backend |
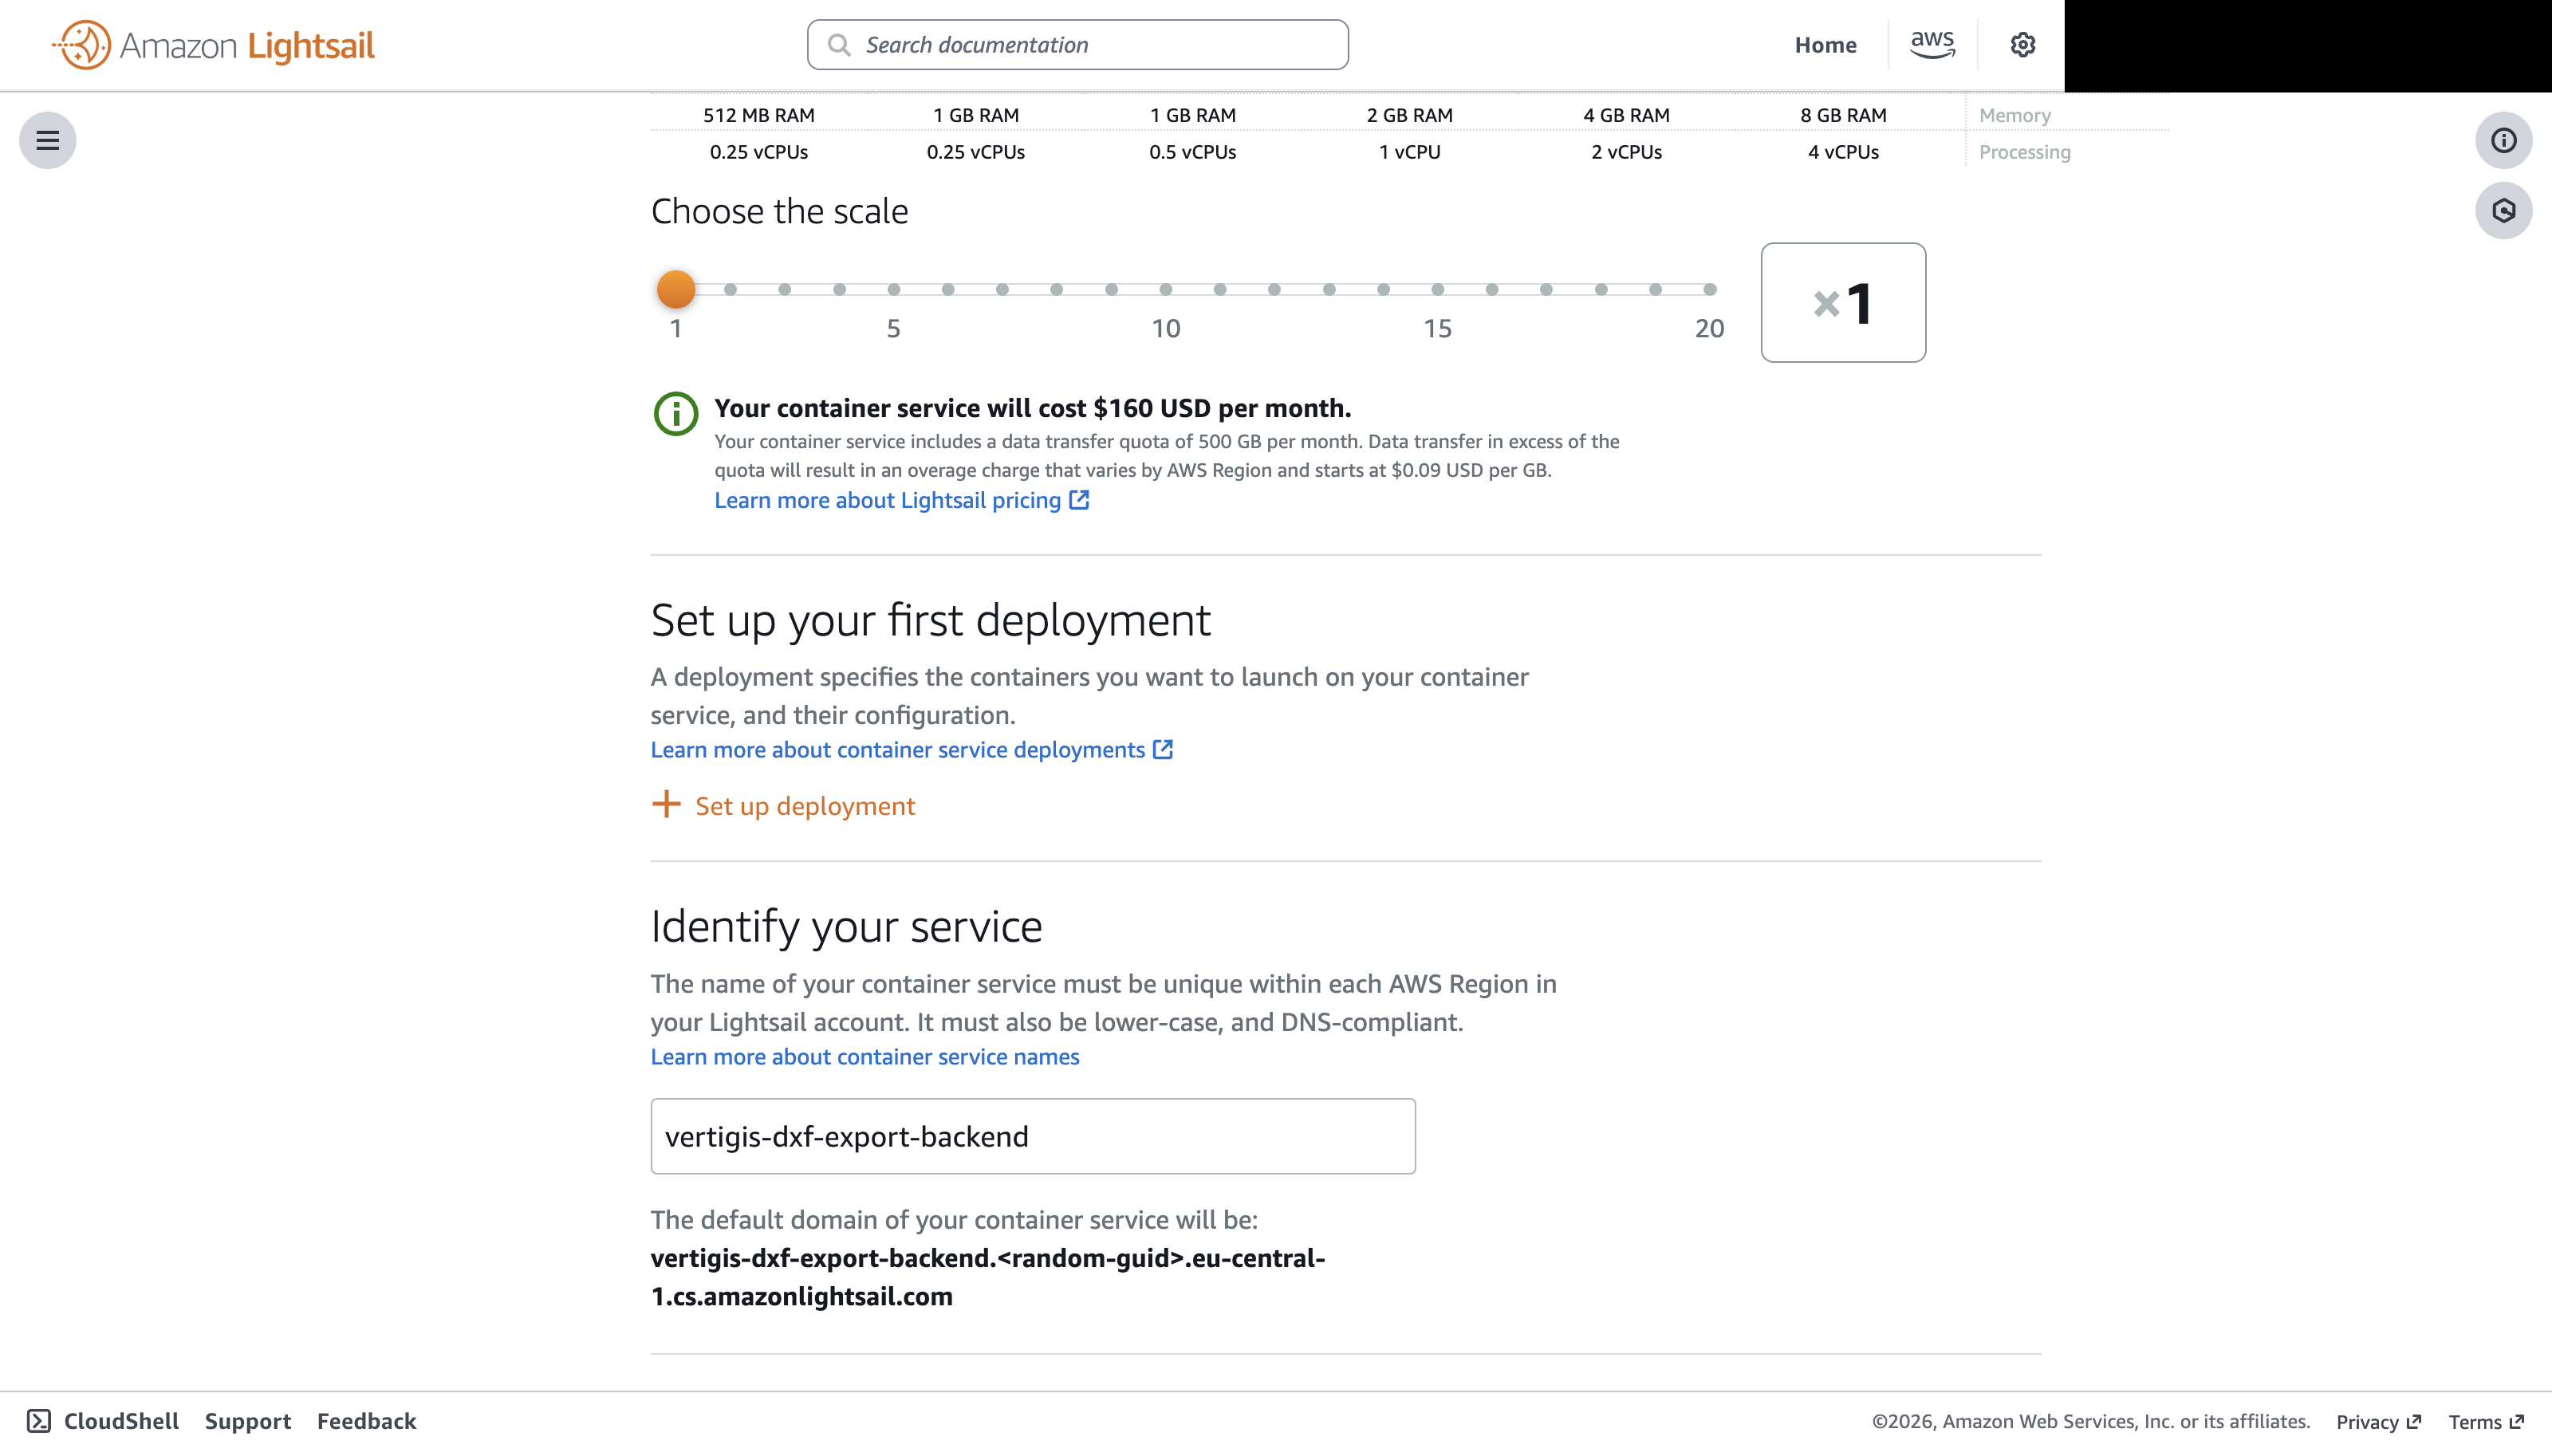
The section Set up your first deployment can be skipped - the deployment is created after the image has been pushed.
Select Create container service to create the container service.
Wait until Status is Ready and note the Public domain. It is required in the following sections.
Push the image
The Getting started tab of the created container service asks for the source of the container images:
Setting |
Description |
Recommended value |
|---|---|---|
What is the source of your container images? |
Select where the container images come from. A public registry only works for images that can be pulled without authentication. |
My local machine |
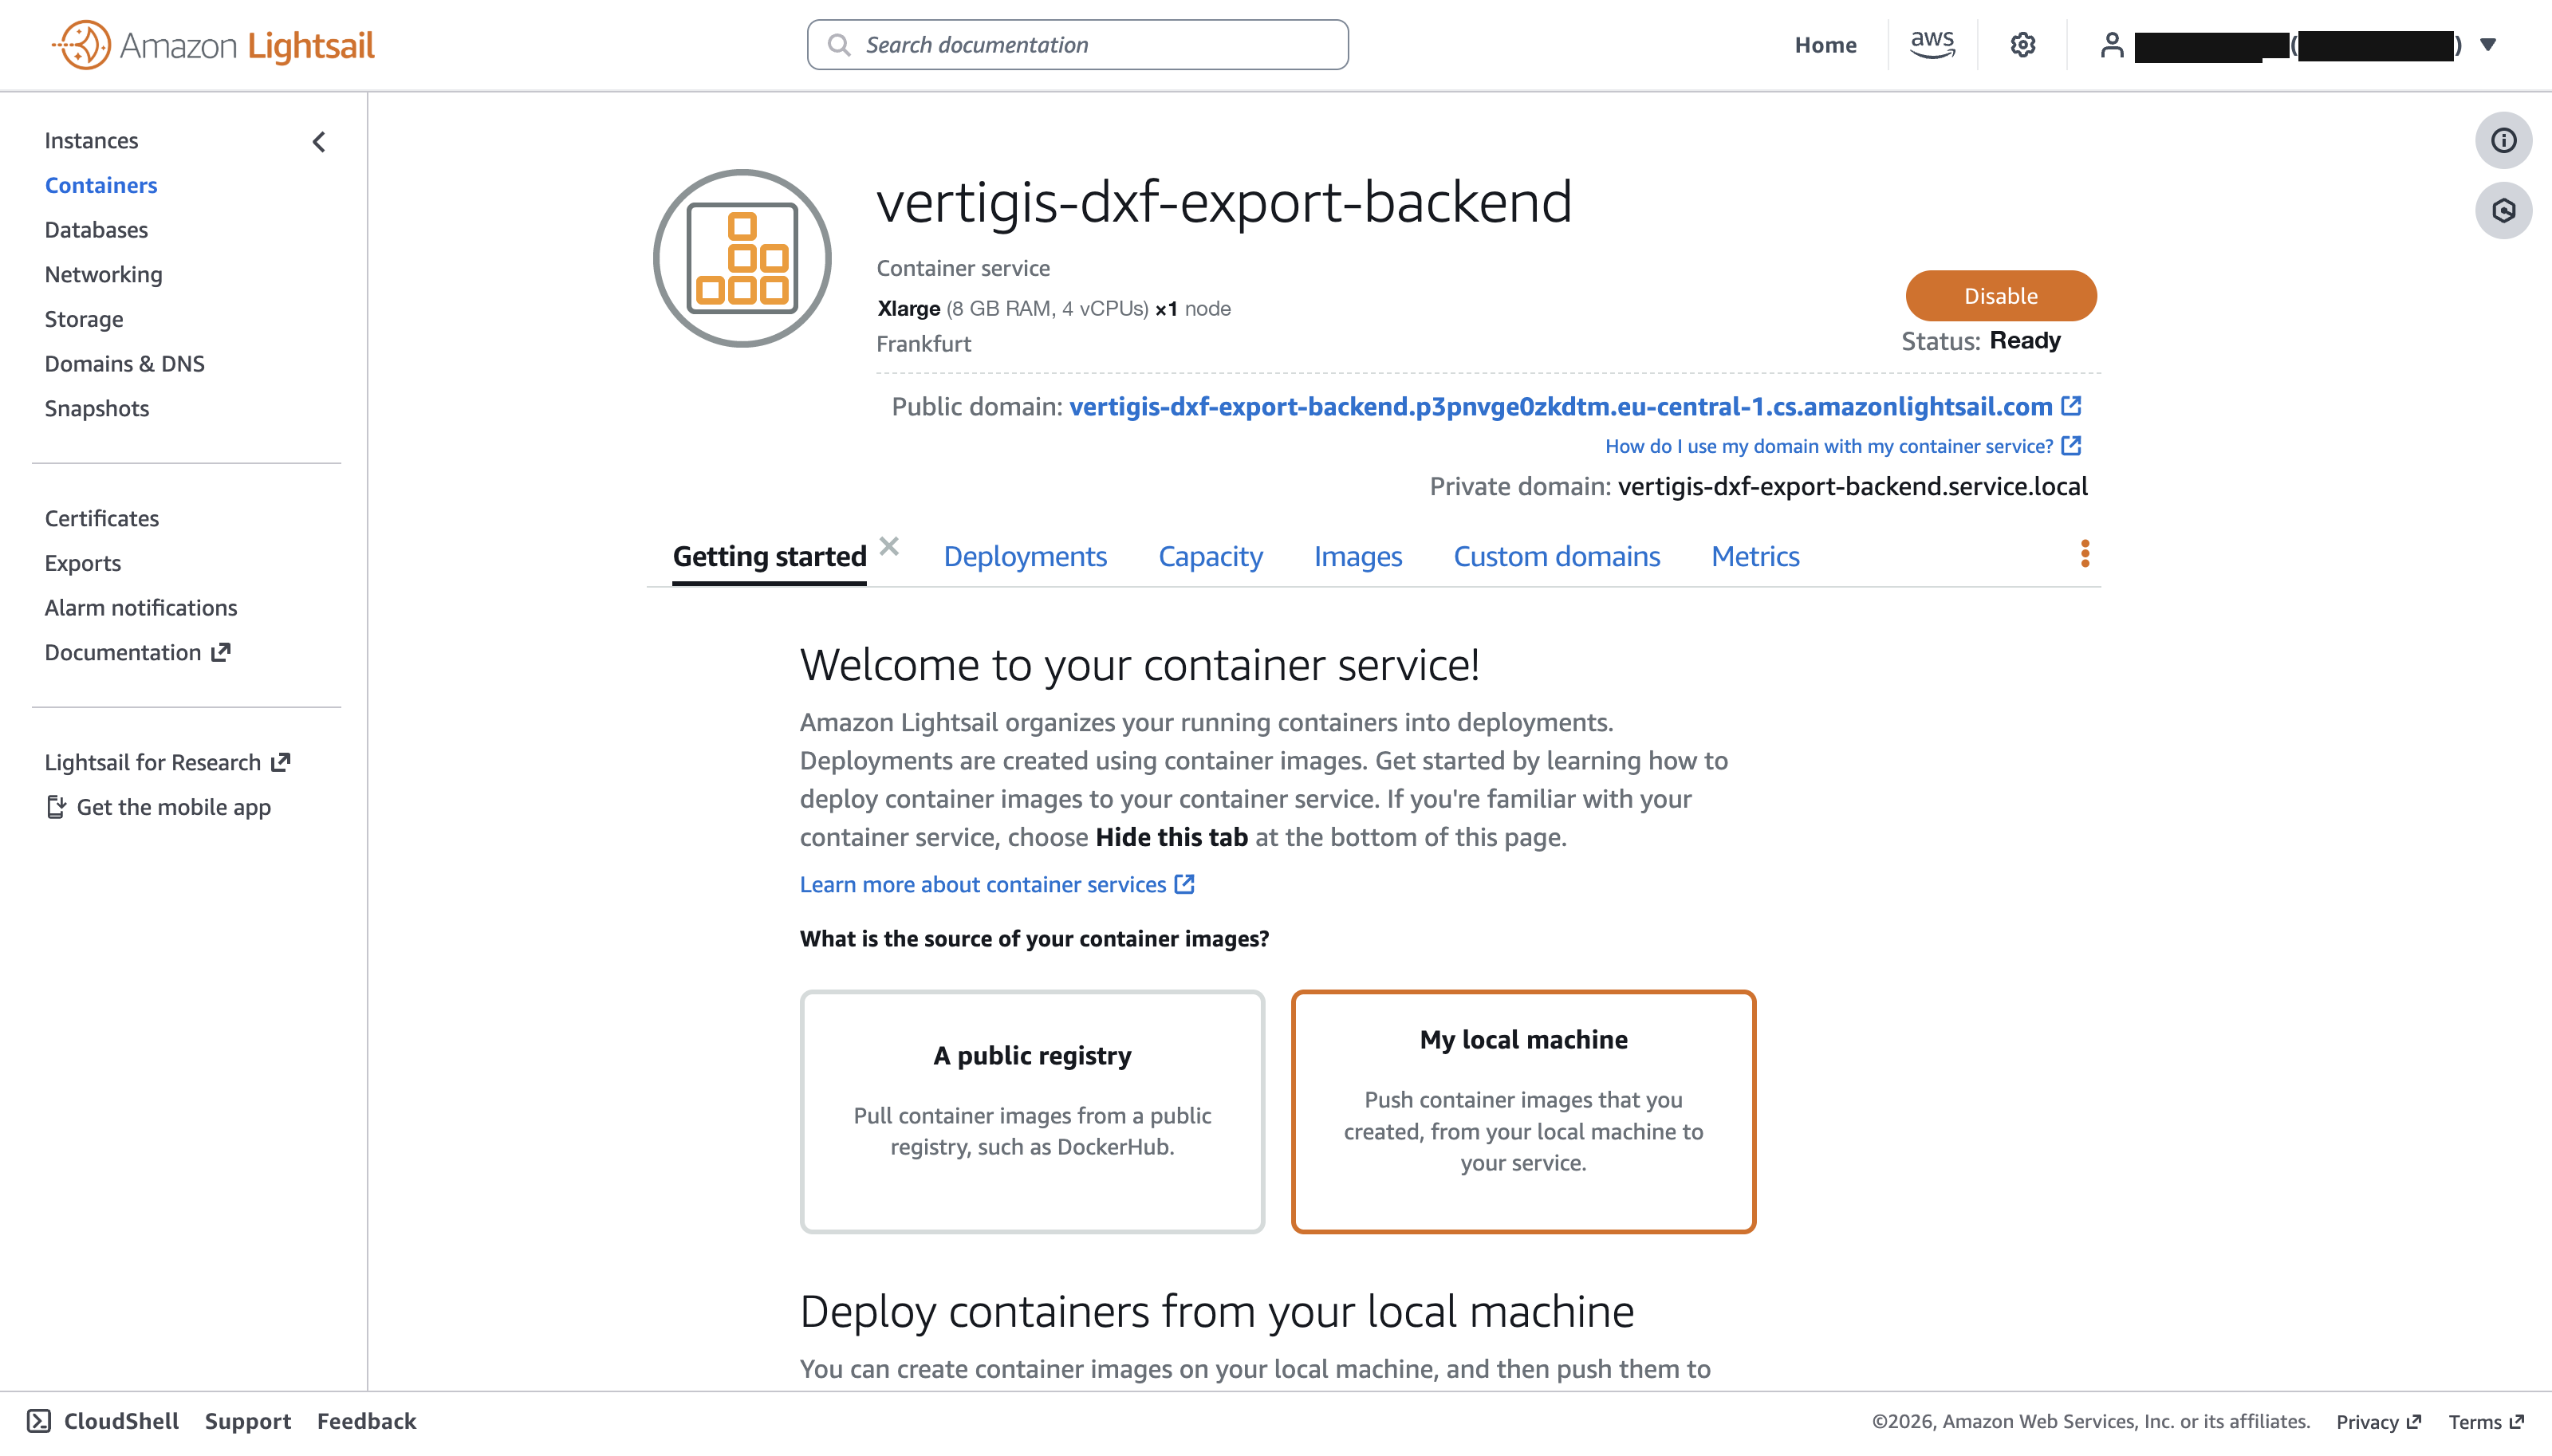
Select My local machine: the DXF Export image is only available in the private VertiGIS container registry, and Lightsail cannot authenticate against external private registries. Pull the image on a local machine and push it to the container service:
docker login vertigisapps.azurecr.io
docker pull --platform linux/amd64 vertigisapps.azurecr.io/networks/dxf-export
aws lightsail push-container-image \
--region eu-central-1 \
--service-name vertigis-dxf-export-backend \
--label dxf-export \
--image vertigisapps.azurecr.io/networks/dxf-export:1.3.0
Enter the VertiGIS container registry username and password when prompted by docker login.
Lightsail runs containers on linux/amd64 nodes. The --platform linux/amd64 flag ensures that the correct architecture is pulled, which is required when pushing from a machine with a different architecture (for example Apple Silicon).
The push command prints the stored image reference (for example :vertigis-dxf-export-backend.dxf-export.1). It is required in the following section. The pushed image is also shown in the Images tab of the container service.
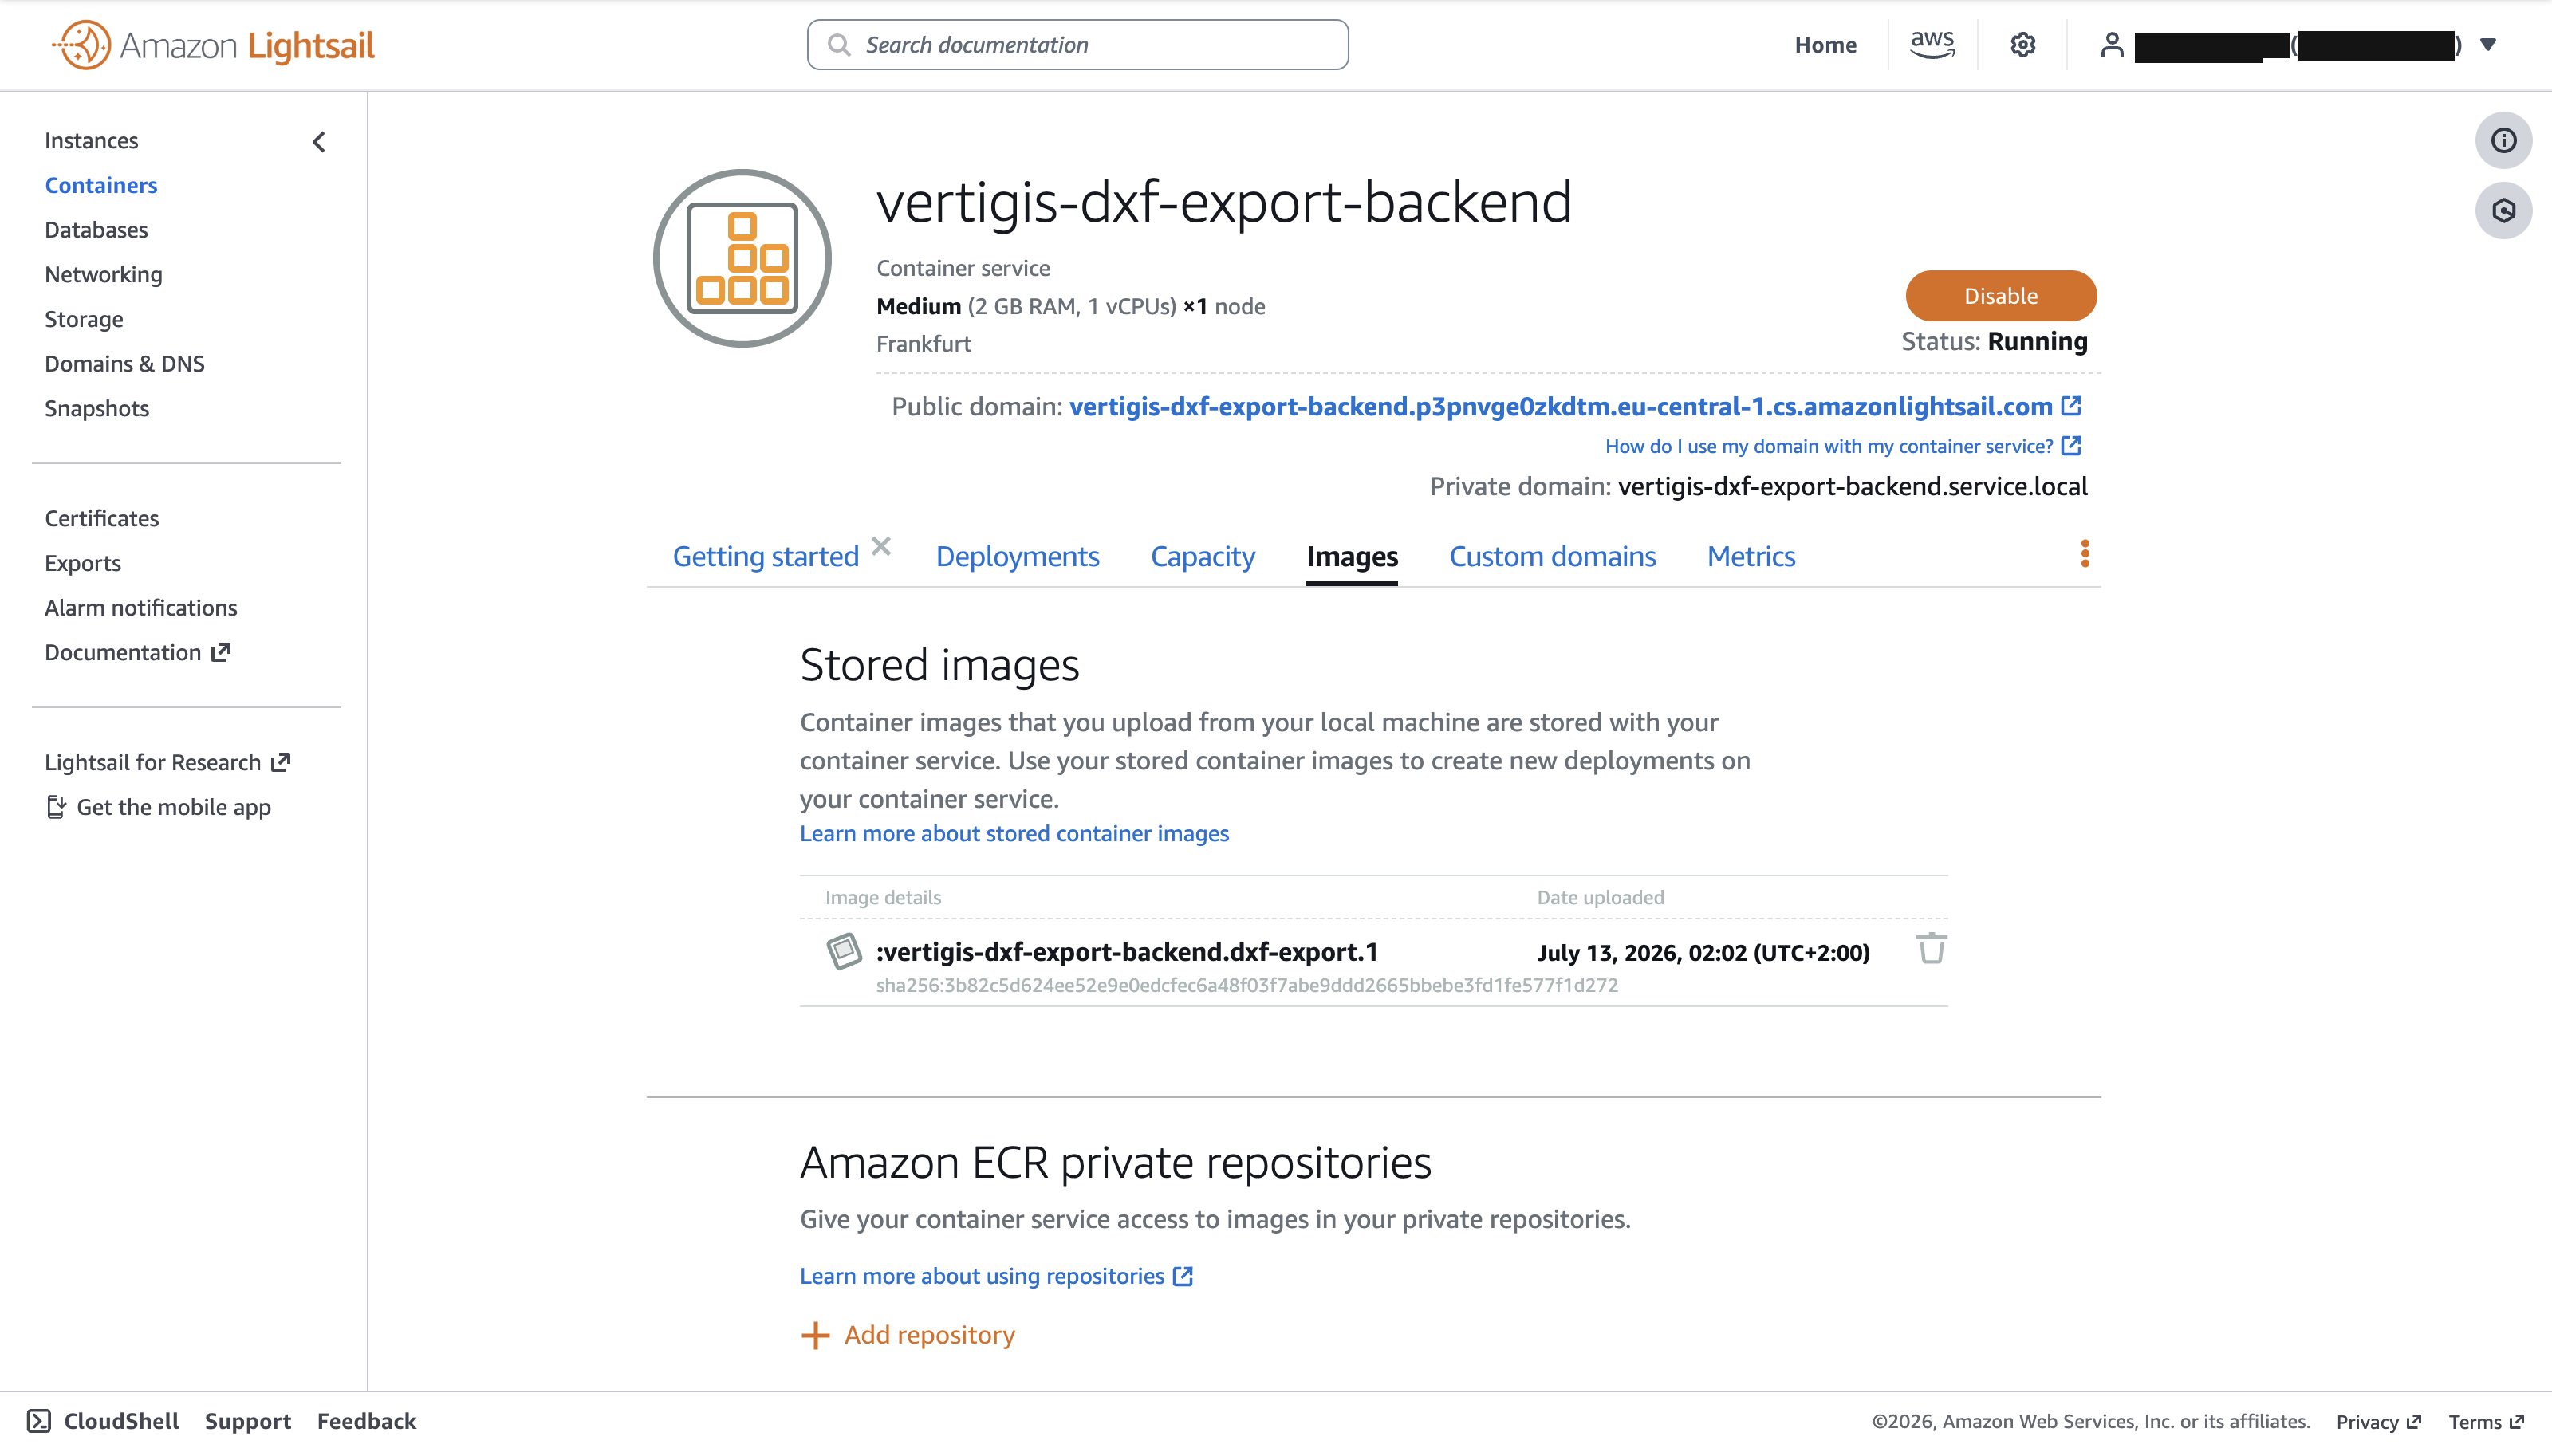
Alternatively, the image can be provided through a private Amazon ECR repository - see Alternative: push the image to Amazon ECR.
Create the deployment
Open the container service, select Deployments and click on Create your first deployment.
Setting |
Description |
Recommended value |
|---|---|---|
Container name |
Specify a name for the container. |
vertigis-dxf-export-backend |
Image |
Select the pushed image. |
:vertigis-dxf-export-backend.dxf-export.1 |
Open ports |
Select the target port and protocol. |
5000, HTTP |
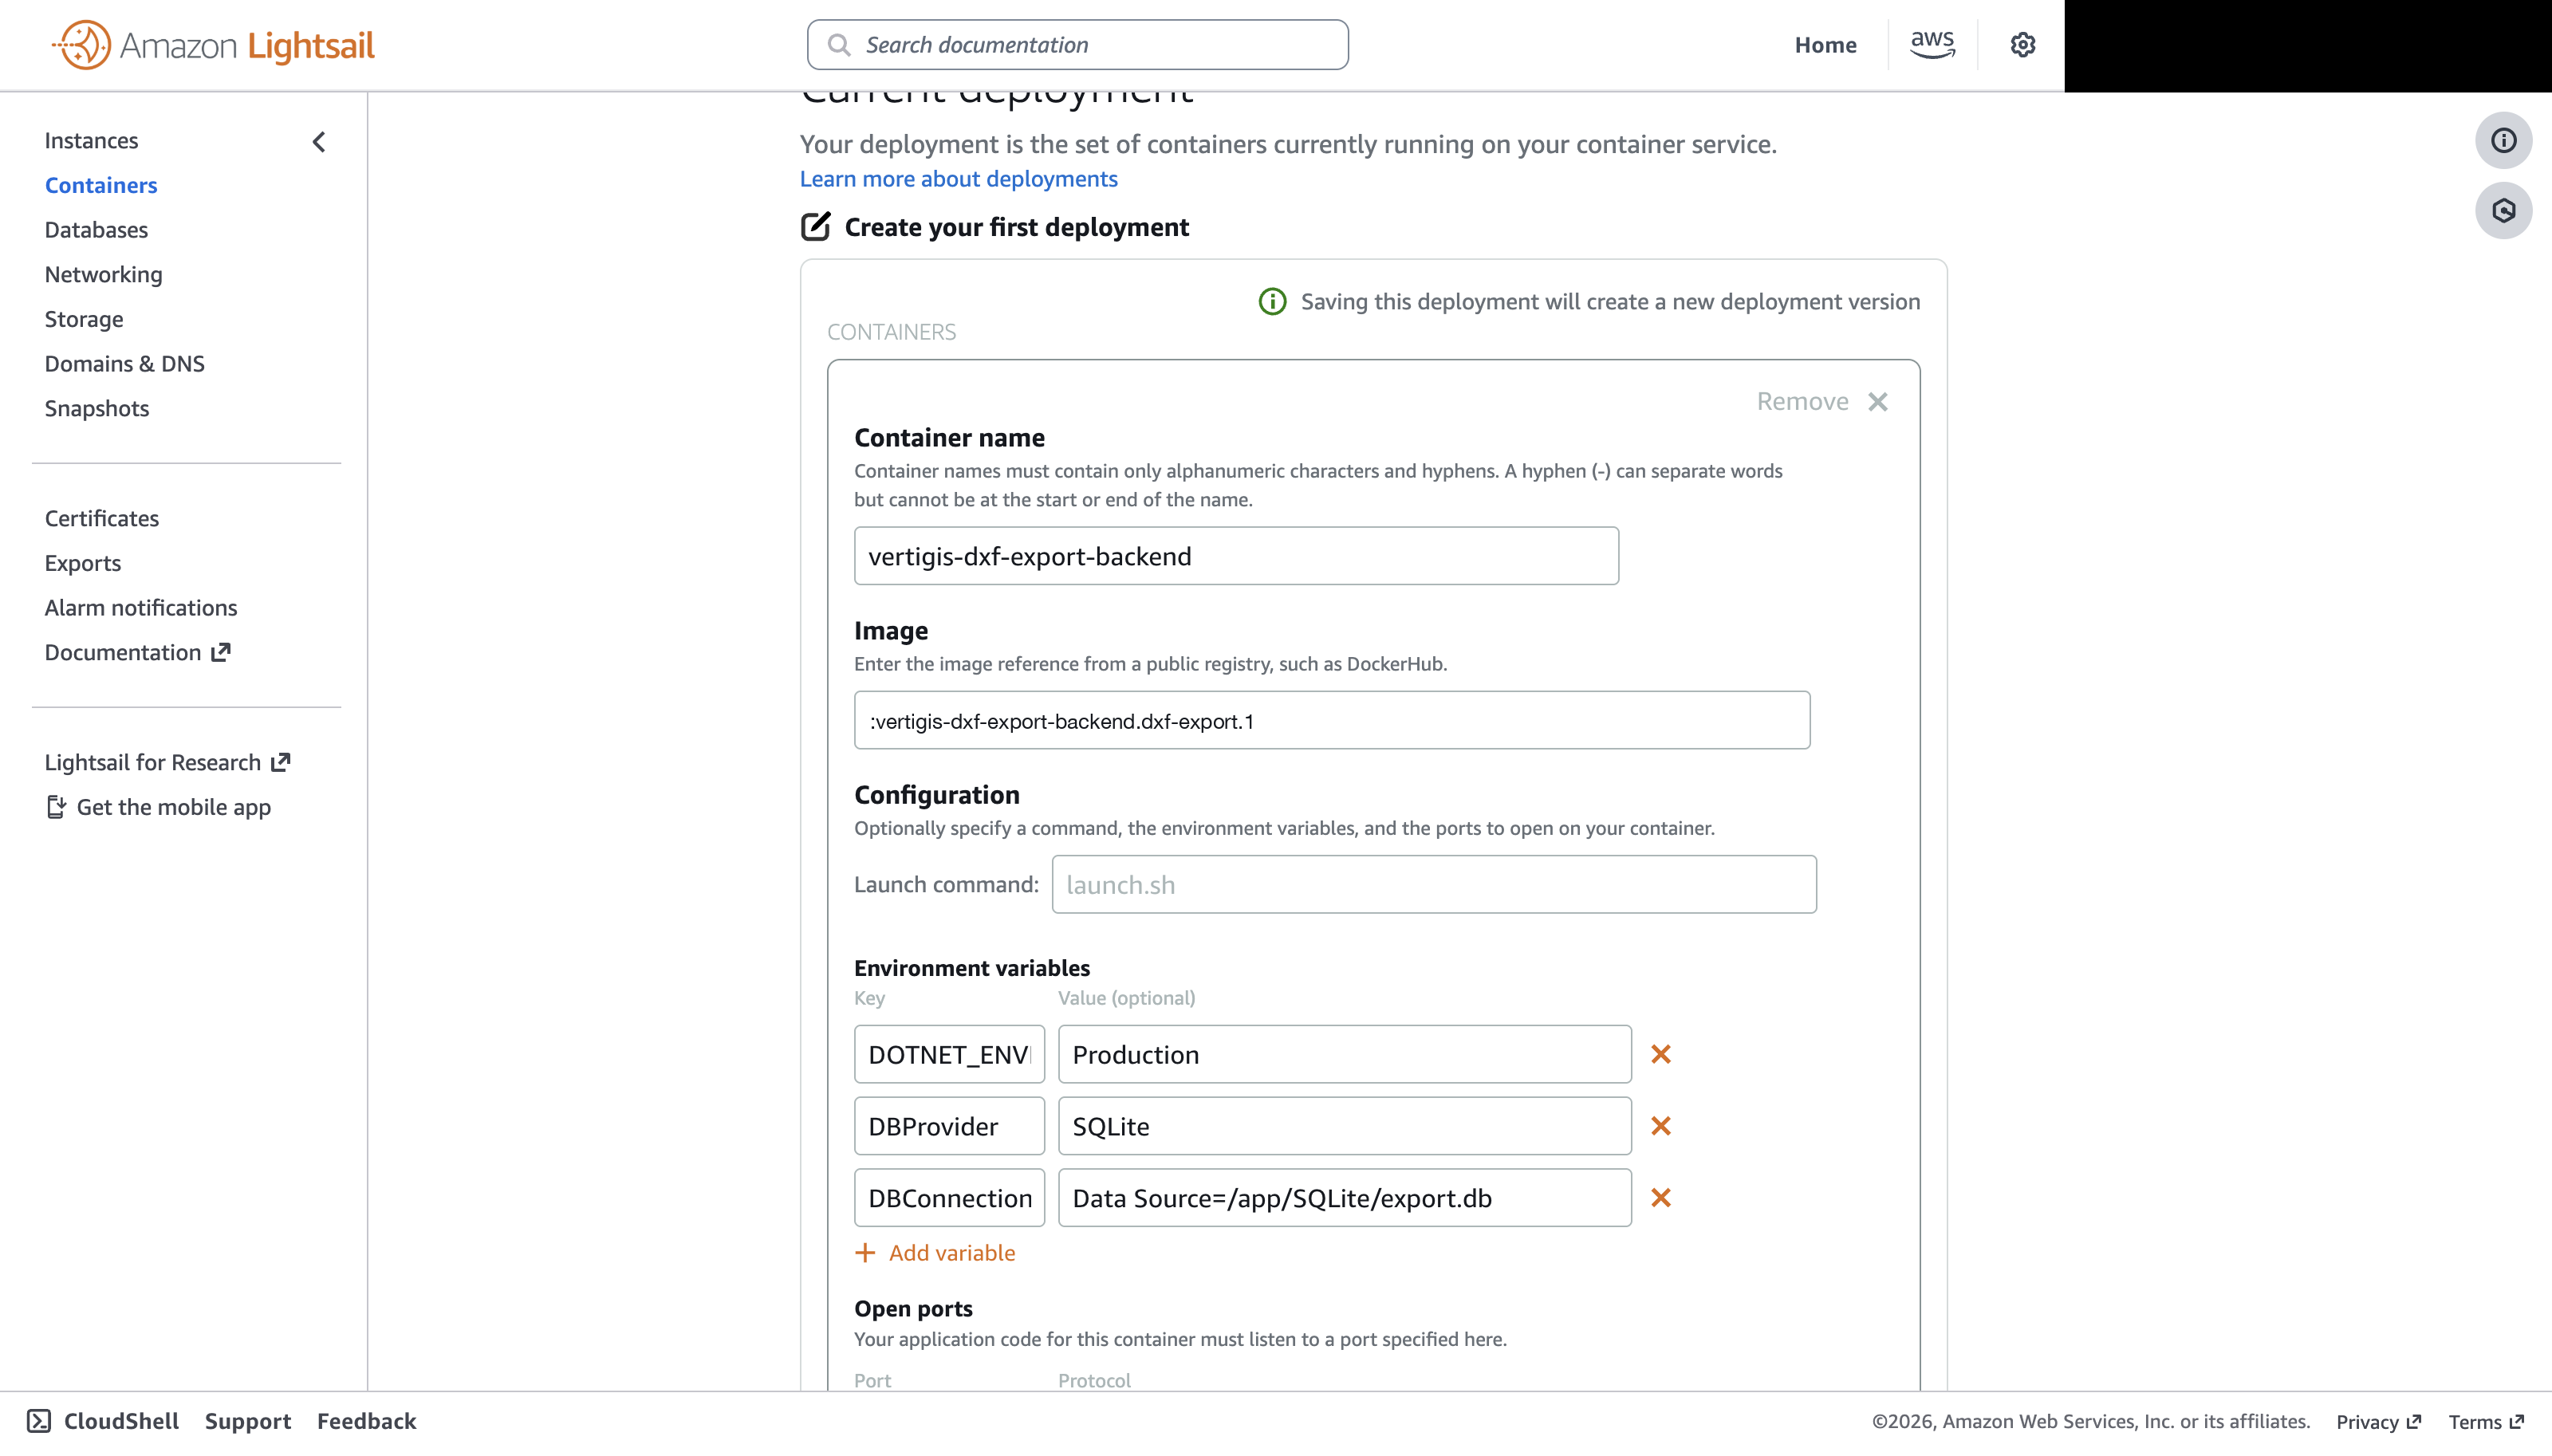
Environment variables
The following variable is independent of the used database type:
Key |
Value |
|---|---|
DOTNET_ENVIRONMENT |
Production |
The following variables are different, depending on the database system used:
SQLite
Key |
Value |
|---|---|
DBProvider |
SQLite |
DBConnection |
Data Source=/app/SQLite/export.db |
Lightsail containers have no persistent volumes. When using SQLite, the database is stored inside the container and is lost when a new deployment is created. Use PostgreSQL for durable data.
PostgreSQL
Key |
Value |
|---|---|
DBProvider |
Postgres |
DBConnection |
Host={DB-Host};Port={DB-Port};Database={DB-Name};Username={DB-User};Password={DB-User-Password} |
DBConnection placeholders:
•DB-Host: The name of the host where the Postgres database is running
•DB-Port: The port to access the Postgres database on the host
•DB-Name: The name of the database
•DB-User: The name of the user to access the Postgres database
•DB-User-Password: The password of the Postgres database user
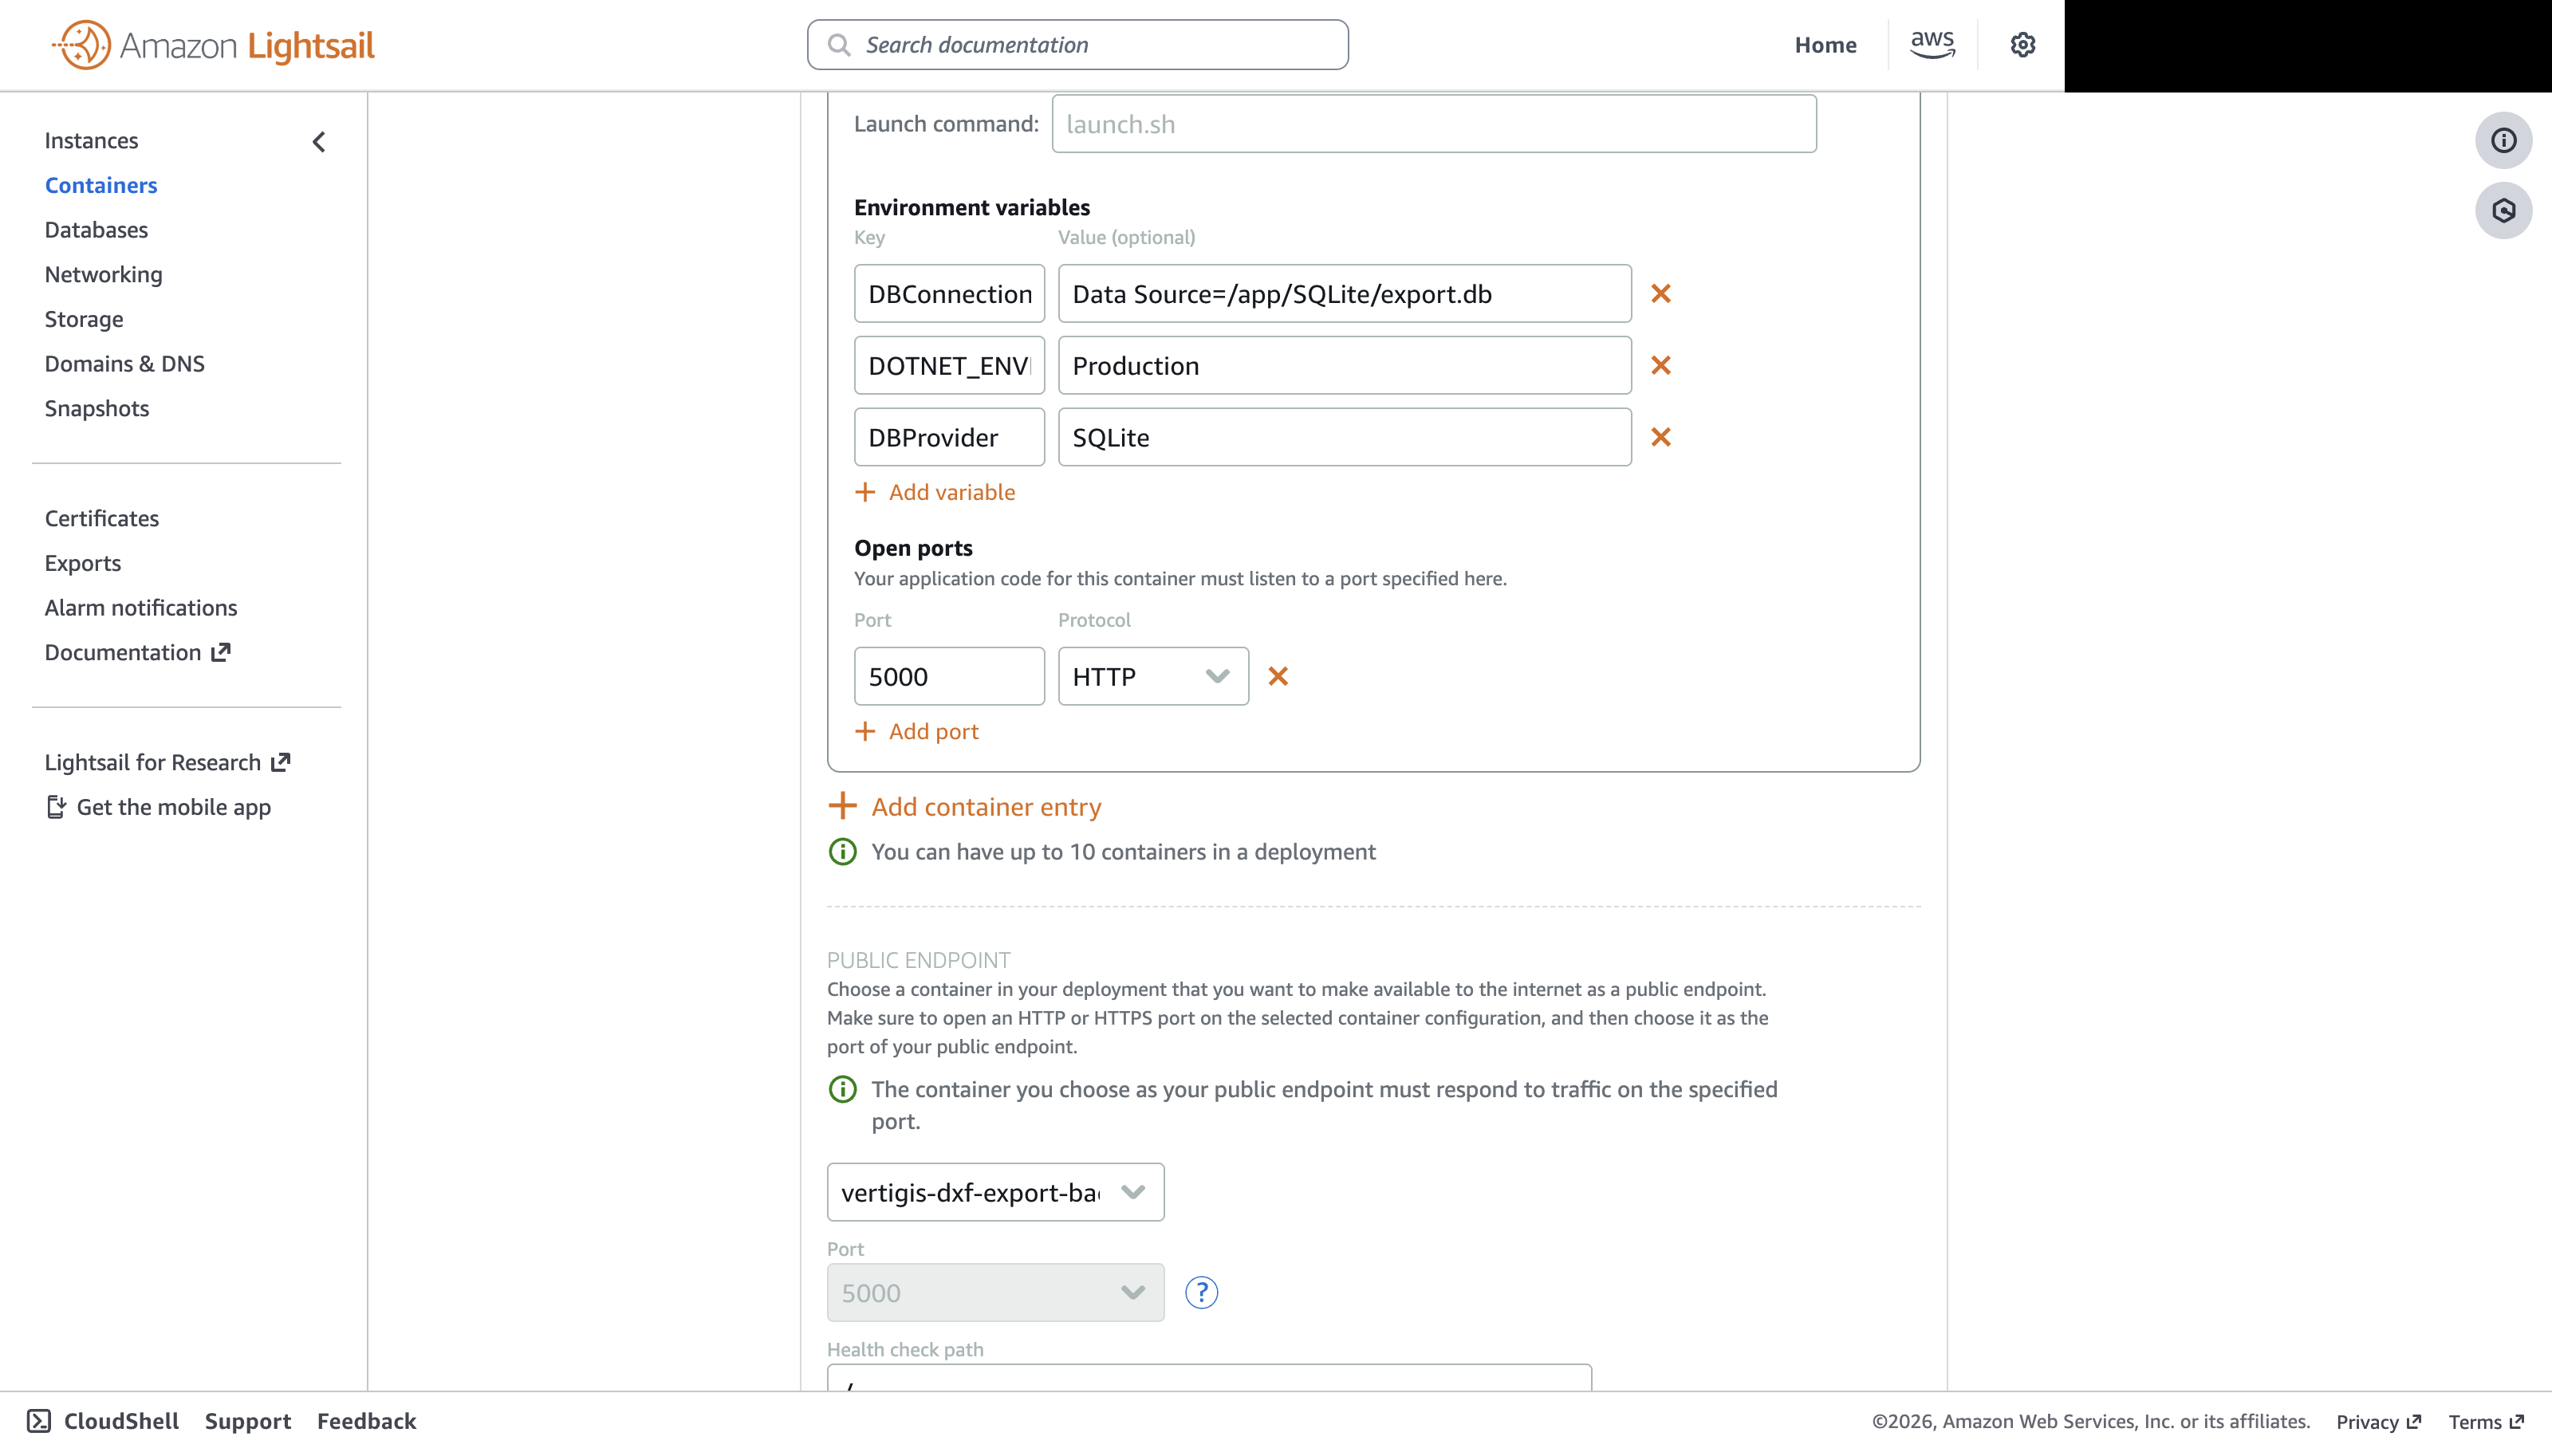
Public endpoint
Setting |
Description |
Recommended value |
|---|---|---|
Container |
Select the container that receives public traffic. |
vertigis-dxf-export-backend |
Port |
Select the target port. |
5000 |
Health check path |
Select the health check path. |
/ |
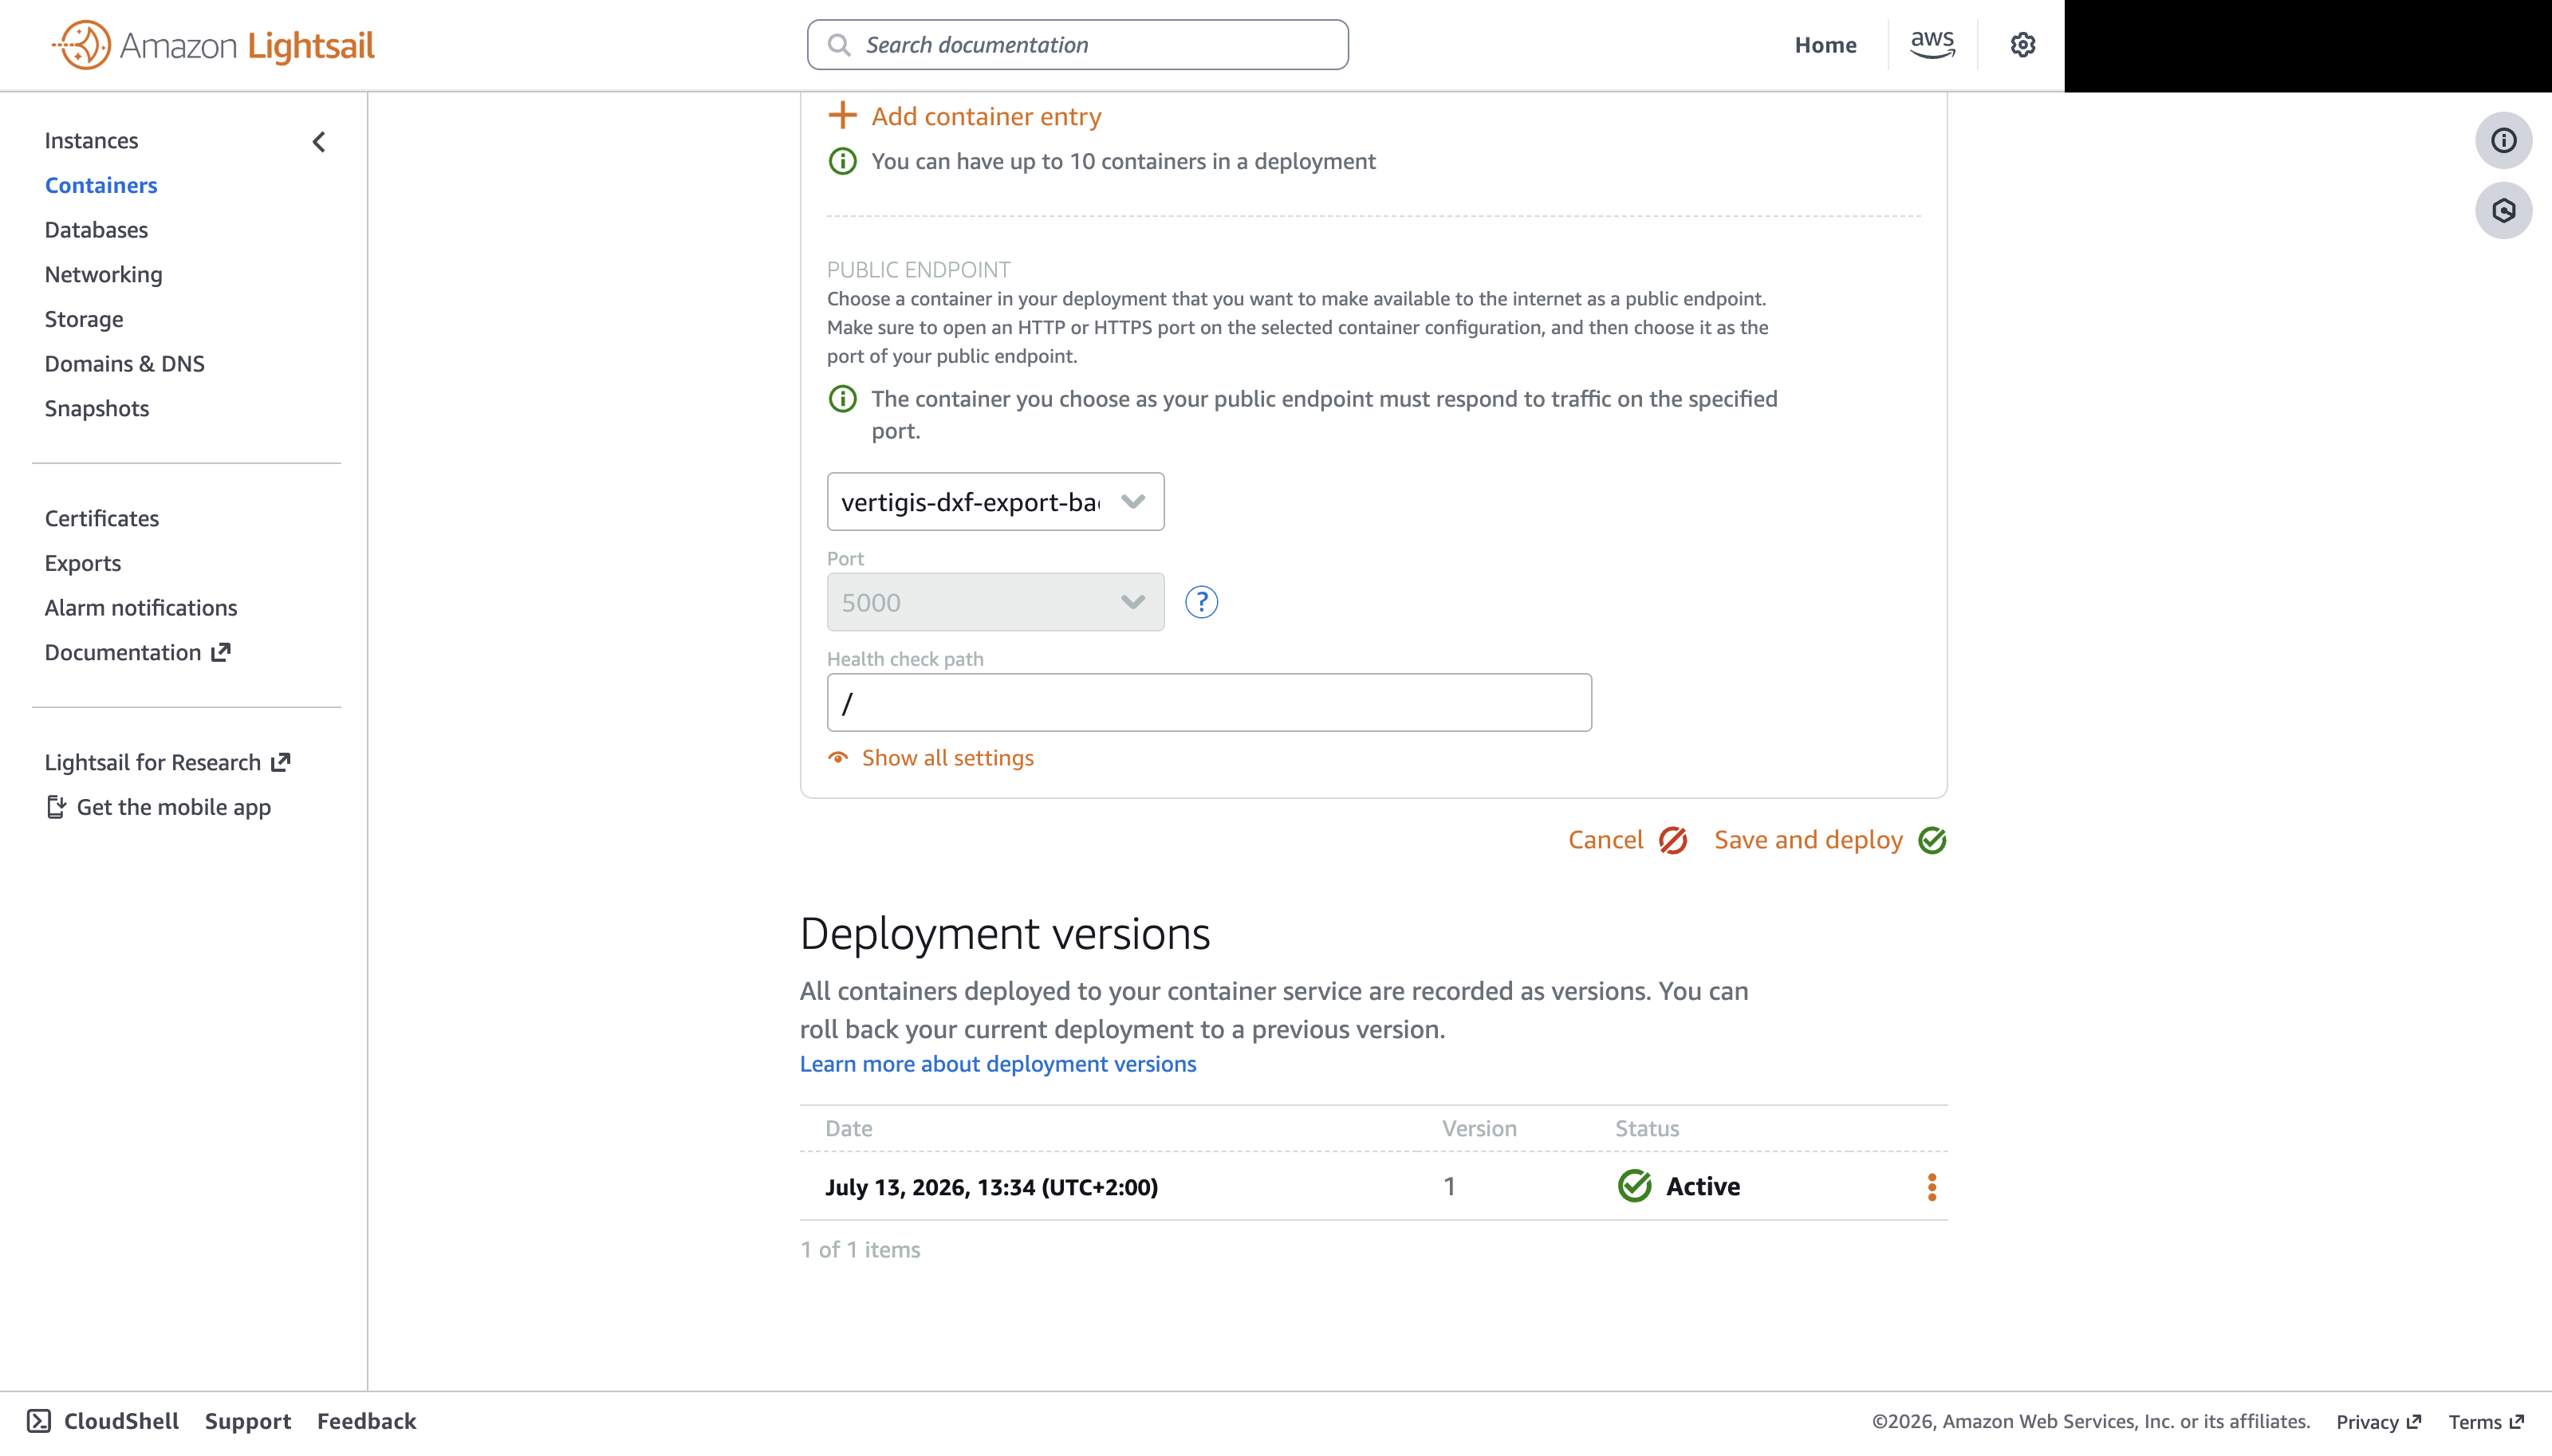
Select Save and deploy to create the deployment.
Validate the installation
Open the container service and check if Status is Running.
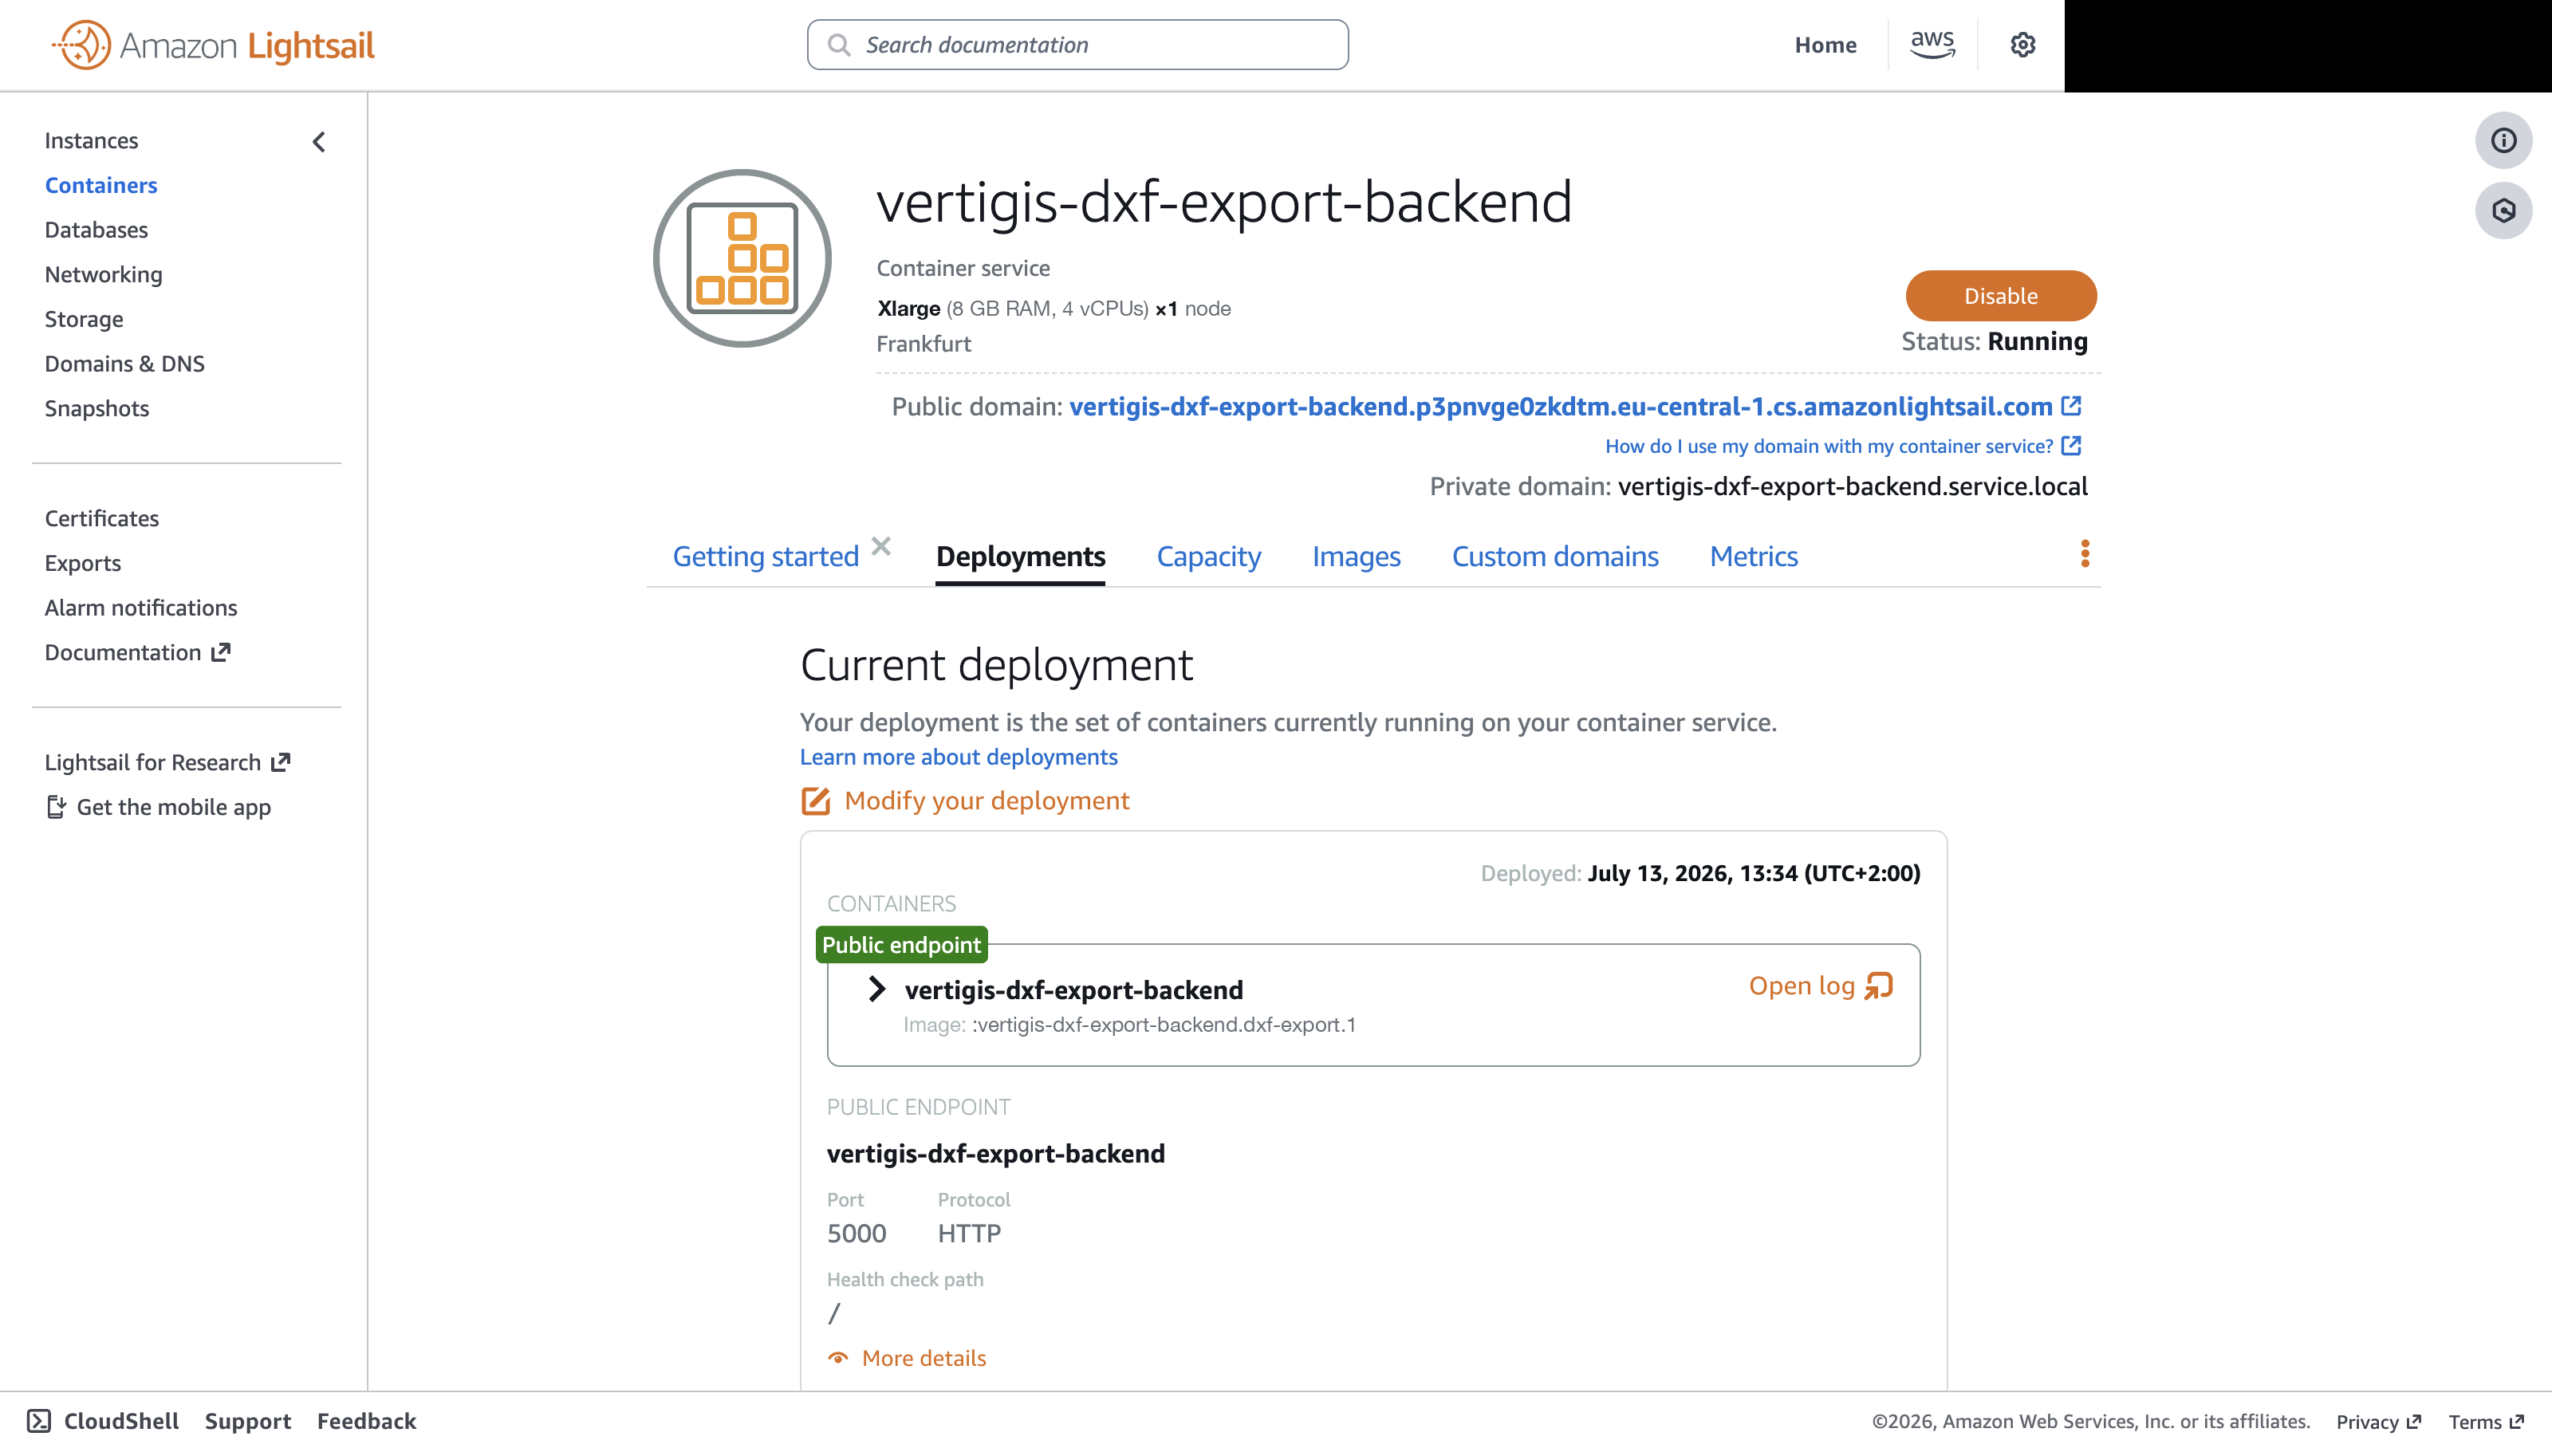
The Public domain shows the URL that can be used to reference the Backend in VertiGIS Applications. The URL is served over HTTPS with a certificate managed by Lightsail.
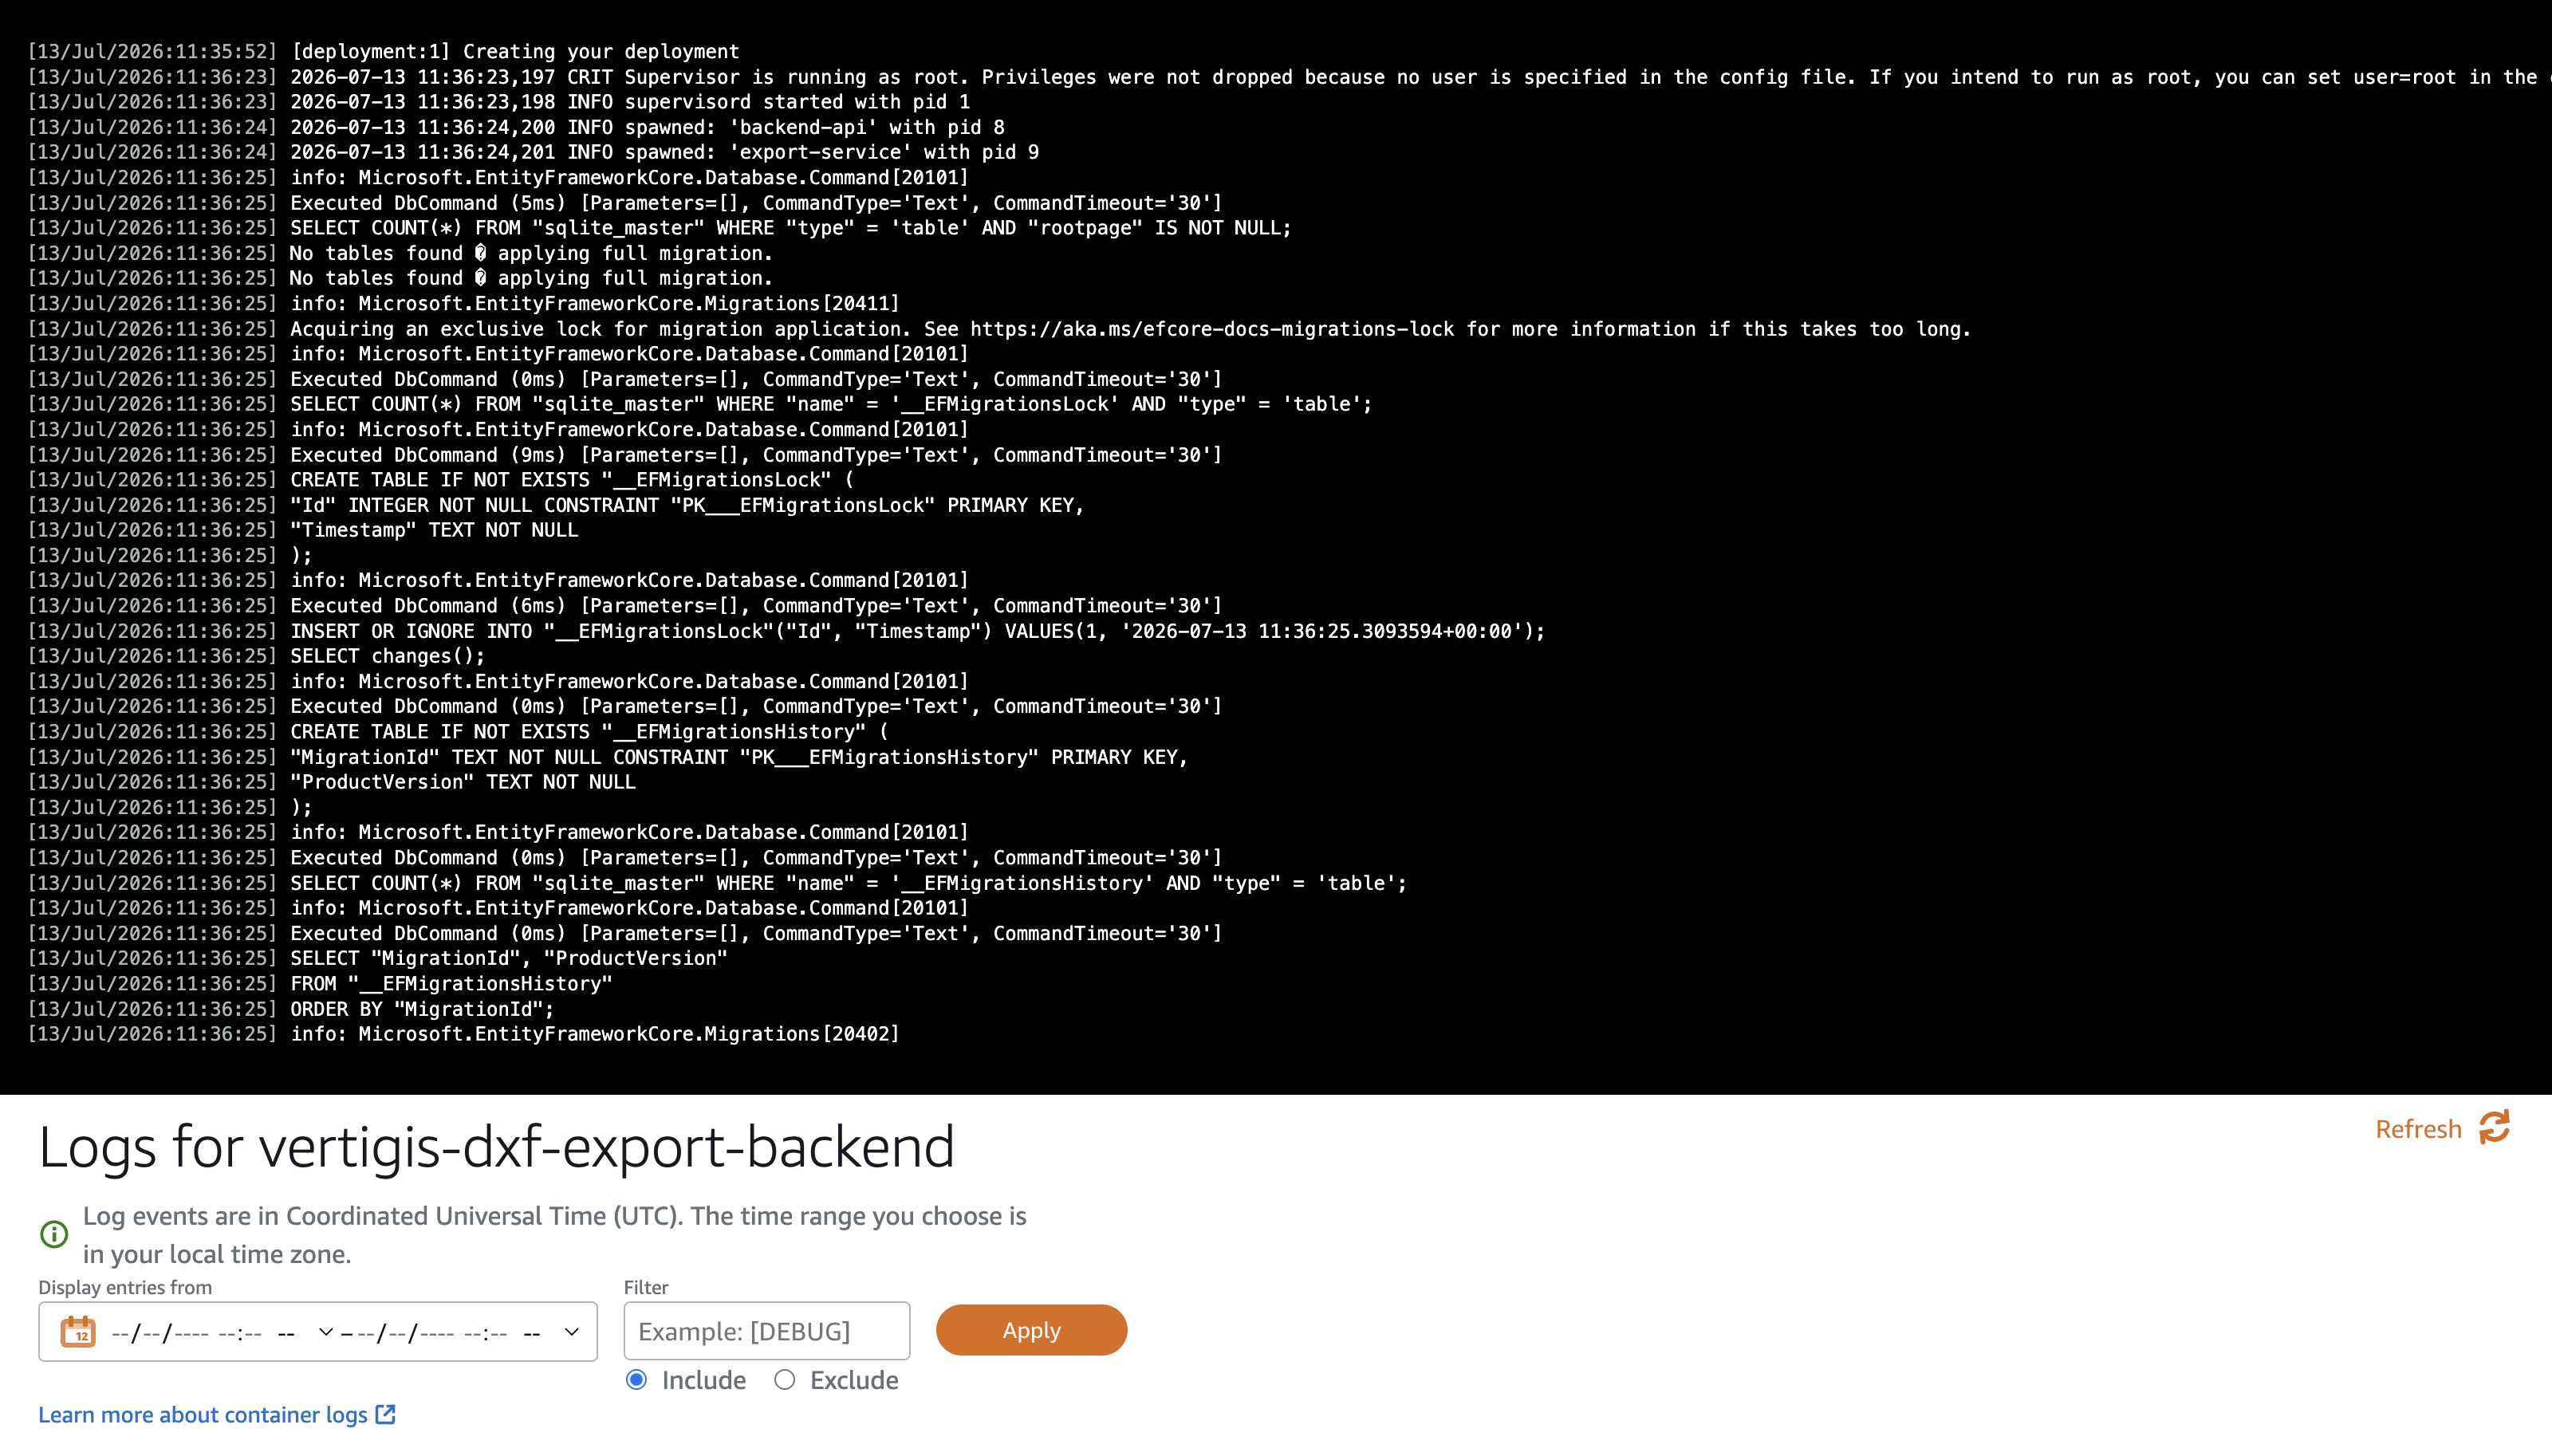
Select the Deployments tab and open the container logs of the current deployment. Check for any error messages:
Container Maintenance
To observe or maintain the DXF Backend, use the tabs of the container service (Deployments, Capacity, Metrics) as you would for any other container application.
Scaling is manual: open the Capacity tab to change the power or the number of nodes. Scaling to more than one node requires PostgreSQL as the database system. Keep the scale at 1 when using SQLite.
Request a Lightsail limit increase
AWS accounts have a capacity limit for Lightsail container services.
The limit is account-specific and depends on the requested power: creating or updating a container service can fail with the error "you've either reached or will exceed your maximum limit of Lightsail Container Services" even if no other container services exist in the account. Lightsail container service limits cannot be managed in the Service Quotas console — the limit must be raised through an AWS Support case, and AWS may require a Developer support plan or higher to process the increase.
Navigate to Support and describe the request in the support assistant:
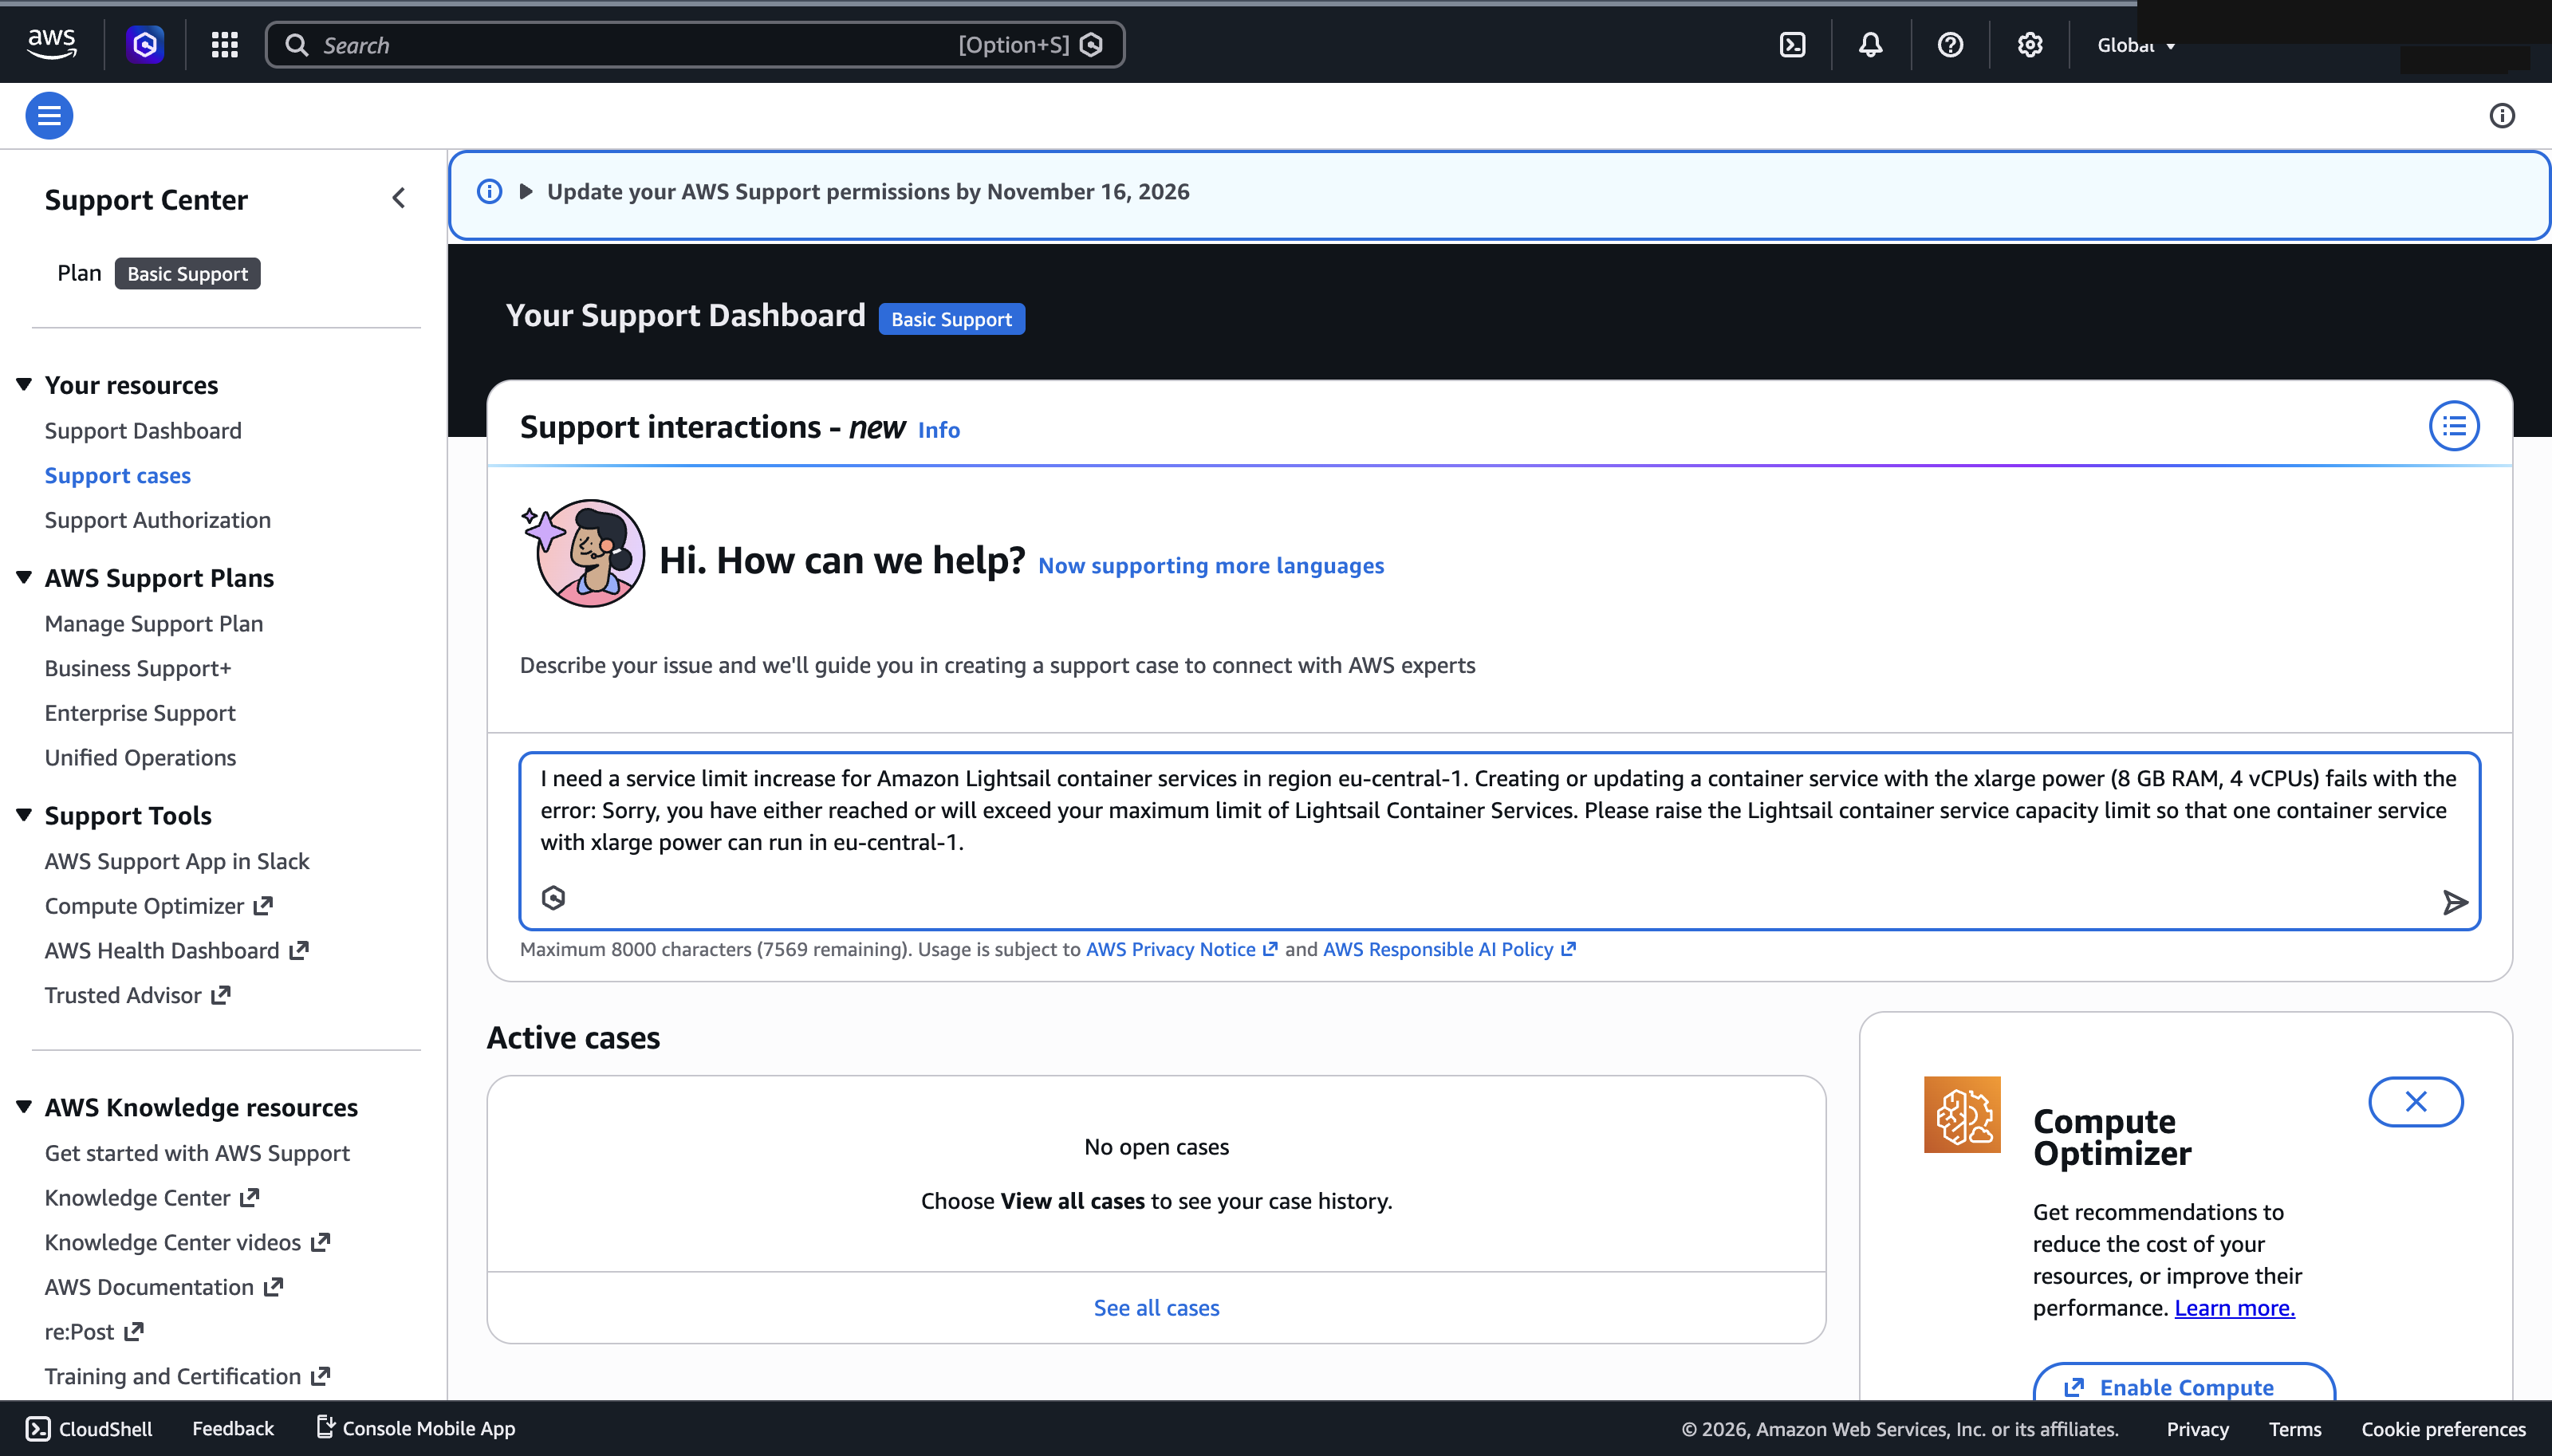
The assistant offers to create a support case. Select Create a case:
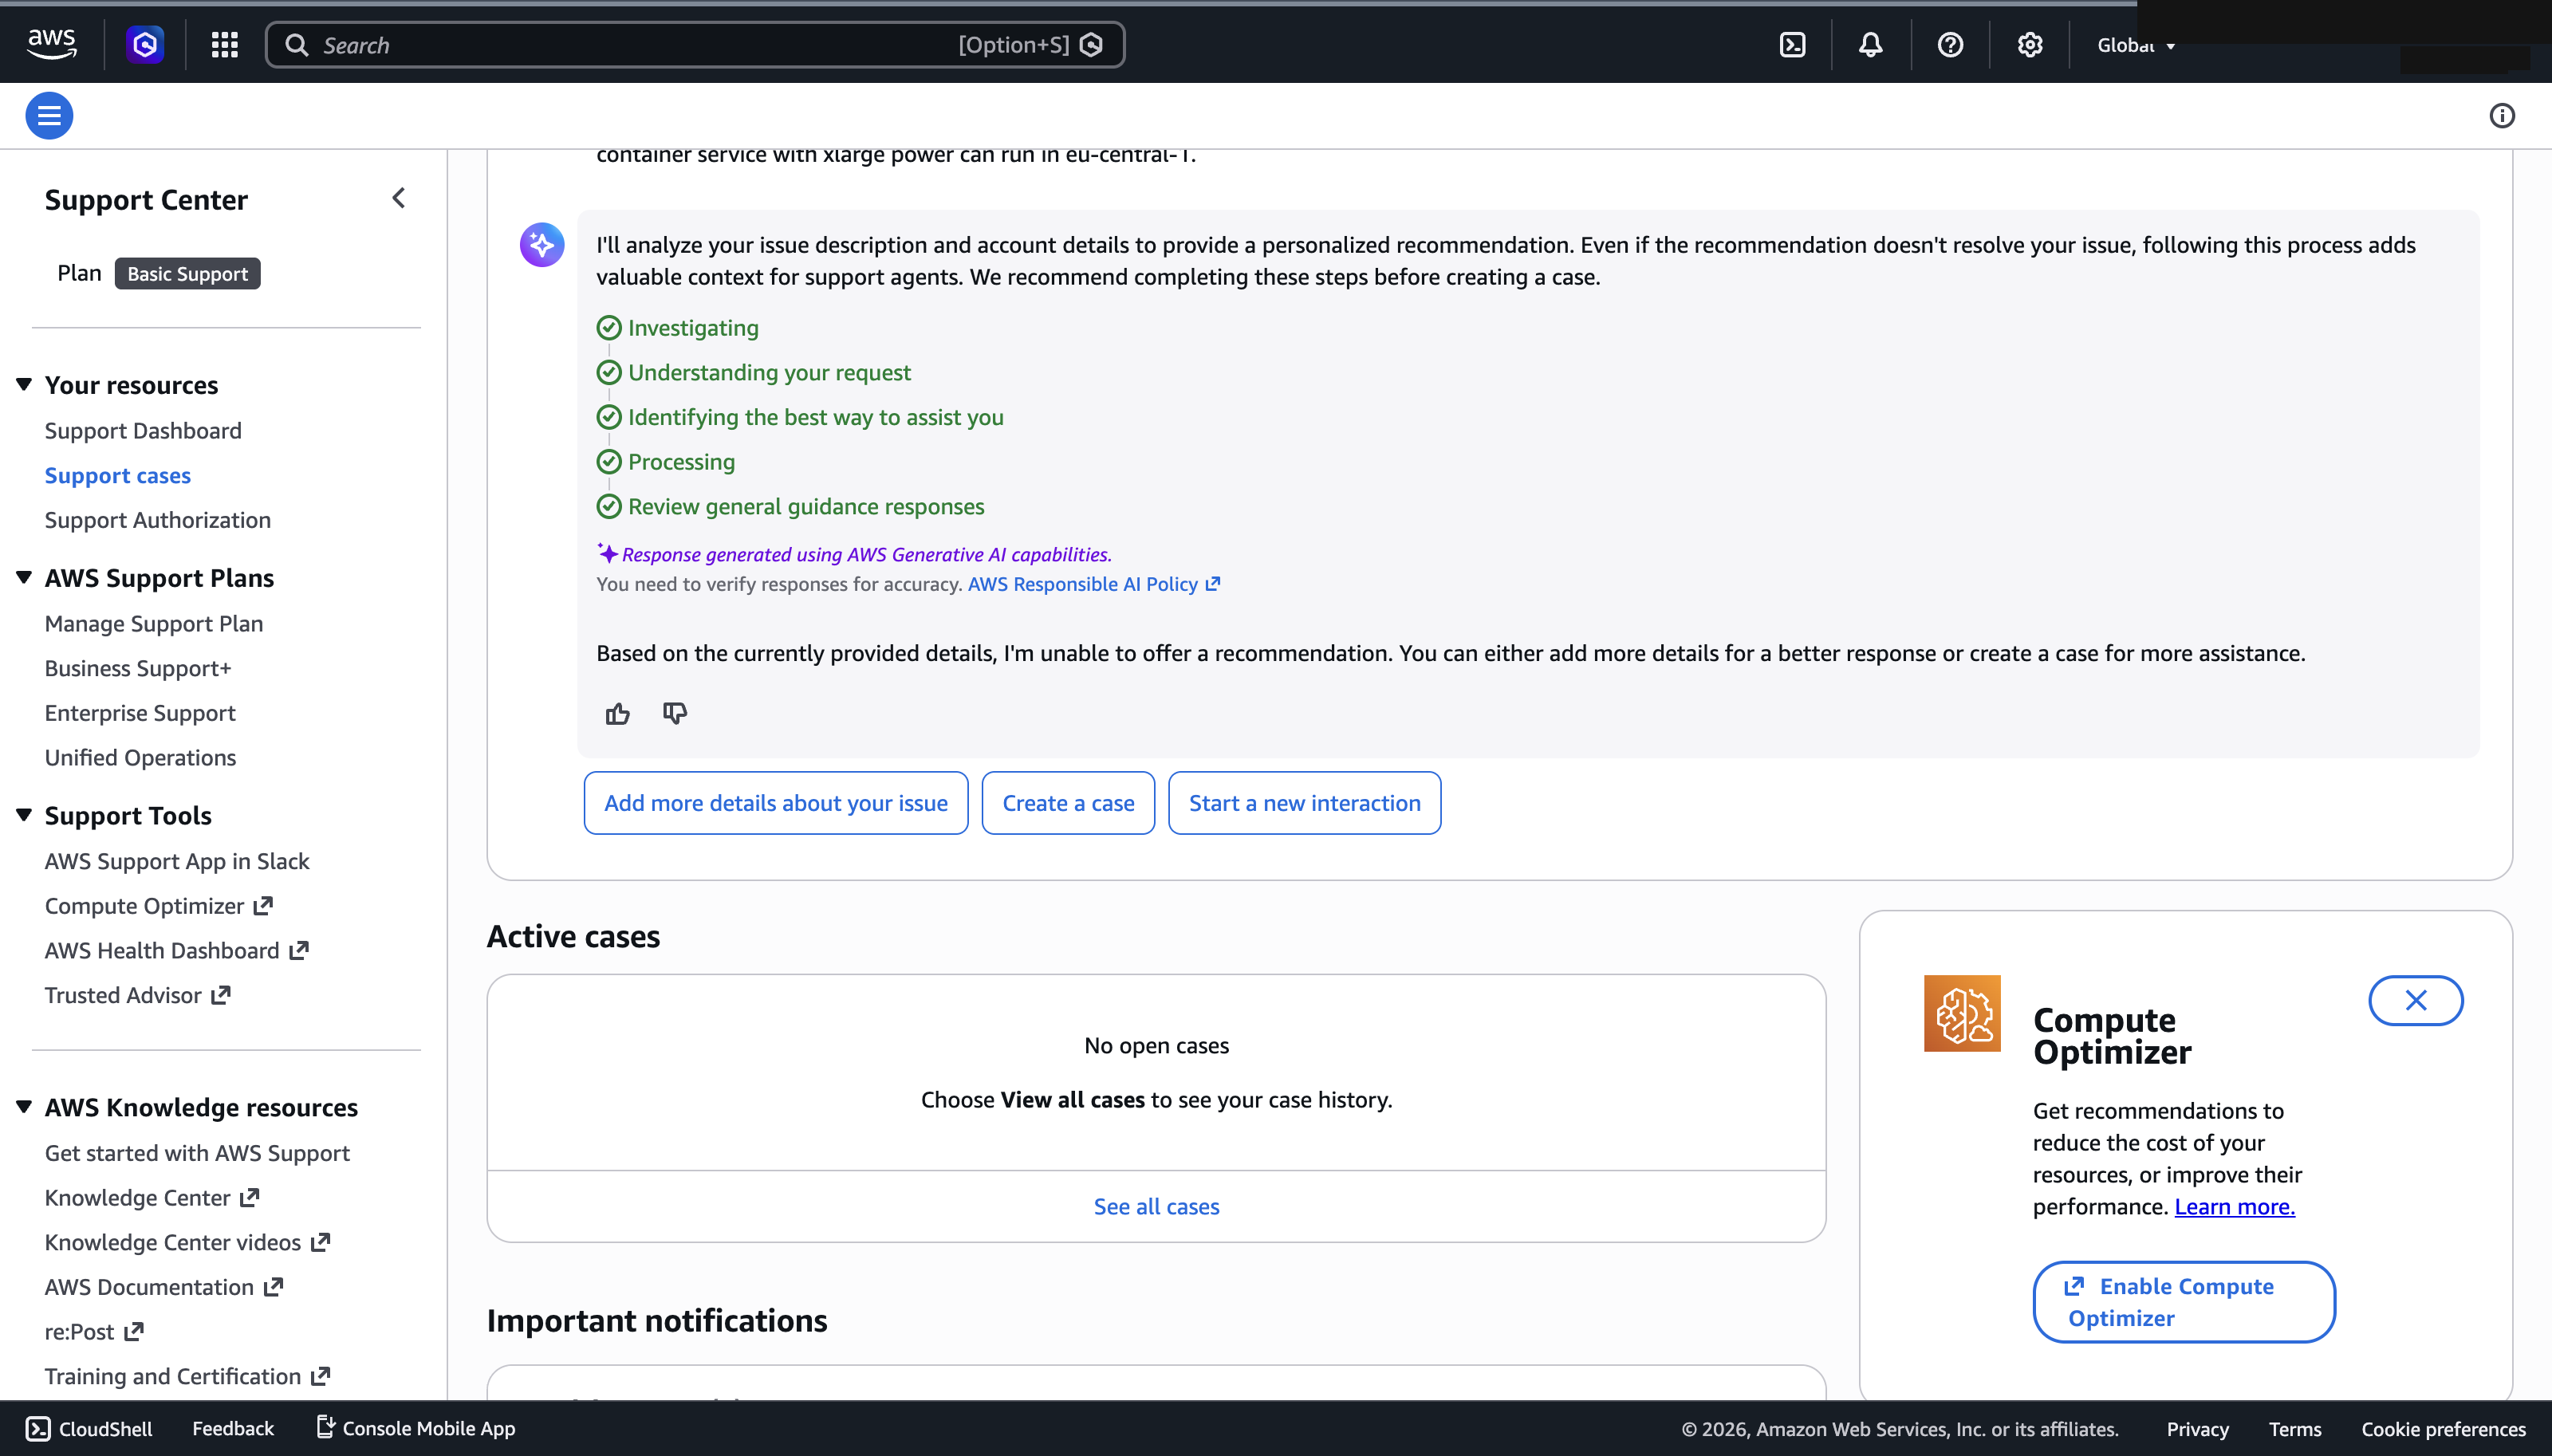
The case form opens with the description already filled in. Classify the case:
Setting |
Description |
Recommended value |
|---|---|---|
Subject |
Specify a subject for the case. |
Lightsail container service limit increase |
Description |
Describe the limit increase, including the region, the power and the error message. |
Please raise the Lightsail container service limit in eu-central-1 to create a container service with the power Xlarge (8 GB RAM, 4 vCPUs). Creating the service fails with: "you've either reached or will exceed your maximum limit of Lightsail Container Services". |
Case type |
Select the type of case. |
Service limit increase |
Service |
Select the affected service. |
Service Limit Increase |
Category |
Select the category. |
Lightsail has no dedicated entry. General |
Severity |
Select the severity. |
General question |
Communication preference |
Select the preferred language and how AWS should respond. |
Web |
Select Submit to create the case. The case is shown with its correspondence and can be found under Support cases at any time:
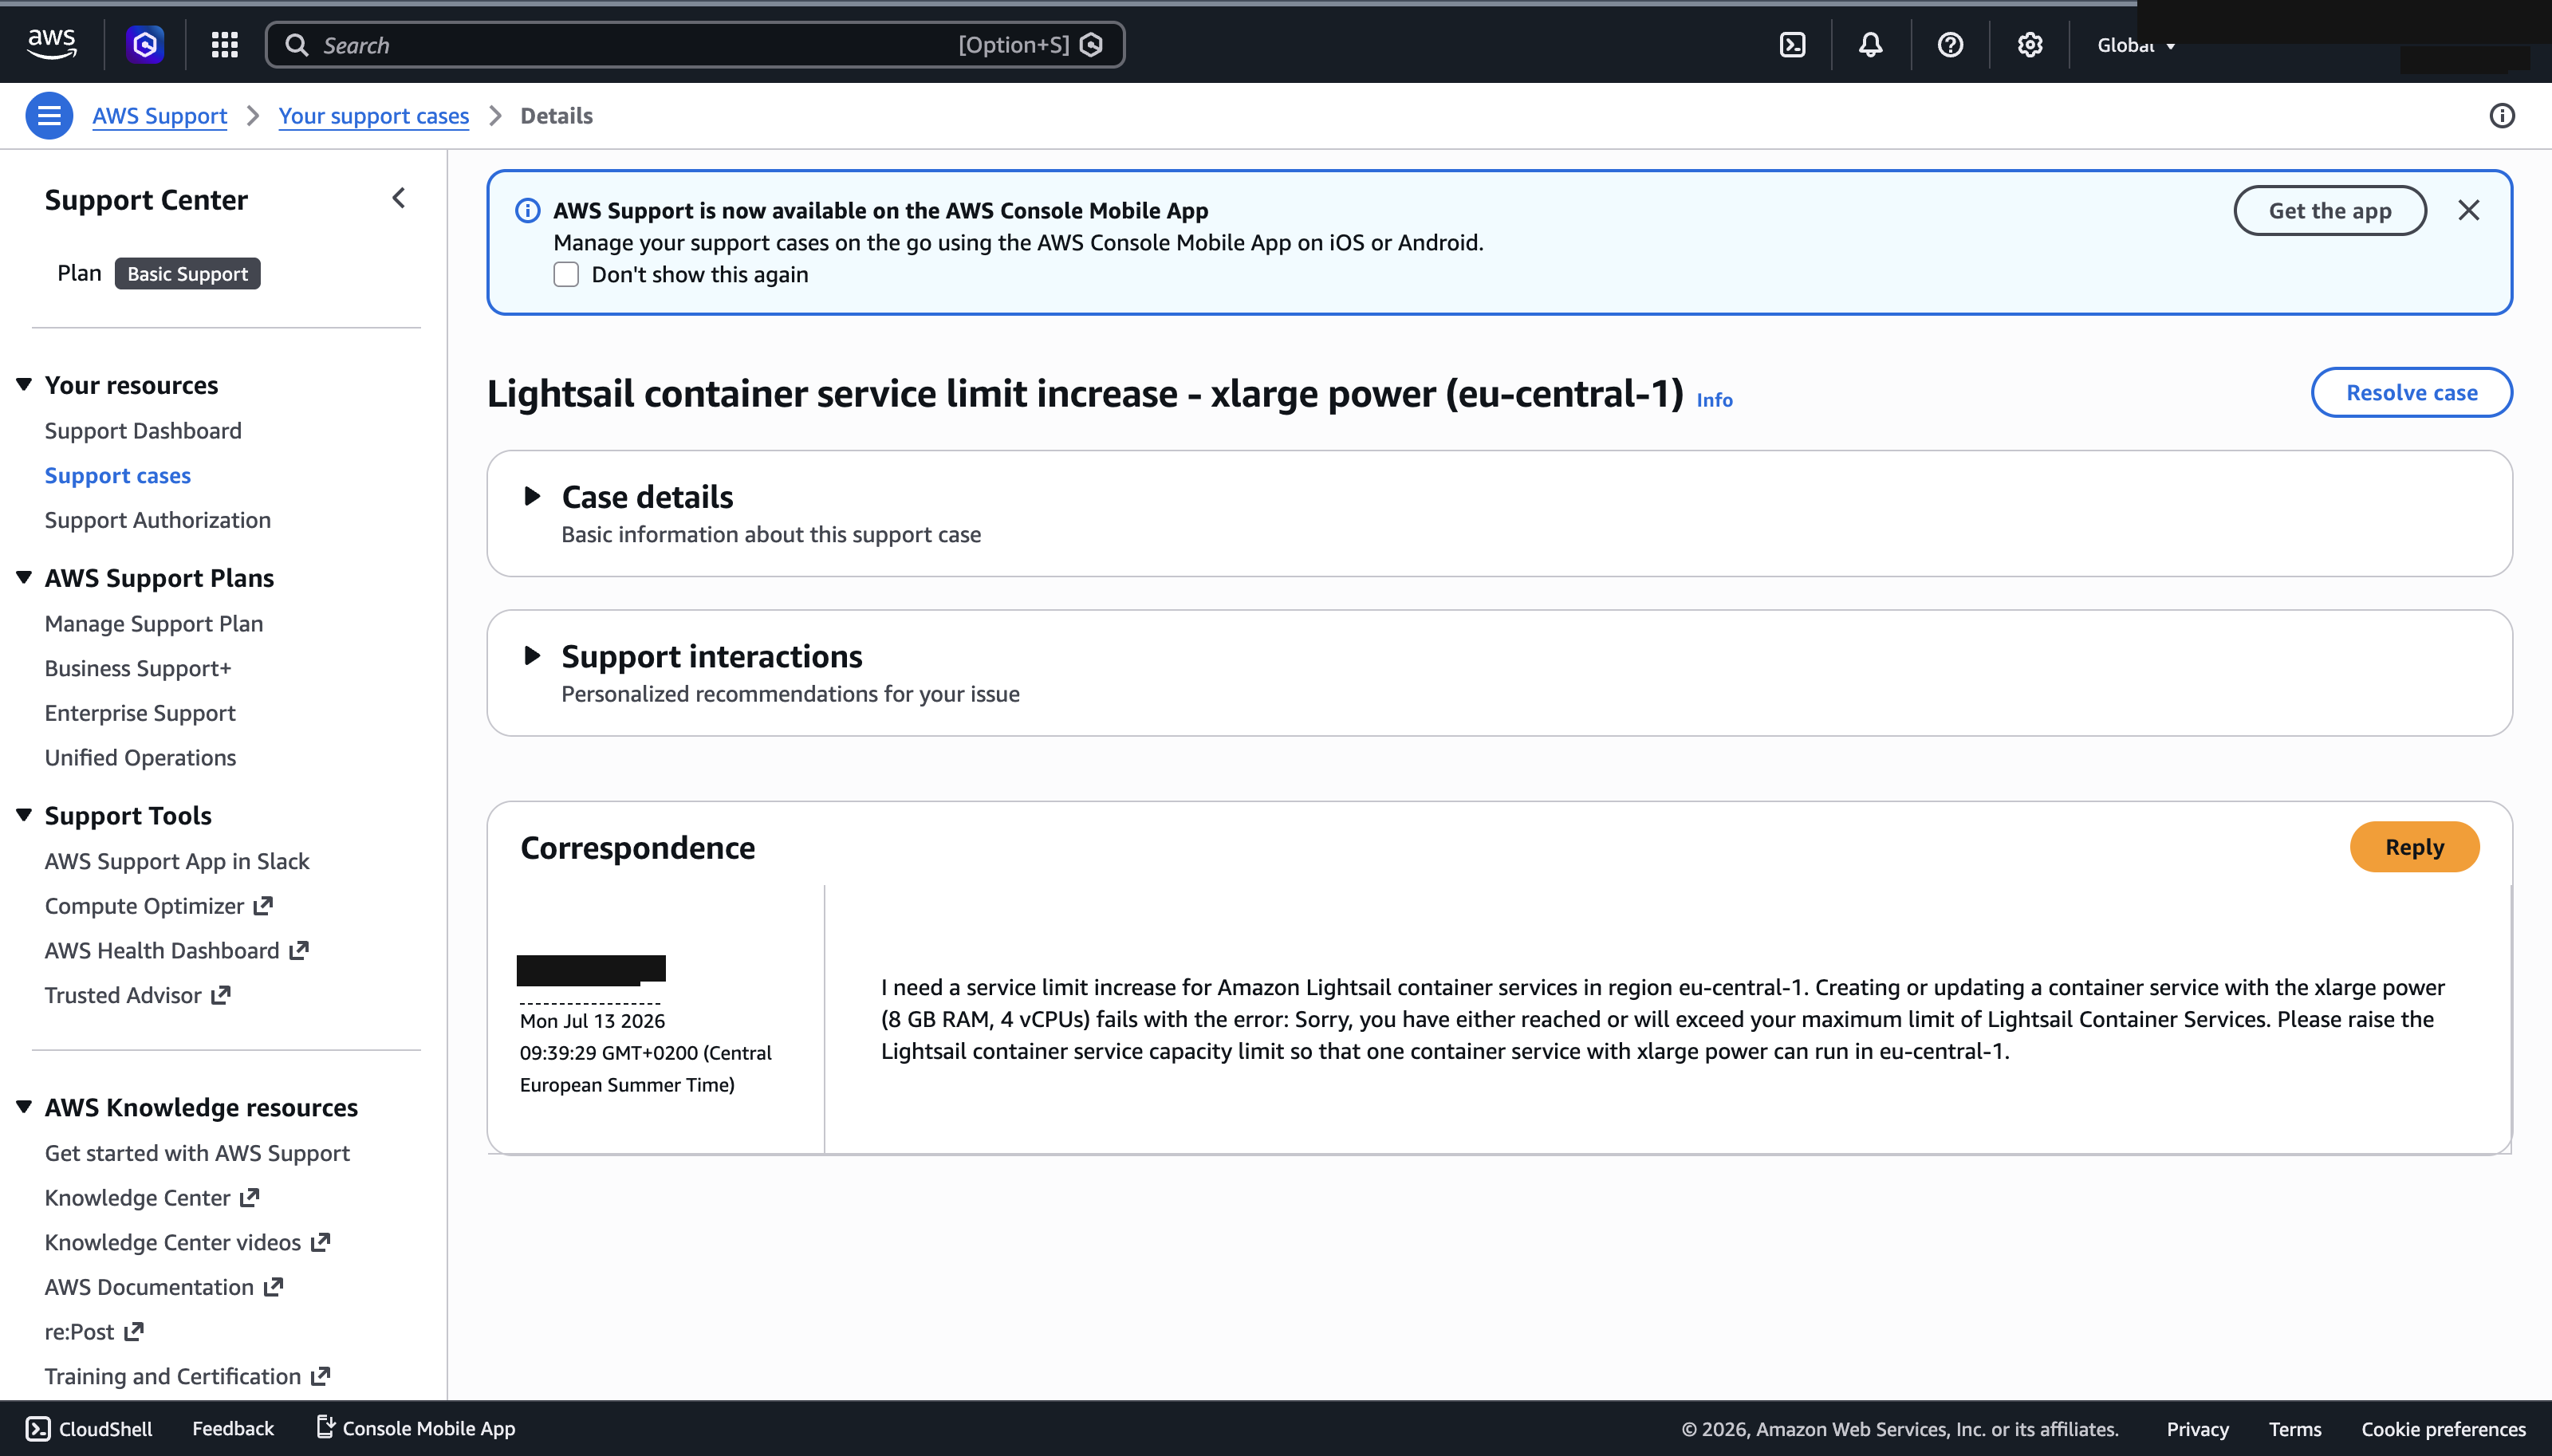
AWS typically responds within one to two business days. After the limit has been raised, the power of the container service can be changed on the Capacity tab.
Alternative: push the image to Amazon ECR
Instead of pushing the image to the container service directly, it can be stored in a private Amazon ECR repository. The repository keeps the image independent of the container service (stored images are deleted together with the service), makes it available to other AWS services and does not require the lightsailctl plugin.
Create the ECR repository
The repository must be created in the same AWS Region as the container service. Navigate to Amazon ECR, select Private registry > Repositories and click on Create repository.
Setting |
Description |
Recommended value |
|---|---|---|
Repository name |
Specify a name for the repository to be created. |
vertigis-dxf-export |
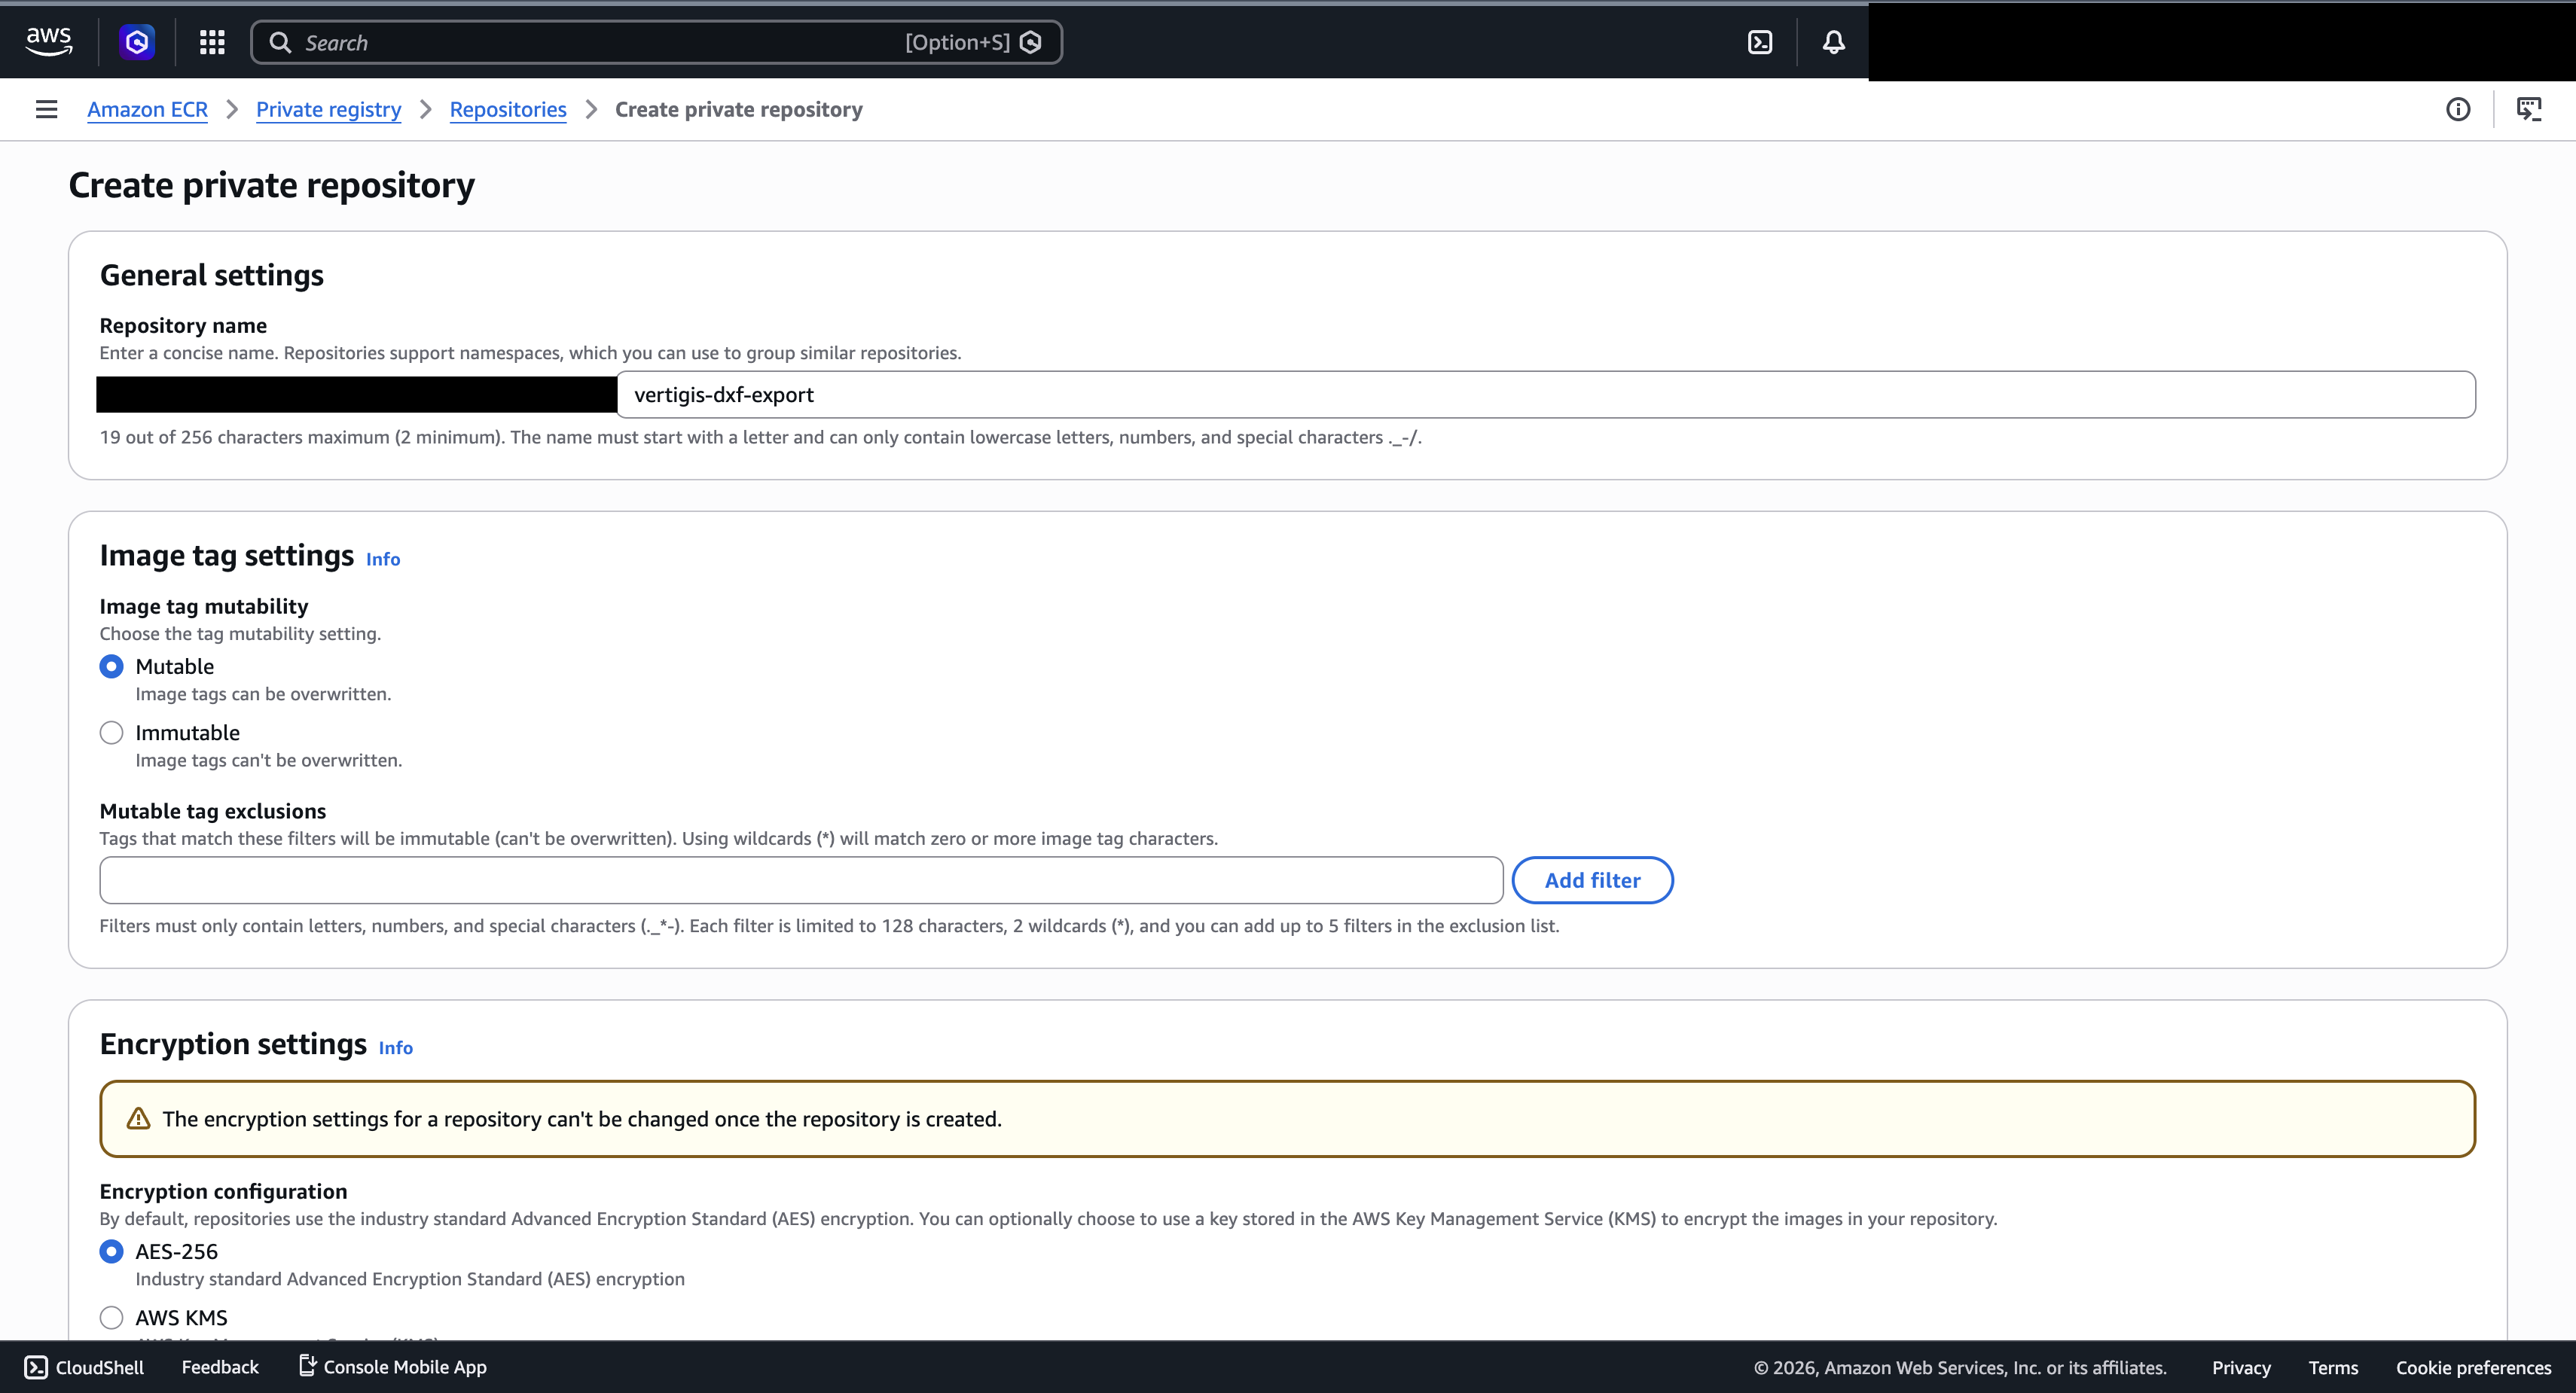
Select Create to create the repository and note the Repository URI.
Push the image to ECR
Pull the image on a local machine, tag it and push it to the ECR repository:
docker login vertigisapps.azurecr.io
docker pull --platform linux/amd64 vertigisapps.azurecr.io/networks/dxf-export
aws ecr get-login-password --region eu-central-1 | docker login --username AWS --password-stdin {Account-ID}.dkr.ecr.eu-central-1.amazonaws.com
docker tag vertigisapps.azurecr.io/networks/dxf-export:1.3.0 {Account-ID}.dkr.ecr.eu-central-1.amazonaws.com/vertigis-dxf-export:1.3.0
docker push {Account-ID}.dkr.ecr.eu-central-1.amazonaws.com/vertigis-dxf-export:1.3.0
Replace {Account-ID} with your AWS account ID.
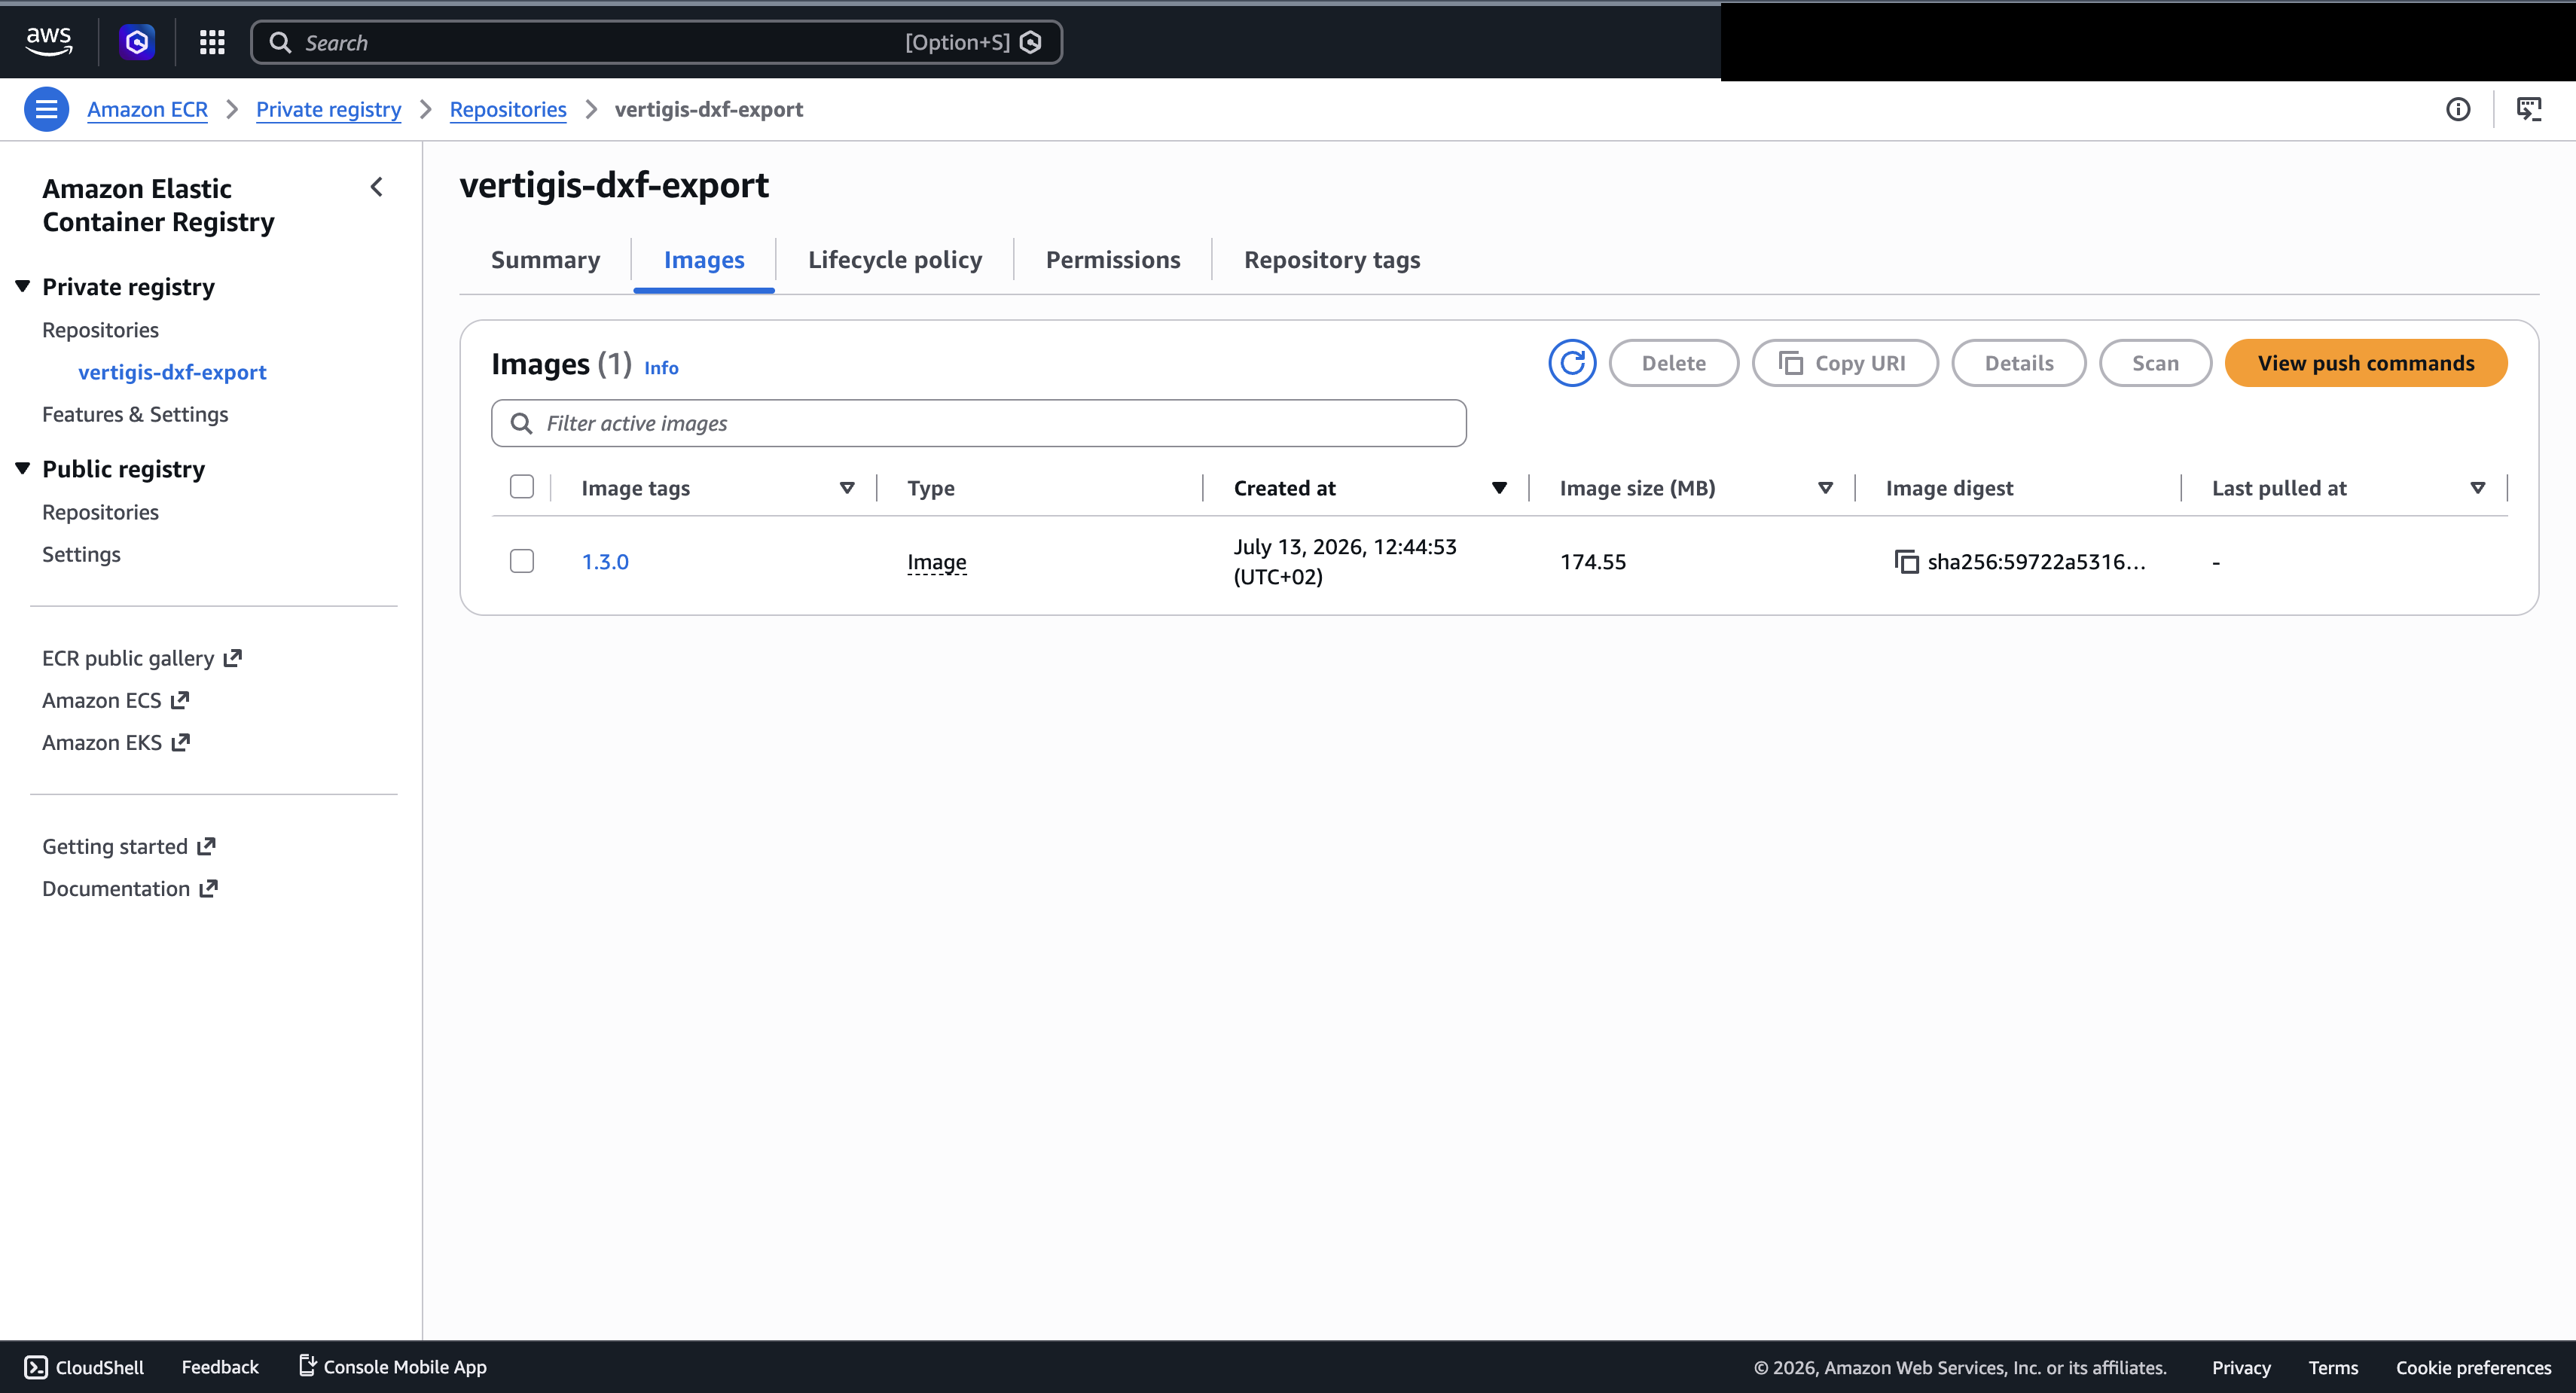
The pushed image is shown in the ECR repository:
Grant access to the ECR repository
The container service needs permission to pull images from the private ECR repository.
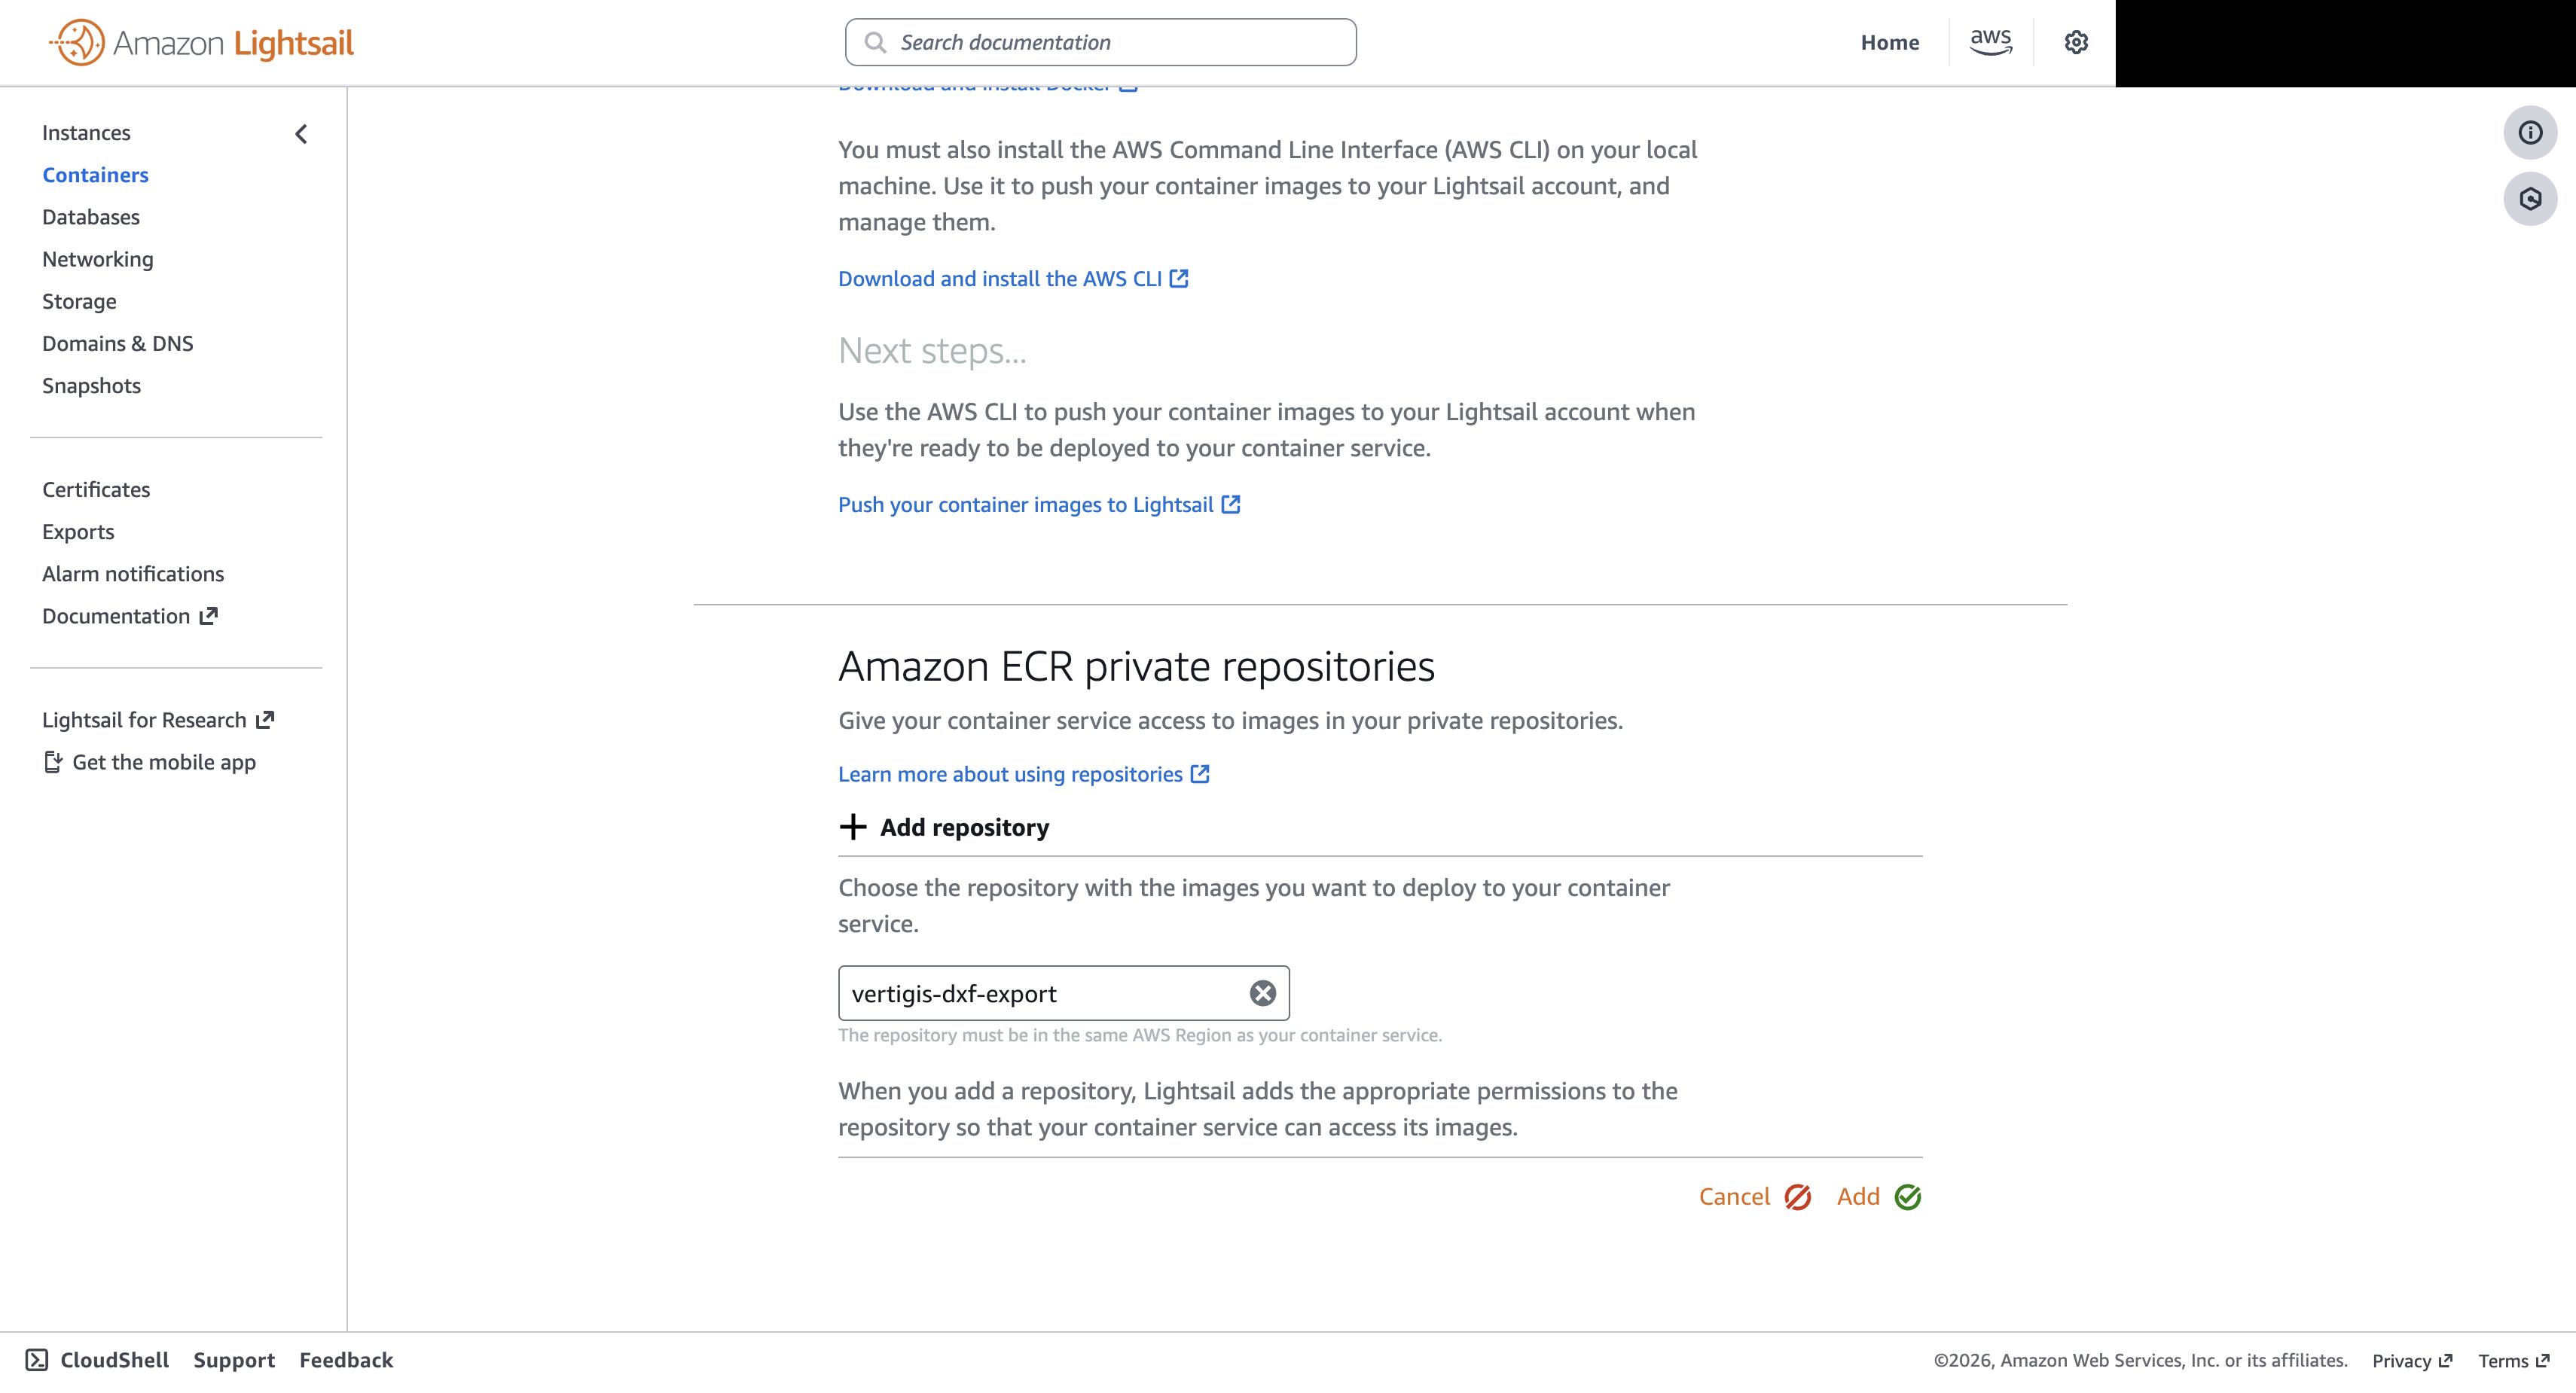
1.Open the container service, select the Images tab and click on Add repository in the Amazon ECR private repositories section.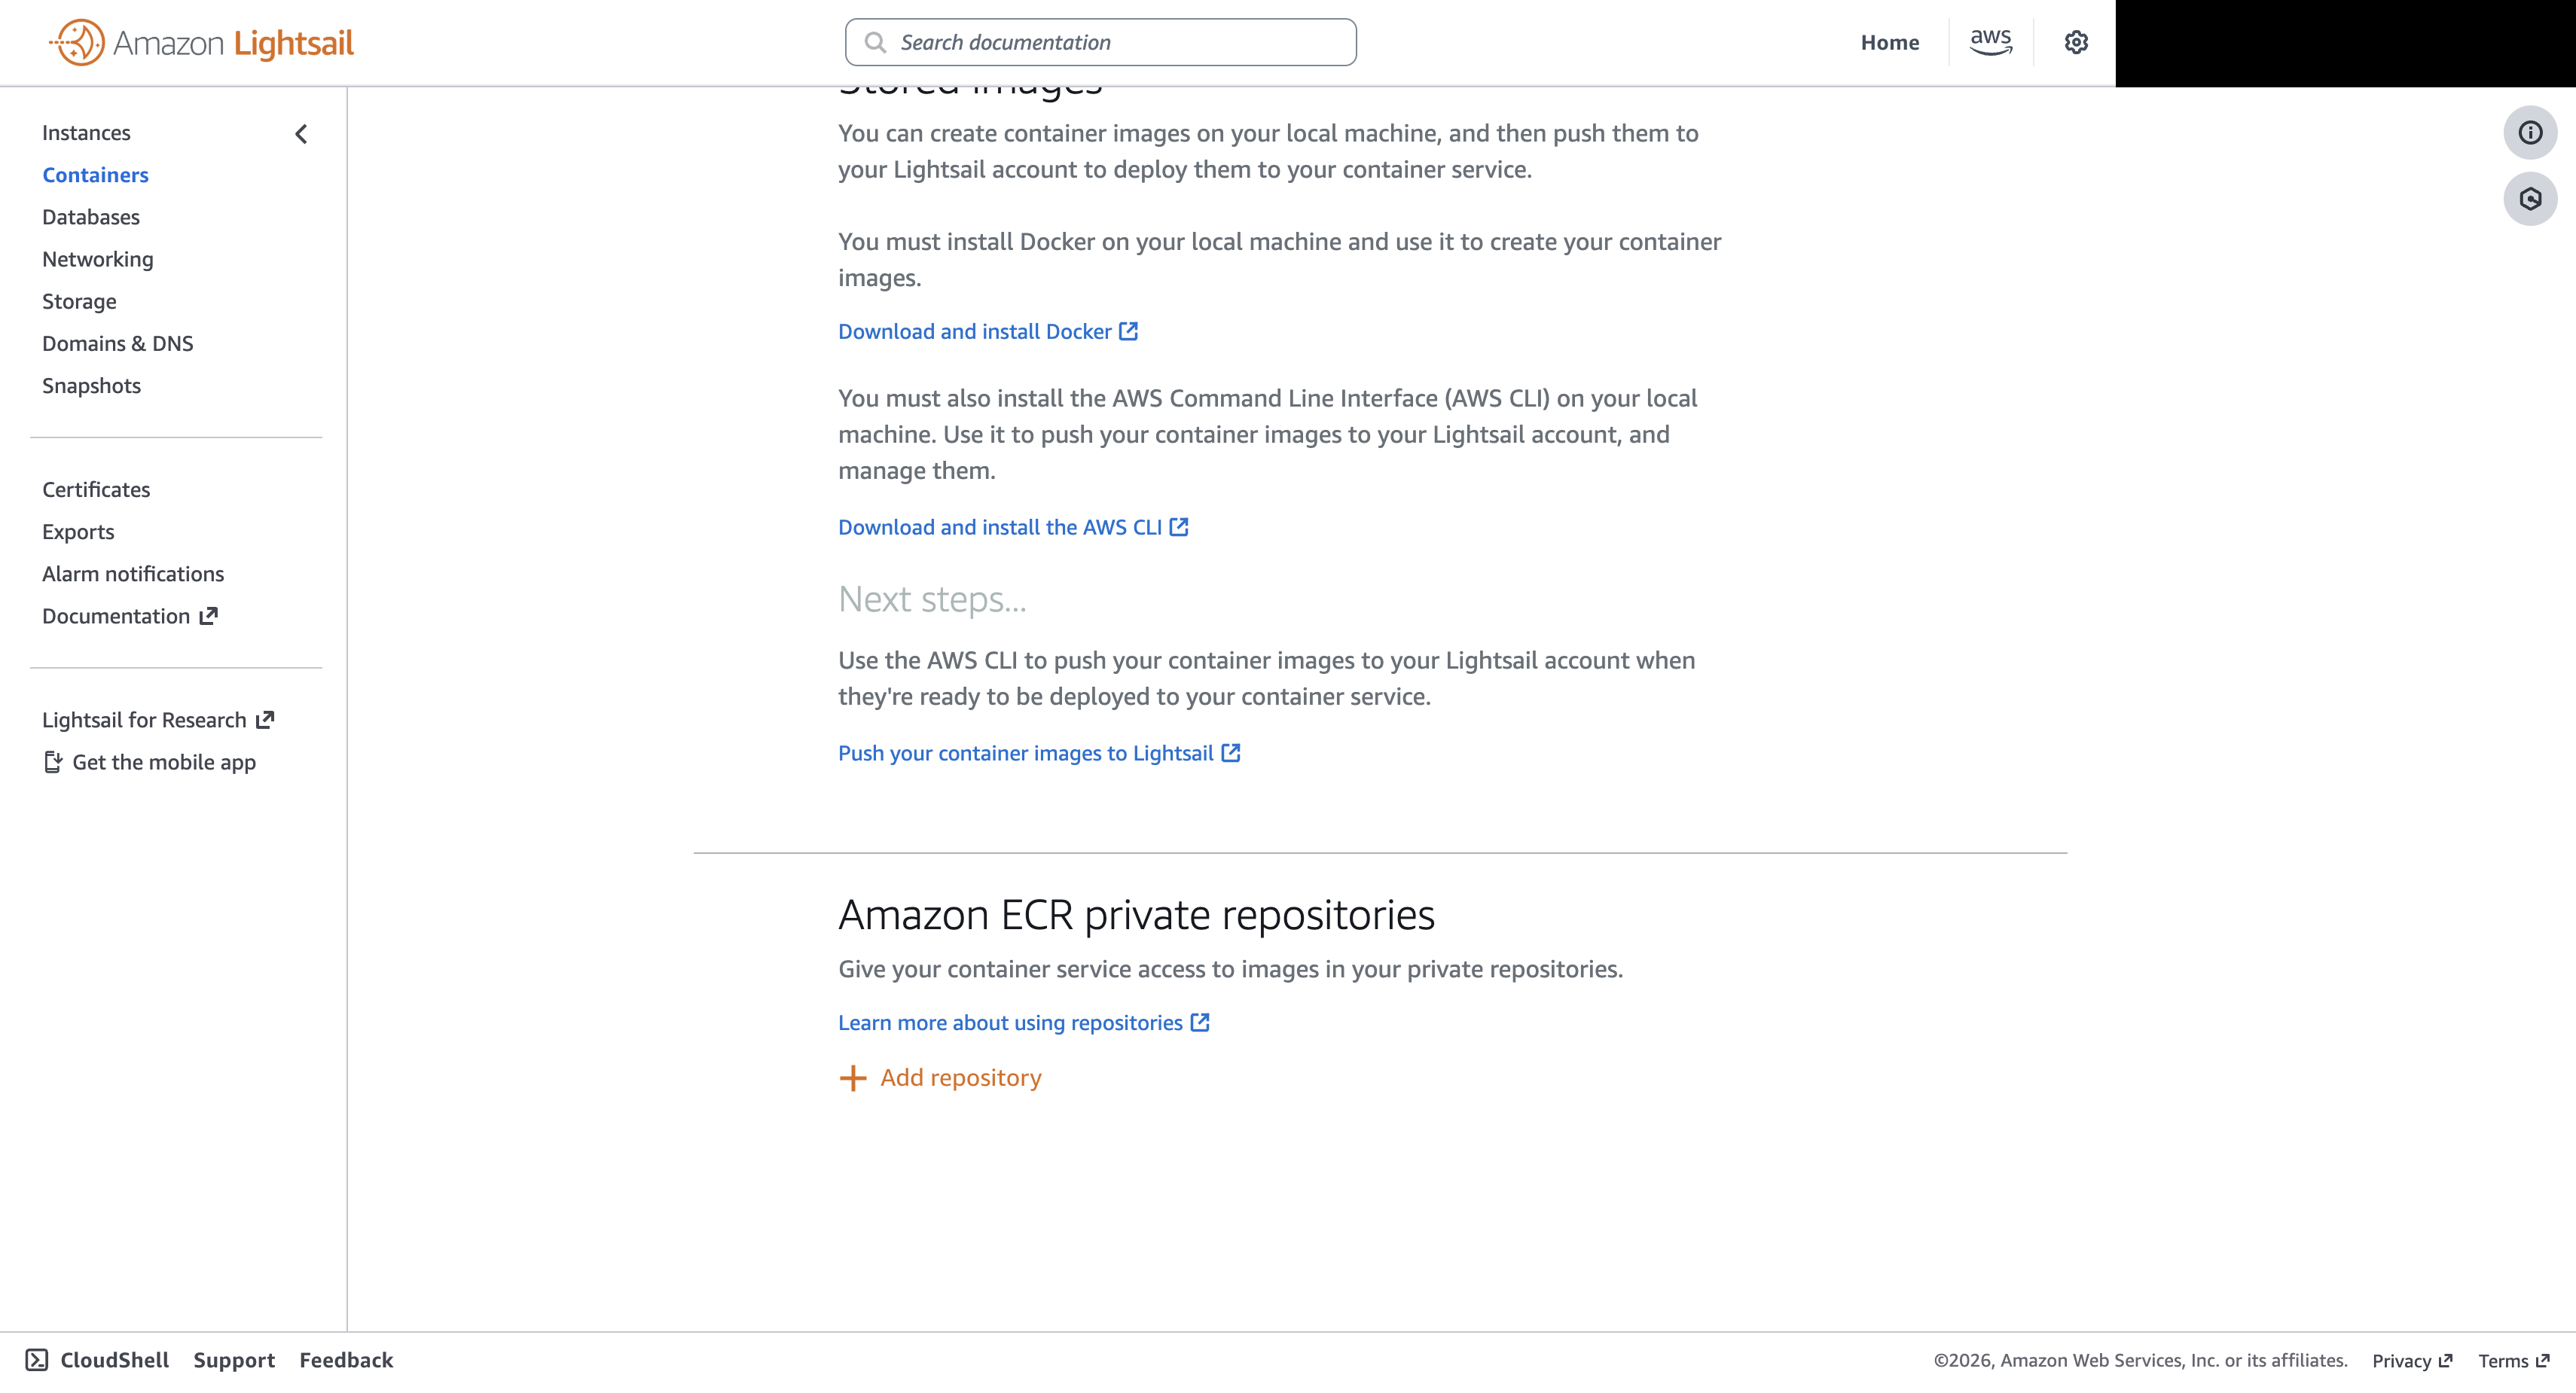
2.Select the created repository and click on Add. Lightsail activates the Amazon ECR image puller IAM role and automatically adds it to the permissions policy of the repository. Wait until the process is completed and select Continue
When creating the deployment, enter the URI of the pushed image (for example {Account-ID}.dkr.ecr.eu-central-1.amazonaws.com/vertigis-dxf-export:1.3.0) as the Image value instead of the stored image reference.