If your company uses a Microsoft Exchange Server stored locally on its own infrastructure for email, you can connect the server to VertiGIS FM so that specified users can receive email and appointment or meeting messages generated by events in VertiGIS FM.
VertiGIS FM is compatible with Exchange 2007 and all later versions.
Connect an Exchange Server to VertiGIS FM
Complete the steps below in VertiGIS FM to connect your organization's Microsoft Exchange Server to your VertiGIS FM instance.
To Connect an Exchange Server to VertiGIS FM
1.Sign in to VertiGIS FM.
2.Navigate to the GroupWare administration page (Administration > Interfaces > GroupWare).
3.In the Server section, click the Add (![]() ) icon.
) icon.

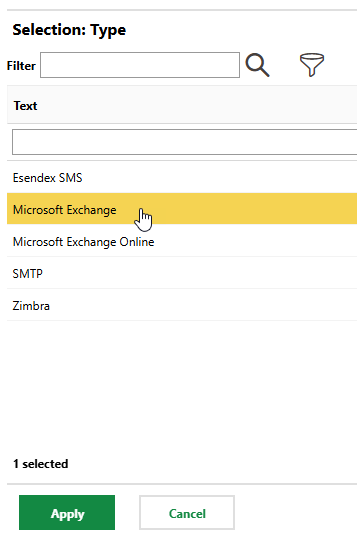
4.Click the arrow in the Type menu. Select Microsoft Exchange Online and then click Apply.
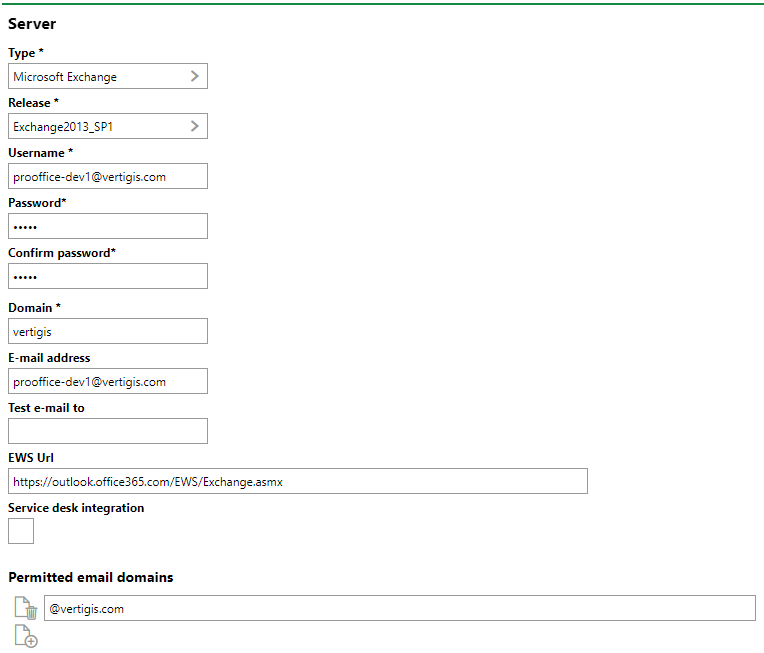
5.Enter the appropriate inputs in each of the form fields. Refer to Microsoft Exchange Server Inputs for descriptions of each field.
6.Click Save and Close.
Exchange Server Fields in VertiGIS FM
Field |
Description |
|---|---|
Type |
The type of server. To configure Exchange, select Microsoft Exchange here. |
Release |
The version of the server (e.g., Exchange2013_SP1). |
Username |
The email address of the sender of emails sent through the server. |
Password |
The Windows user's password. |
Confirm Password |
The Windows user's password re-entered. |
Domain |
Your company's accepted domain in the server. |
E-mail address |
The email address of the person who will be identified as the sender. This field can be left empty. |
Test e-mail to |
|
EWS Url |
Exchange Web Services URL, or address of your Exchange server. The URL should populate automatically if the autodiscover service is activated. If the auto-discover service isn't activated, you can enter the EWS URL manually. |
Service desk integration |
A check box that, if selected, means that all emails sent a specified email address will be open a service desk ticket. Refer to Service Desk Integration for more information. |
Permitted email domains |
The domains to which email or appointment messages are restricted. For example, if the event notified users when a work order is assigned to them, and you assigned the work order to an external contractor whose email address is not in a domain specified in this section, they would not receive an email. You can click the Add ( |
Autodiscover Exchange
Ensure the following URL is available to connect your Exchange server with VertiGIS FM:
https://autodiscover.domain.de/autodiscover/autodiscover.xml
Replace domain.de with what appears after the @ symbol in the email addresses for your company's directory.
After you log in with the domain\user and password, the browser will display a string of code that resembles the one below:
<?xml version="1.0 encoding="UTF-8"?>
< Autodiscover xmlns =" http://schemas.microsoft.com/exchange/autodiscover/responseschema/2006 "> < Response > < Error Id =" 2248572075 Time = " 16:02:12.7667649 " > < ErrorCode > 600 </ ErrorCode>
< Message > Invalid request </ Message > < DebugData /></ Error ></ Response ></ Autodiscover >
Contact support if discover.domain.de is not found.
Service Desk Integration
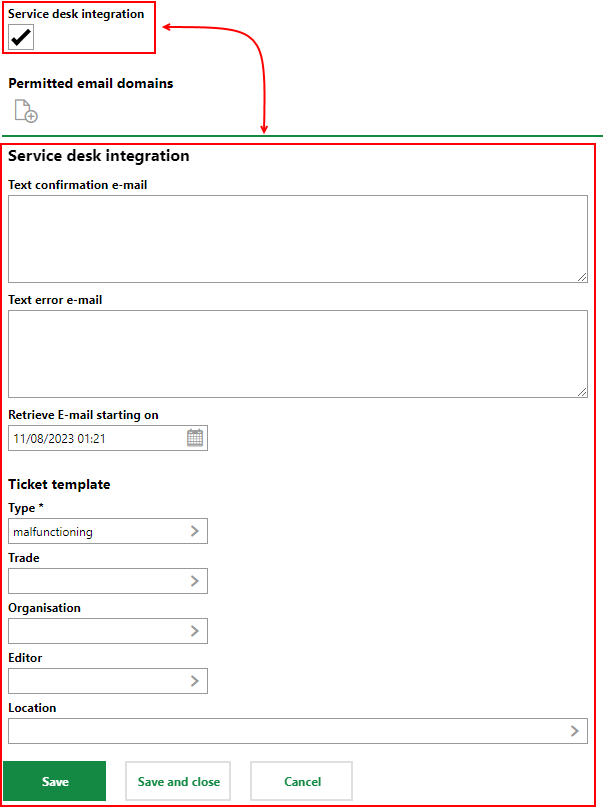
The Service Desk Integration form becomes visible on the server configuration form when you select the Service Desk Integration check box.
Service Desk Integration Check Box and Corresponding Form
Service Desk Integration Form
Field |
Description |
|---|---|
Text confirmation e-mail |
Message indicating a corresponding service desk ticket has been created in the email. |
Text error e-mail |
Message indicating a corresponding service desk ticket was unable to be created in the email. |
Retrieve E-mail starting on |
The date and time the service desk integration with the email account will begin. |
Ticket Template |
Refer to Service Desk Ticket Fields for ticket information on the fields contained in this section. |
Events
After connecting your organization's SMTP server, you can configure VertiGIS FM events that will trigger notifications. Refer to Groupware Events.