To enable the Attribute Form Service in a VertiGIS Studio application, you must:
1.Add an App Library Link referencing the Attribute Form Service JavaScript file
2.Register the service in item.json - via the designer UI
3.Manually add the workflow entry to app.json
4.Specify Attribute Form Configuration
Step 1 - Reference the Attribute Form Service Script
The Attribute Form Service is distributed as a JavaScript file hosted at:
https://static.vertigis.com/workflow-activities-attribute-editing/{version}/attributeformservice.js
Replace {version} with the desired release, for example 1.10.2.
Older versions (e.g. 1.7.0) remain available at their respective version paths. Ensure the version used for the service script matches the version used in the workflow URL in Step 3.
The Attribute Form Service does not appear in the Services tab unless it has been registered via an App Library Link.
The application must first be saved as a portal item before the Upload Library option becomes available.
To add the library link:
1.Open an existing application or create a new application in VertiGIS App Designer.
2.Select File.
3.If Upload Library is disabled, select Save As to save the application as a new portal item, then return to File.
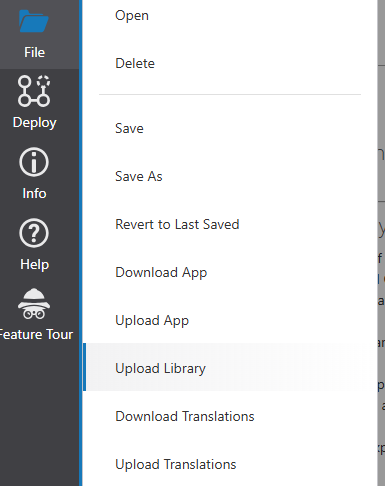
4.Select Upload Library.
5.In the dialog, enter the service URL in the Add Library Link text box:
https://static.vertigis.com/workflow-activities-attribute-editing/{version}/attributeformservice.js
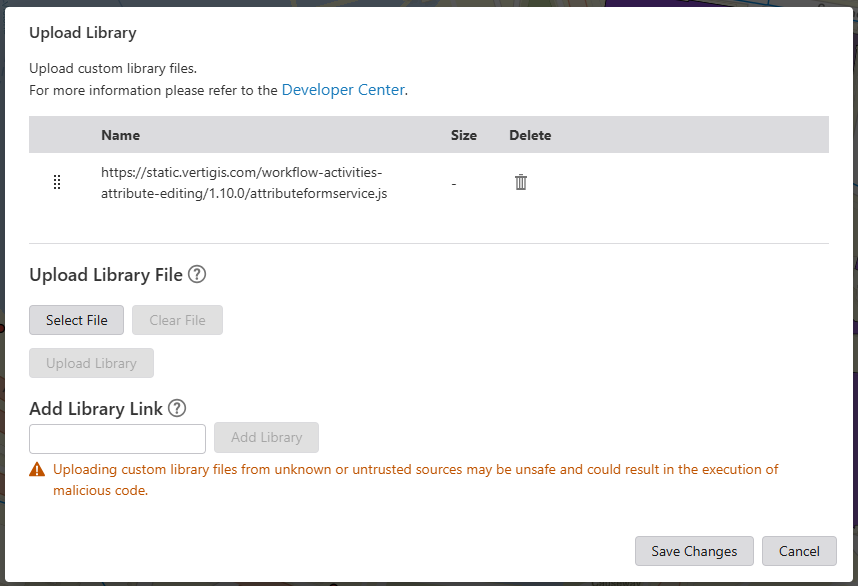
6.Click Add Library to register the service.
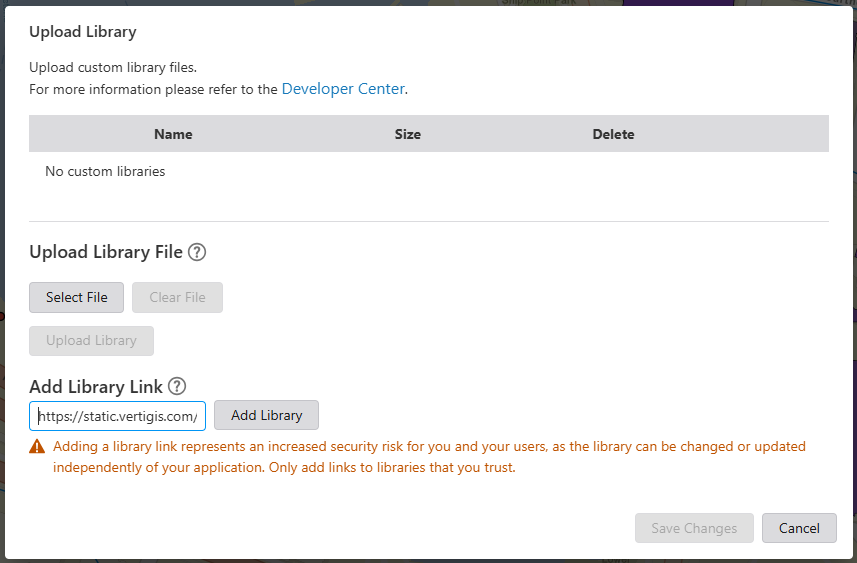
7.Click Save Changes to write the service registration to item.json.
Why is a portal item required?
item.json is ESRI metadata attached to all portal items. The library registration is stored there, which is why the app must exist as a portal item before services can be added.
After saving, the Attribute Form Service will appear in the Services tab, where you can select a configuration.
Step 2 - Edit app.json to Add the Workflow Entry
After the service is registered, an additional block must be manually added to app.json.
To open the JSON editor in VertiGIS Studio Web Designer, press Ctrl+Shift+E.
Locate the attribute-form-service entry (added automatically when you selected the service) and add the workflow block immediately after it:
[
{
"id": "attribute-form-service",
"$type": "attribute-form-service-type"
},
{
"id": "edit.display-attribute-editor",
"title": "{a title or translation-key}",
"commandArgumentInput": "context",
"icon": "form",
"url": "https://static.vertigis.com/workflow-activities-attribute-editing/{VERSION}/attribute-form-workflow.json",
"$type": "workflow"
}
]
The version in the url field must match the version used when registering the service in Step 2.
Step 3 - Add the Workflow to the Layout
The app.json also contains the application layout as an XML string. To display the attribute form in a panel, that panel's XML must reference the workflow added in Step 3.
To access the layout XML, open the JSON editor (Ctrl+Shift+E) and use the switch in the editor to enable Show Layout.
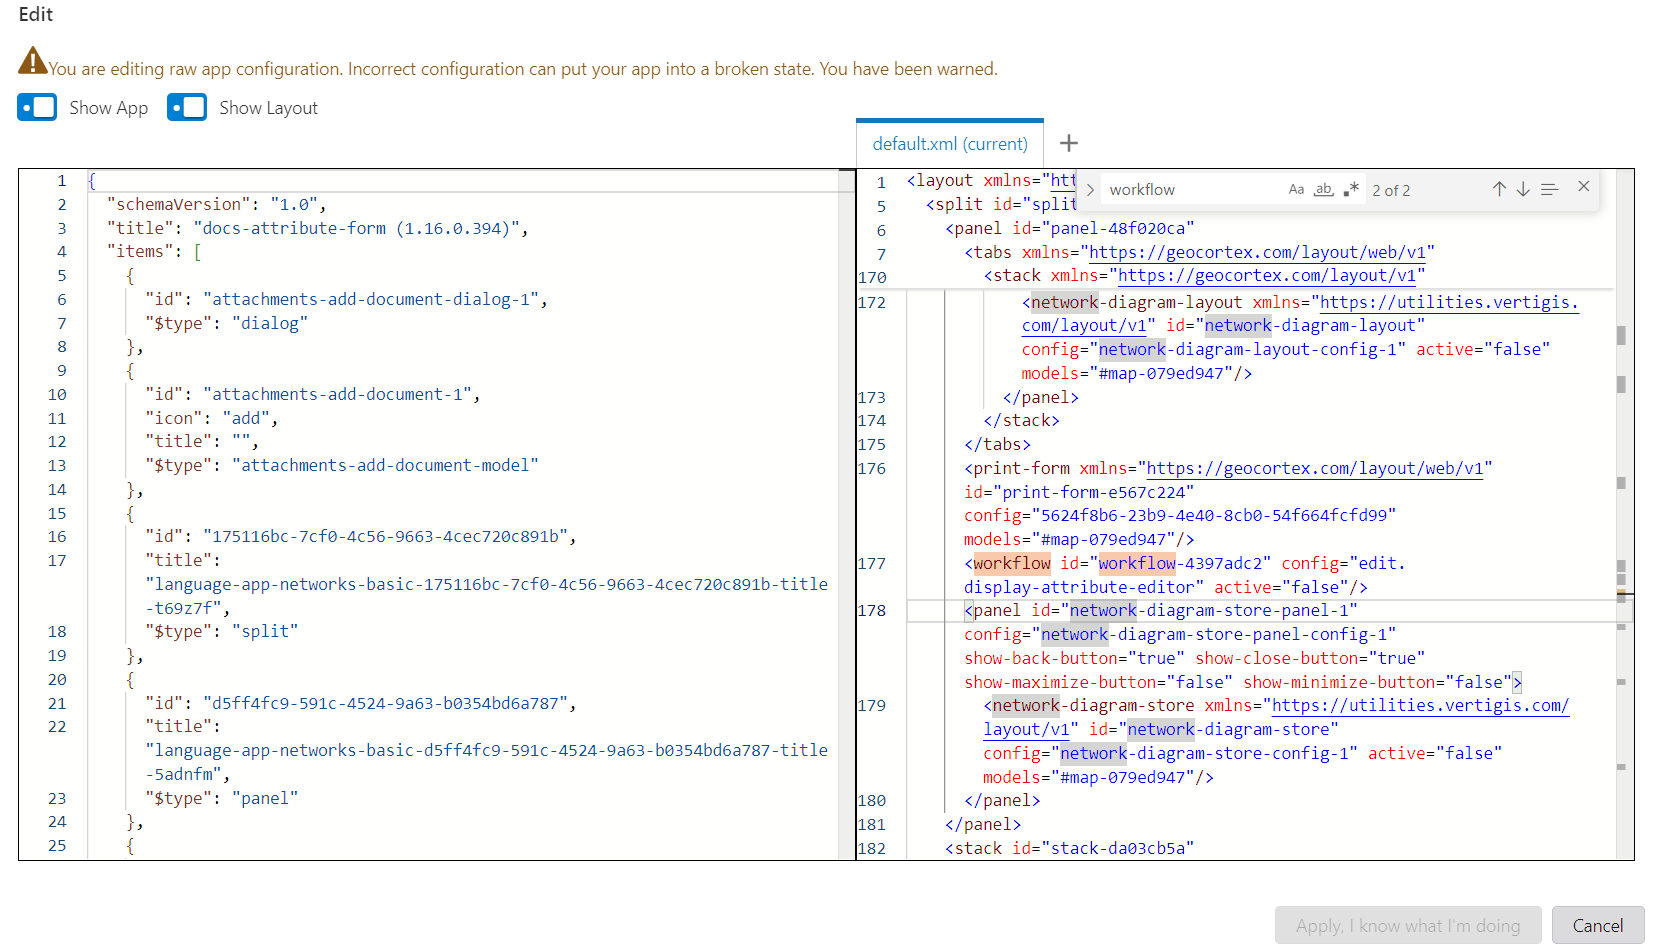
Locate the <panel> element where the attribute form should appear and add the following line inside it:
<workflow id="workflow-attribute-form" active="false" config="edit.display-attribute-editor"/>
For context, it sits inside the panel like this:
<panel id="panel-ca25ef76" show-close-button="false" width="26" config="panel-config-1">
...
<workflow id="workflow-attribute-form" active="false" config="edit.display-attribute-editor"/>
...
</panel>
Two things to keep in mind:
•The config value (edit.display-attribute-editor) must match the id of the workflow block added to app.json in Step 3.
•The id attribute (workflow-attribute-form) can be chosen freely, but must be unique within the layout.
Step 4 - Specify Attribute Form Configuration
Once the workflow entry is in place, open the Services tab in App Designer. The Attribute Form Service will now be accessible. Selecting a configuration from the service tab will add additional properties to the attribute-form-service block in app.json automatically.
The Attribute Form appears as a service in the Studio Web Designer. You'll find the Attribute Form Service entry in the Services tab:

The service lets you specify the configuration in two ways:
•By portal item tag (a label you assign to your configuration)
•By portal item ID or URL (the direct identifier)
Your configuration is stored as a portal item in ArcGIS Portal, making it easy to share and reuse across different apps.
Configuration transforms the Attribute Form from a simple field list into a powerful, user-friendly editing tool. It goes far beyond just organizing fields, enabling:
•Organization: Group related fields and control their display order
•Localization: Support multiple languages for international teams
•Business Rules: Override database constraints or add custom validation
•Smart Interactions: Create dependent fields, dynamic calculations, and conditional visibility
•Enhanced Usability: Add descriptions, tooltips, and domain-specific terminology
Scenario:
For a telecommunications company managing fiber optic cables, configuration could:
1.Group fields into "Physical Properties" (diameter, material) and "Network Data" (capacity, status)
2.Show cable capacity in multiple languages (English, French, German)
3.Automatically calculate bandwidth based on fiber count and type
4.Only show "Repair Date" field when status is "Damaged"
5.Provide dropdown lists of approved vendor names

Configuration Storage
The configuration is stored as a JSON file in an ArcGIS Portal item. This makes it:
•Shareable: Use the same configuration across multiple apps
•Version-controlled: Track changes and roll back if needed
•Collaborative: Multiple team members can contribute
Version Reference
Component |
URL Pattern |
|---|---|
Service Script |
https://static.vertigis.com/workflow-activities-attribute-editing/{version}/attributeformservice.js |
Workflow JSON |
https://static.vertigis.com/workflow-activities-attribute-editing/{version}/attribute-form-workflow.json |
Versions such as 1.7.0, 1.10.2, etc. are available. Always keep the version consistent across both URLs in your configuration.
Summary Checklist
•Application saved as a portal item
•App Library Link added with the correct versioned service URL
•Library saved (written to item.json)
•app.json manually updated with the edit.display-attribute-editor workflow block
•The app.json also contains the application layout as an XML string
•Workflow URL version matches service URL version
•Configuration selected in the Services tab