Check the SOAP Outbound:
1.Log in the VertiGIS Integrator.
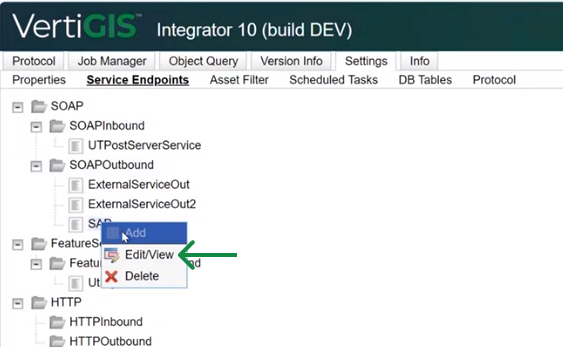
2.Go to Settings> Service Endpoints.
3.Expand the SOAP folder, then the SOAP Outbound one.
4.Right click on the SAP file and click on Edit/View (if no SAP file exists, create one).
In order to send data to a SOAP endpoint, we need a running service that can receive the SOAP request.
5.On the Service Endpoint modal, make sure you have the correct URL and Request XSL file.
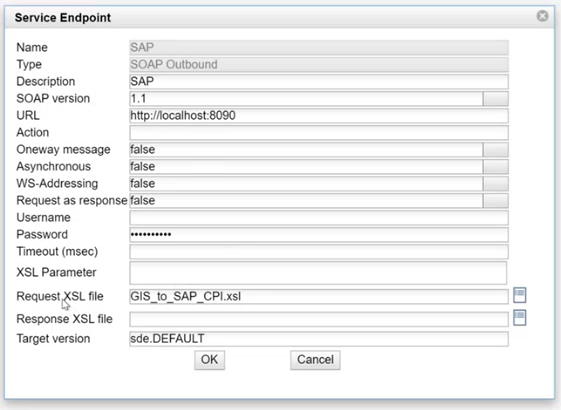
In this example, the URL points to a local machine with no service running, therefore upon making a query, you will receive an error message.
Generate a message from Feature Service:
1.Navigate to the ‘Object Query’ tab to generate messages with the correct data:
For this test, we are using the UtilityNetwork feature service (already defined in the FeatureServiceOutbound endpoint ) and we will get 2 messages as we have 2 features/stations identified in the Berlin demo data.
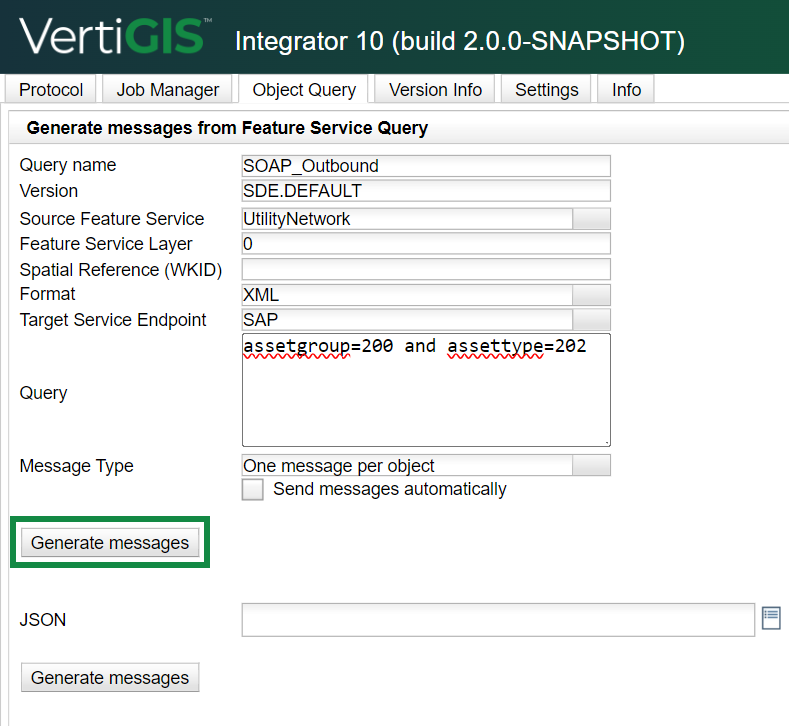
2.Enter the query name in the Query name field.
3.Select the desired feature service from the Source Feature Service drop down.
4.Enter the Feature Service name layer number in the Feature Service Layer.
You can find each layer number for a feature service in the ArGIS Rest Service Directory>Services>ServiceName>ServiceName (Feature Service), under the Layer field. In this test scenario we have the number 0 corresponding to the ELEAssembly.
5.Select the SAP endpoint from the Target Service Endpoint drop down menu.
6.In the Query field, add the values for the asset group and type.
7.In the Message type field, selecting One message per object will result in multiple messages being displayed in the Protocol table (e.g. for 12 objects, the Protocol table will display 12 messages). To see all the objects under one message, select the One message for all objects option.
8.Opt for the Send messages automatically option by ticking the box near it.
If we don’t check the Send messages immediately checkbox, the messages will only be written to the Protocol table and we would have to send them explicitly from there.
8.Click on the first Generate Message button.
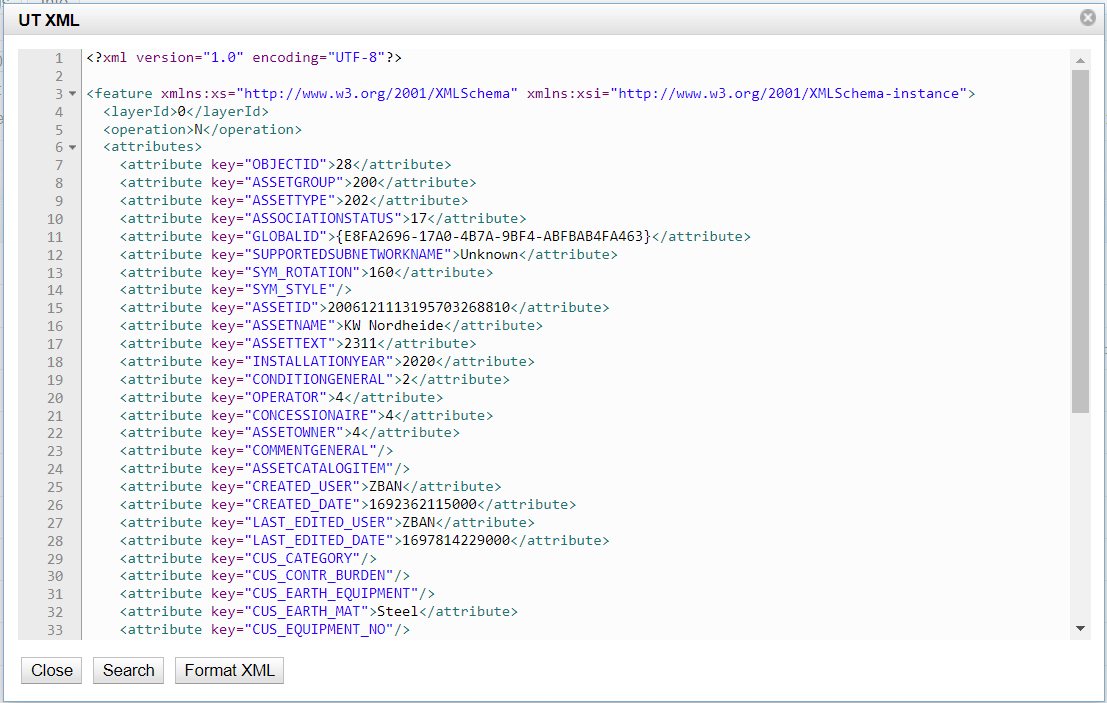
View the Message XML in the Protocol table:
1.Navigate to the Protocol tab.
2.Refresh the table by clicking on the refresh button, situated in the left part.

3.Check the content of the UT XML (we can see that the assetGroup is 200 and the assetType is 202):