This topic purpose is to showcase how to create a feature station locally, in the SoapUI tool.
Prerequirements:
•Have access to an XSL example file (for this scenario the SAP_to_GIS.xsl file is used).
•Configure your XSL file with predefined parameters, such as attributes, geometry, etc.
•Access to the Berlin demo data.
•Access to VertiGIS Integrator.
•Check if the Soap inbound enpoint points to the correct XSL file.
•Access to SoapUI.
Check out the SoapUi chapter for the tool installation.
The VertiGIS Integrator comes with a predefined Soap inbound endpoint, called UTPostServerService. In order to be able to send data to UTPostServerService, we recommend installing the SoapUI tool.
Check if the Soap inbound endpoint points to the correct file:
1.Open VertiGIS Integrator
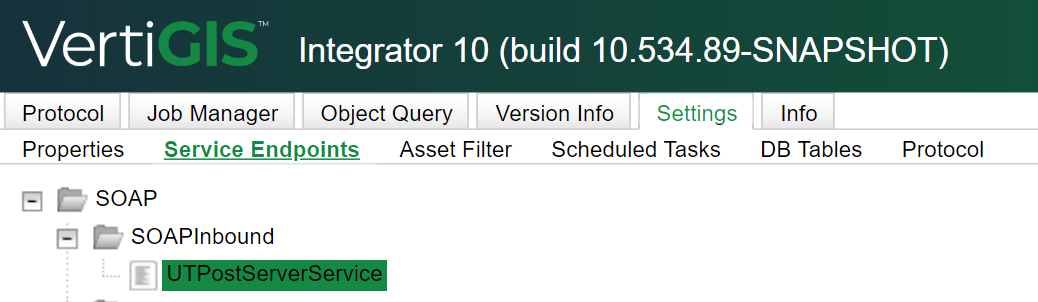
2.Navigate to the Settings tab>Service Endpoints>SOAP>SoapInbound>UTPostServerService.
3.Right click on the UTPostServerService and then click on the Edit/View option.
4.Check if the Request XSL File matches the one from your local drive (found in the Apache folder webapps>utpostserver>WEB-INF>xsl folder).
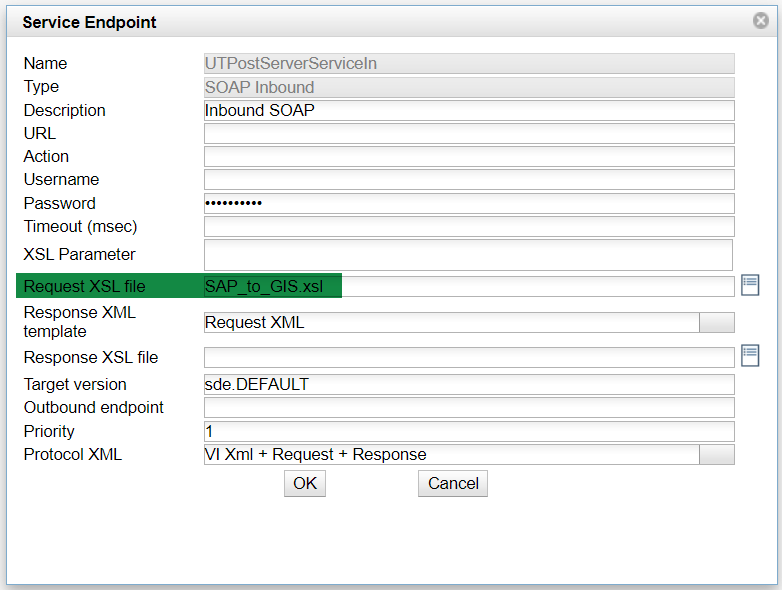
5.If the file names match, click on the OK button. If the file names are different, rename the file in the Request XSL file field accordingly and click on the OK button.
For this showcase scenario we are using the SAP_to_GIS.xsl file.
Configure your XSL file:
1.Open the Apache folder in Windows Explorer.
2.Navigate to the webapps>utpostserver>WEB-INF>xsl folder.
3.Using Notepad++, edit the XSL file corresponding to the Request XSL file (we are using the SAP_to_GIS.xsl file for this showcase scenario).
4.In the XSL file, you can add features but must configure them with attributes and geometry.
5.To add attributes to a feature, you have to add them under the <attributes> line.
6.For geometry you just have to add the <geometry> and </geometry> line and add the coordinates in between as showcased in the following example:
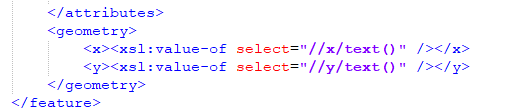
7.Save the file after you added the geometry.
Find out more details about a Feature Service on theArcGIS Website.
Add a new project in SoapUI:
1.Open the SoapUi application.
2.From the File tab, click on the New SOAP Project option.
3.Add a name for the new project in the Project Name field.

4.In the Initial WSDL field, add a valid link and add ?wsdl at the end.
You can use the following link and replace the XXXX with your local host number: http://localhost:XXXX/utpostserver/services/UTPostServerService?wsdl . Make sure you also added the ?wsdl at the end of the link.
5.Click on the OK button to create the new project.
6.You will be prompted to add a username and password. These 2 are defined in the tomcat-users.xml found under the Apache folder>conf.
If your receive a credential error, edit the tomcat-users.xml with Notepad++ and add the following text at the end and replace the USERNAME and PASSWORD with your own.
-->
<role rolename="postserver" />
<role rolename="http_request_endpoint" />
<role rolename="json_api" />
<user username="USERNAME" password="PASSWORD" roles="postserver,http_request_endpoint,json_api" />
</tomcat-users>
Create a new feature station:
1.Right click on the processXML file and select New Request.
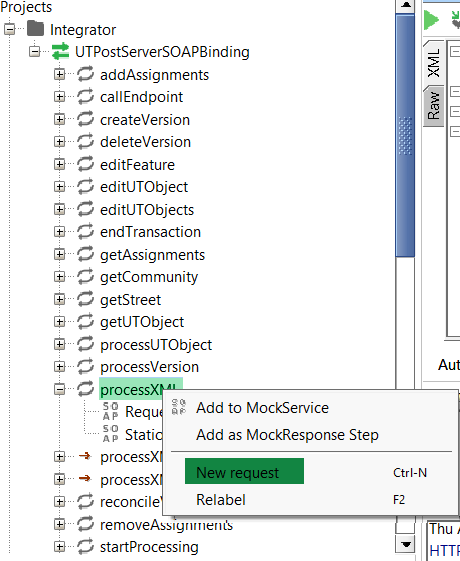
2.Add a name of choice for the new station and click on the OK button. The new station is now visible under processXML.
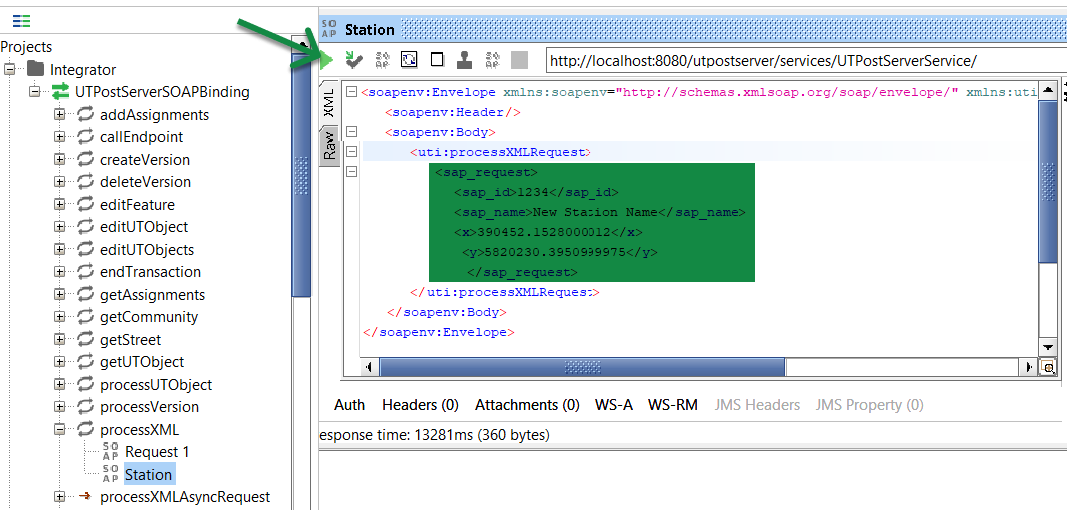
3.Add parameters for the new station.
In this example we have added an ID and a name for the station but also the coordinates. To ensure success you must modify the coordinate values.
<sap_request>
<sap_id>1234</sap_id>
<sap_name>New Station Name</sap_name>
<x>390452.1528000012</x>
<y>5820230.3950999975</y>
</sap_request>
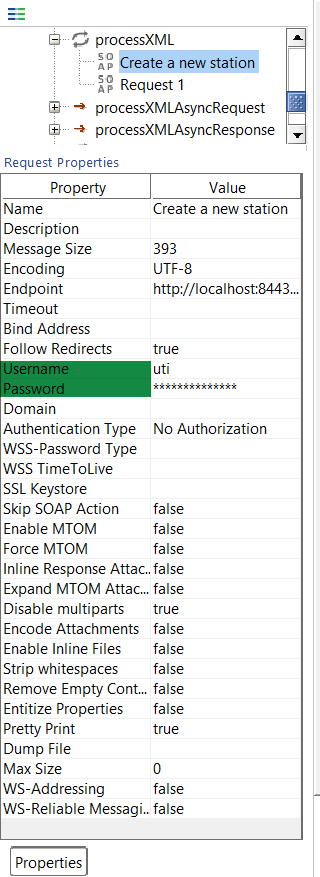
4.Click on the new station field and under the Request Properties section you must add a username and password (for this example the uti username is used).
5.Send the request to the VertiGIS Integrator by clicking on the green triangle (pointed out in the picture from step 3).
Check the SoapUI message in VertiGIS Integrator
1.Open the VertiGIS Integrator.
2.Refresh the Protocol table.
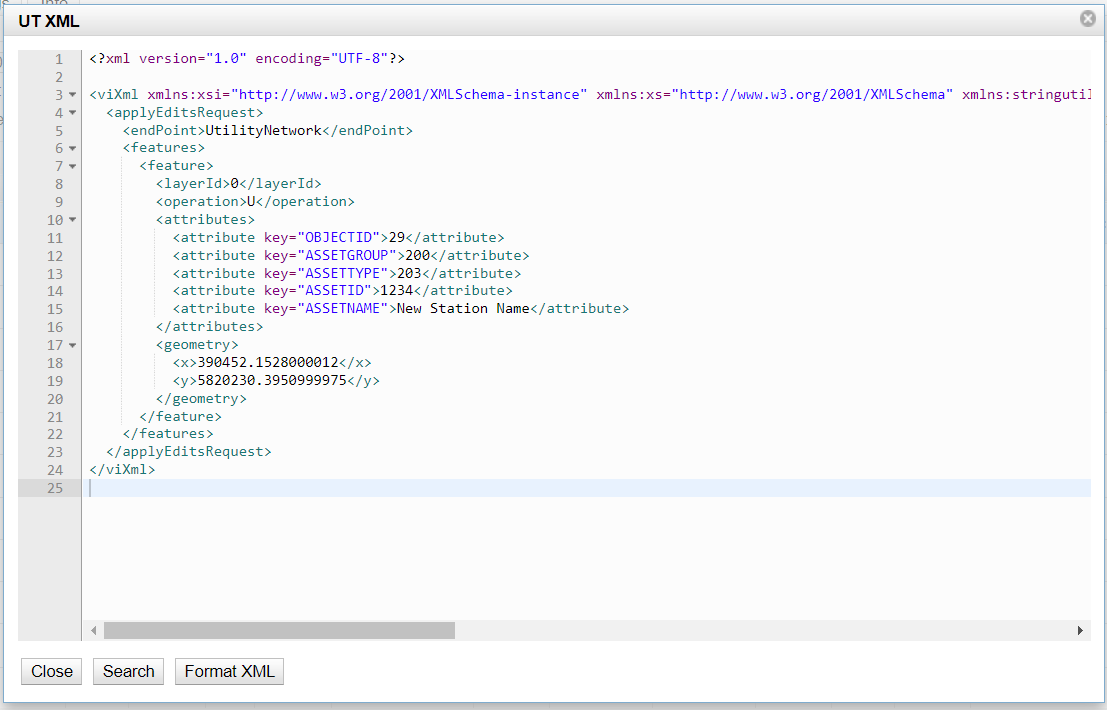
3.Open the UT XML to check the content of the message, including the station id, name, geometry, etc.