After you have saved your web map, you must link the layers in it to VertiGIS FM objects. For each layer in the web map, you must select an attribute in the GIS as the Global Unified Identifier (GUID) and an object in the VertiGIS FM database whose GIS key you will link the layer to.
The FM database contains all the information about an object or asset: its name, asset identification key, physical properties, and more. The GIS contains coordinate data for the corresponding GIS features. When you set the layer mapping for your web map, you are designating the columns (the GUID in the GIS and the GIS Key in the the VertiGIS FM database) to link the two datasets.
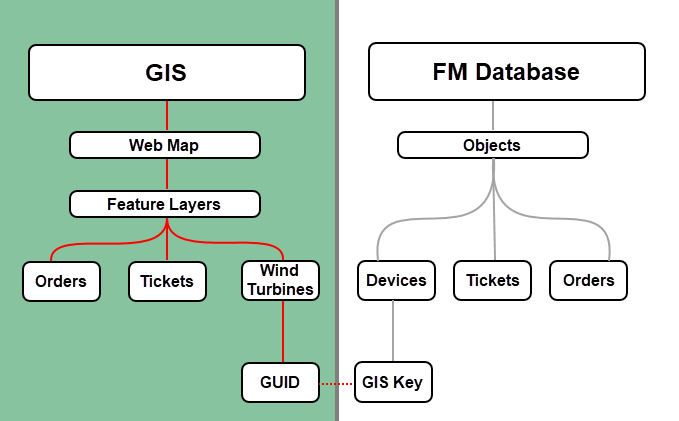
Diagram Showing the Integration between the ArcGIS Portal and VertiGIS FM Database
This part of the integration allows the layers in your web map to display assets, orders, or tickets (or VertiGIS FM objects) as GIS features.
To complete this part of the integration, you must have already logged in to your ArcGIS portal and selected the web map and workflows you want to integrate with VertiGIS FM.
To Map a Layer to a VertiGIS FM Object
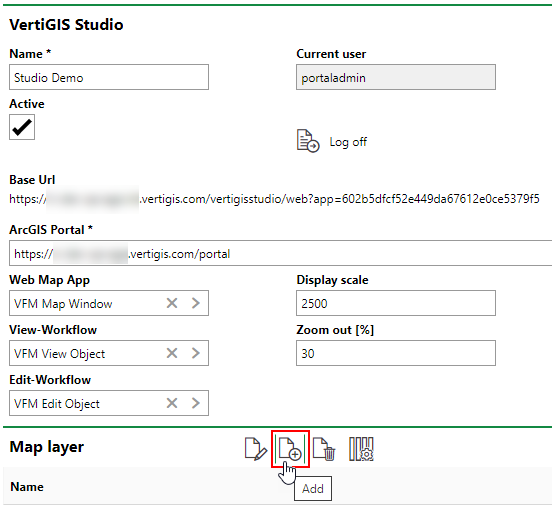
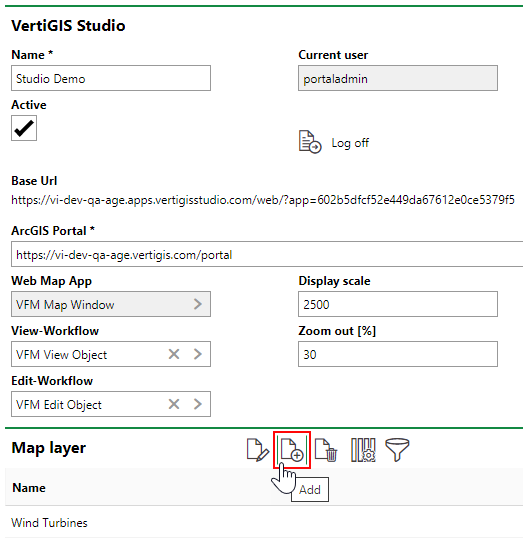
1.In the Map Layer section on configuration page for your map (Administration > Settings > VertiGIS Studio), click the Add (![]() ) icon.
) icon.
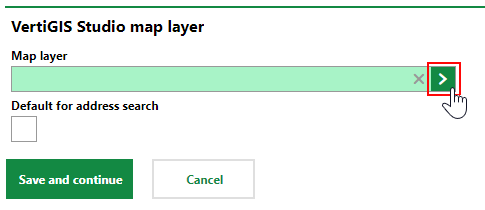
2.Click the > button in the VertiGIS Studio Map Layer menu.
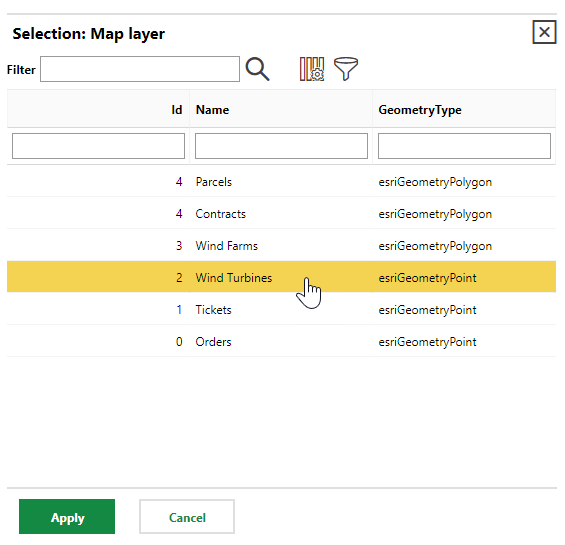
3.Select a layer in your web map and click Apply.
4.Click Save and Continue.
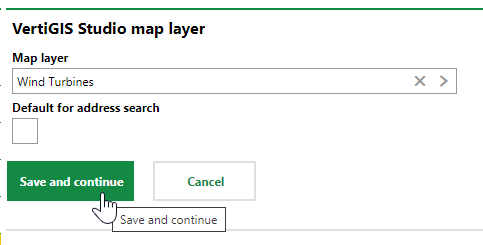
You can select the Default for address search check box if you want the GIS to use the address of the feature's corresponding VertiGIS FM object to display its location on the web map in the event that the feature has no location coordinates in the GIS database.
5.Click the > button in the GIS GUID menu.
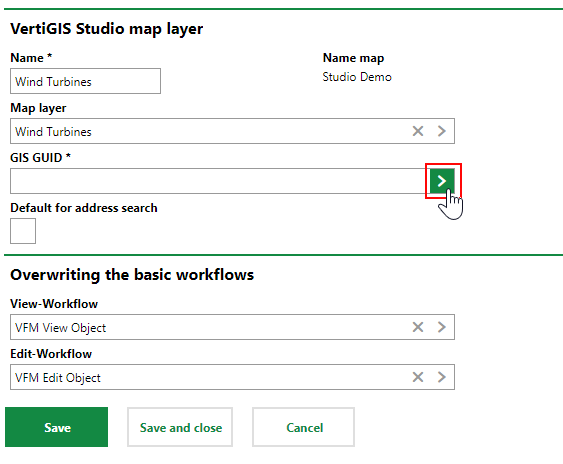
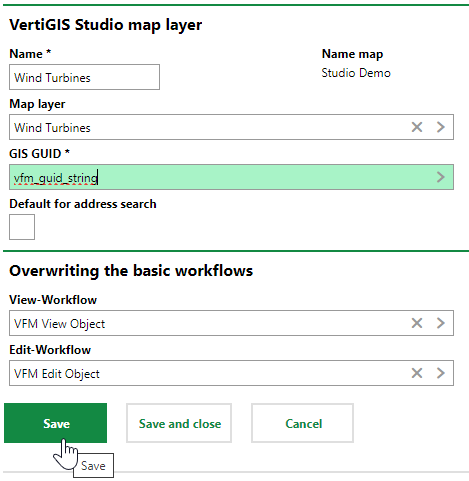
6.Select an attribute from the GIS layer and click Apply. You should be selecting a GUID, a unique identifier that has been implemented in the GIS and can be used to identify the layer.

Contact your administrator if you do not know the name of the attribute intended to be used as the GUID.
7.Click Save.
8.In the Objects section, click the Edit (![]() ) icon.
) icon.
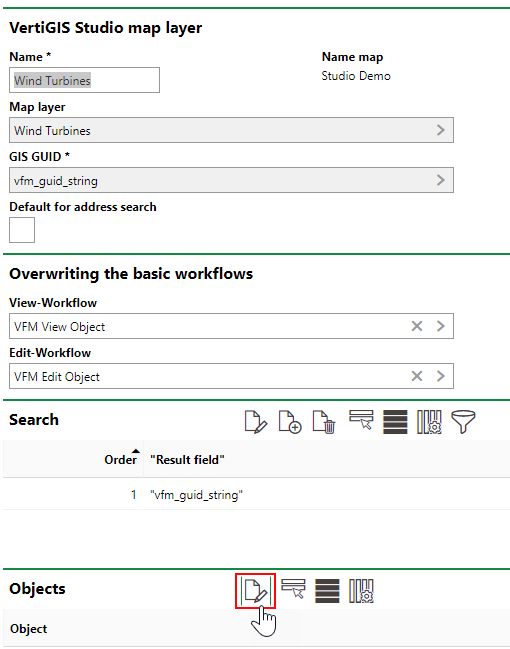
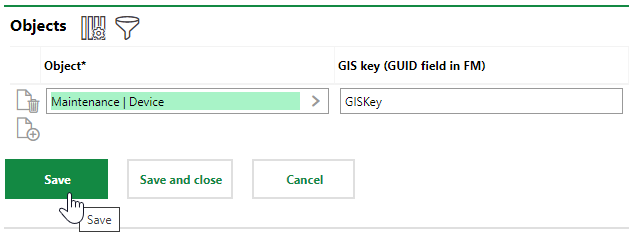
9.Under Objects, click the Add (![]() ) icon.
) icon.

10.In the Selection: Object dialog, select the type of VertiGIS FM object to which you want to link the GIS attribute.
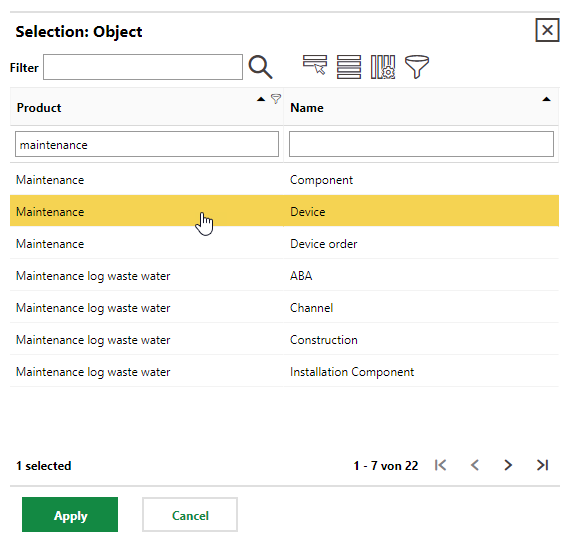
By default, the number of objects listed in the Selection dialog may be limited. You may need to search by its name (e.g., "device") or the associated product (e.g., "maintenance") to find the object to which you want to link the layer.
11.Click Save.
If you navigate to the details page for the linked object (in this example, the device details page for wind turbines), the Map section will indicate the location of the device on the layer that you mapped to the object on the web map you selected.
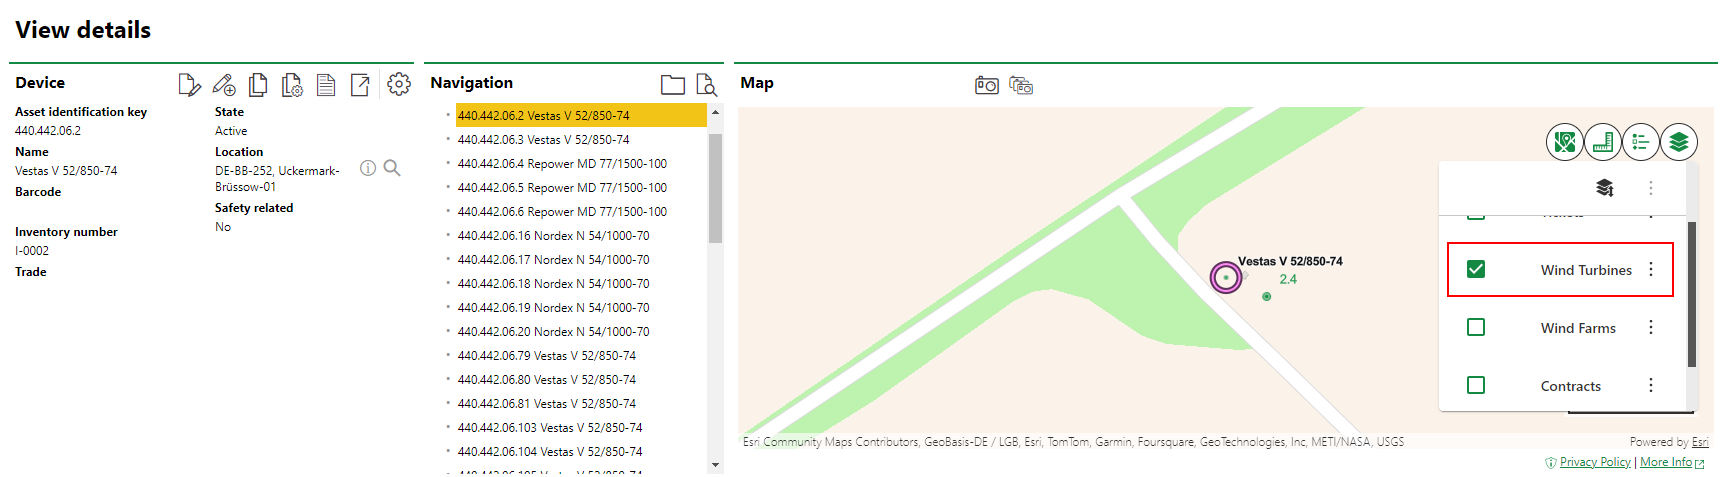
Map Showing Details Page for Object Linked to Map Layer
You can complete the procedure above for all the layers in the web map.
Adding Additional Layers to Map Configuration
For each one, select the GUID string for the GIS features and then select the VertiGIS FM object to which you want to link the layer.
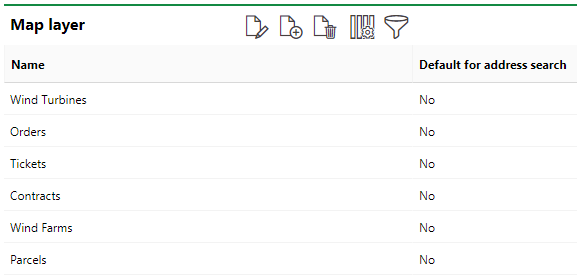
Completed Layer Mapping for All Layers in Web Map
When you have mapped each layer to an object, you should be able to view the object's location on the integrated web map on the details page for that object.