You can create a route/trench for existing multilines, or during multiline creation. You can easily identify which cables or pipes belong to a specific tube or trench and modify them as needed.
Creating containment hierarchies for routes and trenches requires predefined containment association rules in the Utility Network. See Configure Multilines.
For our example in the procedure below, we create multiple cables (LVCables) and bundle them together in a trench, you can also use trench containers to organize features hierarchically.
To create a route/trench for existing multilines:
1.Go to Edit > Multilines > Route/Trench Create and click Select.
2.Select the multiline (the multiple LV cables in our example).
You can reload your results by pressing on the button  to select a new baseline feature if needed.
3.Optional: Click Configure tools form the action menu next to Multilines, to adjust the search buffer.
Click on the tool-tip next to Route/Trench create to learn more about the search buffer setting.
4.Automatic Feature Detection: The system creates a search area around the route base and detects nearby features running parallel to it. This search area is divided into logical segments, where features remain consistently parallel. Each segment is visualized on the map as a temporary polygon.
A new segment is created when:
oA feature is no longer parallel.
oA feature exits the search area.
oA feature starts or ends.
5.Optional: Select the route/trench structure you want to create. In our example, we create a Trench.
If you do not select a polygon or area as a graphical representation of the route/trench, it appears as a line.
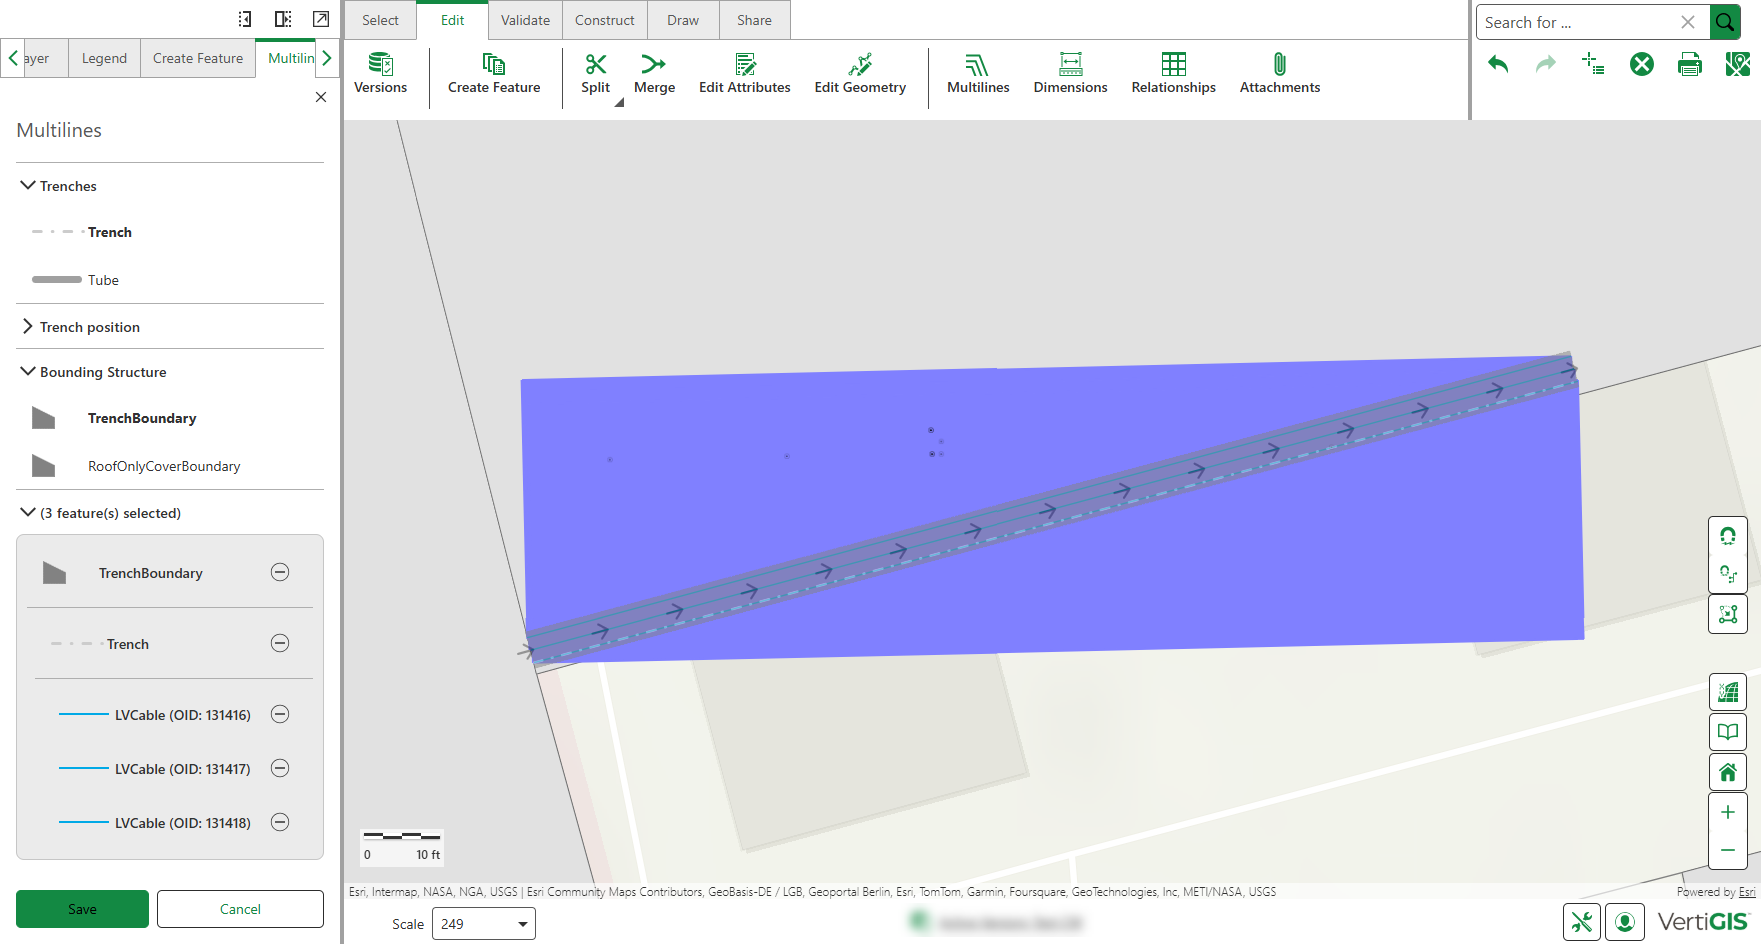
The table below describes the route/trench options.
Setting |
Description |
|---|---|
Trenches |
Optional: You can use the Trench and Tube settings to create a graphical representation of a trench area or tube. |
Trench Position |
The Trench Offset is the distance of the trench from the trench axis. |
Bounding Structure |
Optional: Select Trench or Tube to view its aerial representation. Otherwise, you can see the trench represented as a line. |
Feature(s) selected |
Displays the features included in the trench/tube. Features placed in trench containers during multiline creation appear indented with gray background borders to show hierarchy. You can remove the feature or selection of tube/trench. |
6.Optional: Use the Sketch tool to define a specific section of the feature to be covered by the trench. Click Sketch, then draw the desired area directly on the map.
A trench is created over a part of the feature, rather than its entirety.
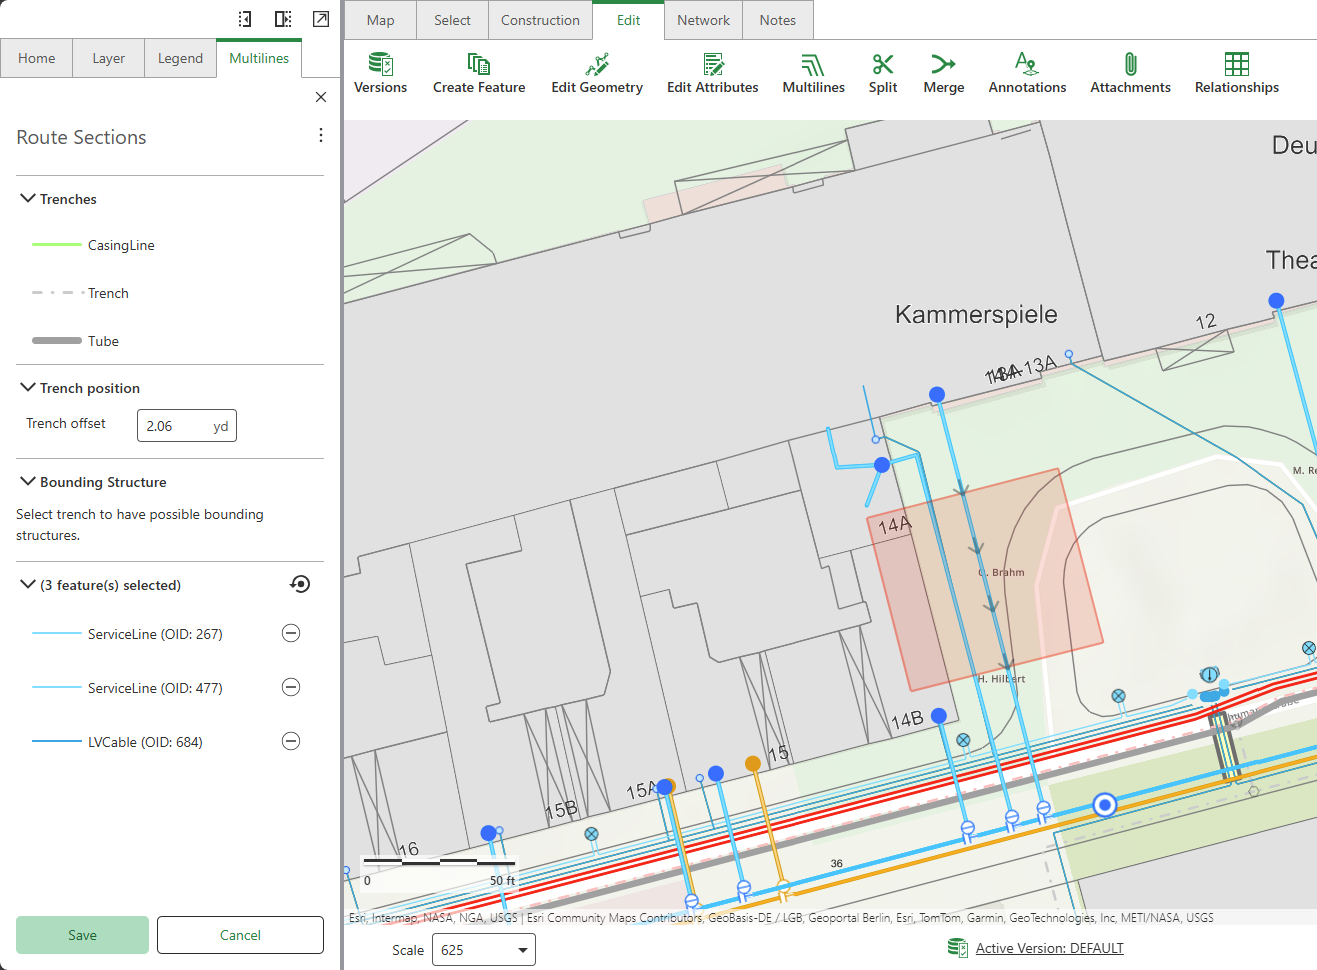
This tool is especially useful when placing a protection tube only at the crossover point where pipelines or cables run beneath a street to provide targeted coverage.
7.Click Save.
The figure below shows how the features are connected within the topology. When the required containment rules are configured, the line features are associated with the Structure Line (e.g., Tube or Trench). If a Structure Boundary is present, it contains the Structure Line.
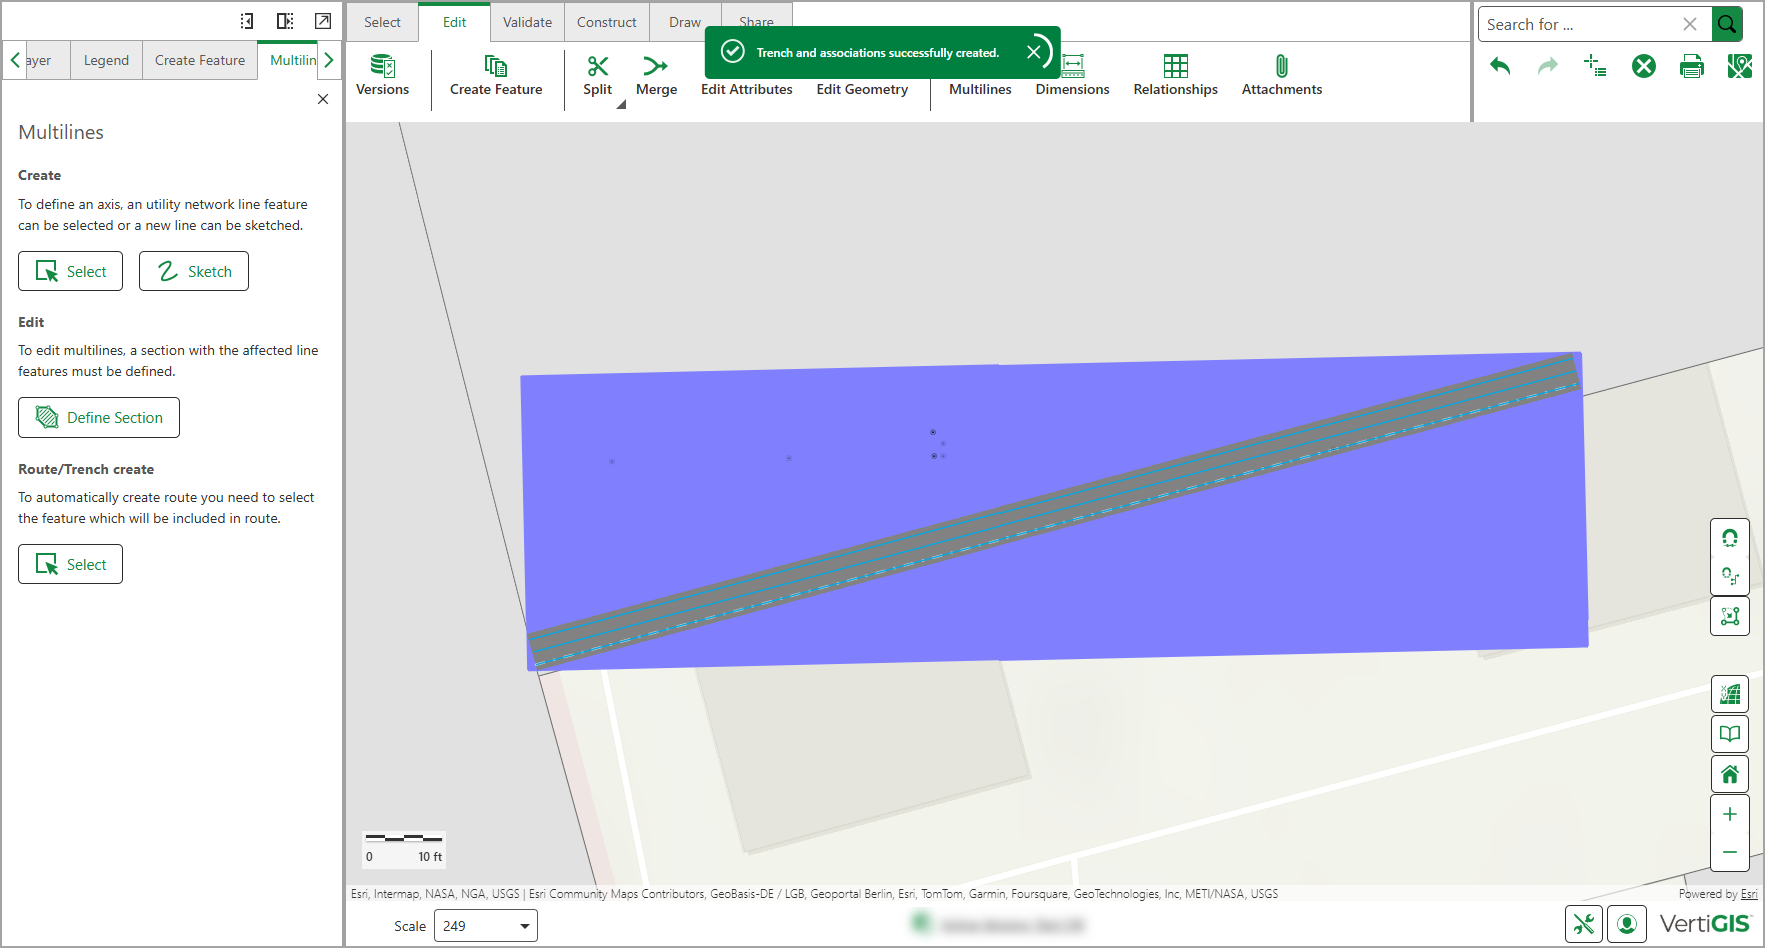
When adding feature lines to trench, they are validated using the same rules applied during route or trench creation.
To create a route/trench during multiline creation, see Create Multilines.
To extend an existing route/trench:
1.Go to Edit > Multilines.
2.Select Extend Multilines.
3.Select the boundary area on the map by double-clicking it.
The selected features and their hierarchy are displayed in the left panel.
4.Draw a line across the multiline features, beyond the existing boundary, to define how far the boundary should extend.
5.Click Save Edits.
Your changes are applied.
Edit Route
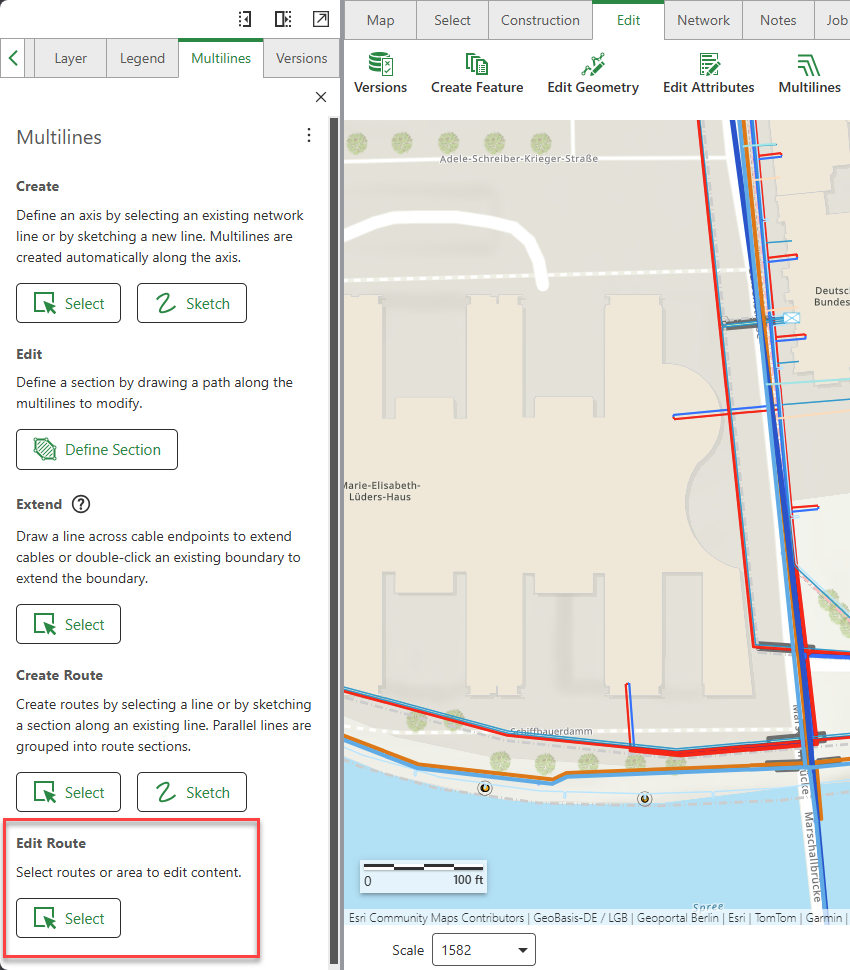
To edit a route/trench:
1.Go to Edit > Multilines.
2.Under Edit Route, click Select.
The mouse pointer changes to a circle symbol.
3.Select the route line on the map.
The selected route and its associated area are loaded in the panel, the route contents and their hierarchy are displayed.
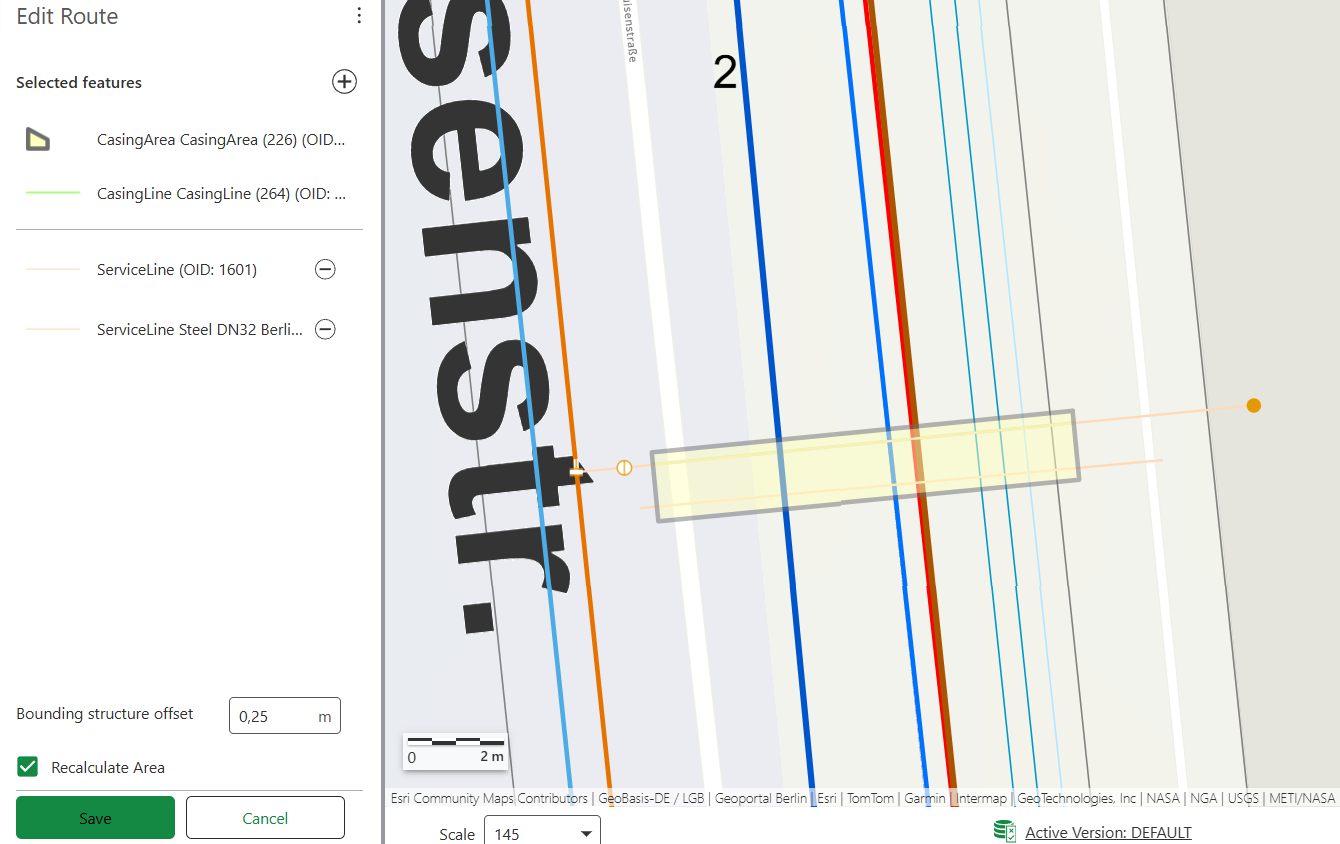
4.Review the associated features to the route, and modify it using the available options:
▪Add a feature: Click the Plus Sign (+), then select one or more line features on the map to associate them with the route.
▪Remove a feature: Click the Minus Sign (-) to remove a line feature from the route by deleting its association. The line feature itself remains unchanged.
5.Optional: Adjust the following settings for the route boundary:
▪Bounding Structure Offset: Specifies the distance between the contained line features and the bounding structure.
▪Recalculate Area: When selected, it automatically adjusts the route boundary to cover all selected line features. Depending on the route contents, the boundary may expand or shrink to accommodate the lines.
Recalculate Area is only available if the selected route has an associated area. If the area cannot be recalculated, a warning message appears.
6.Click Save to apply the changes.