Configuration of the Network Locator Web Client is primarily managed using the standard VertiGIS Studio Web Designer, a web-based application that you can easily access through your preferred web browser. To learn how to start and log in to the application, refer to the VertiGIS Studio Web documentation.
Customize Network Locator WebApp
1.Log in to your instance of VertiGIS Studio Web Designer.
2.Open the Network Locator Web App that has been deployed with Solution Manager.
3.Customize Your Application: You can now begin customizing the app to meet your specific requirements.
If you open the Locator Client or Locator Cockpit in Studio Designer, you may see an error message. This happens because you are not logged into Networks Locator User Management (Keycloak) when accessing the app through Designer. You can safely ignore this message and still make customizations to the app.

Connect WebApp to Network Locator Web Services
The Network Locator Web App communicates with the Network Locator Web Services via a REST API accessed through an URL. It is crucial to set the correct URL in the Web App Settings.
If the proper URL was already provided during deployment, you are all set to go.
If the proper URL was not yet provided, follow these steps to configure the Network Locator Web Services URL in the VertiGIS Studio Web Designer:
1.Navigate to the Services tab.
2.Open the VNL Service.
3.Set the VNL Base URL to point to your Network Locator deployment.
Typically, the URL looks like https://<KUBERNETES-BASE-URL>/api-network-locator-gateway-<namespace-name>.
Orderbook
The Orderbook component displays the history of previous orders—either for an individual user (Locator Client) or for all users (Locator Cockpit).
Fields
By default, all available fields are displayed. However, it is possible to limit which fields are shown.
To customize the visible fields, follow these steps:
1.Navigate to the Components tab.
2.Locate and click on the Orderbook component.
3.Scroll to the lower part of the configuration panel to find the Column Visibility section.
4.In this section, you can toggle the visibility of each field individually by enabling or disabling the corresponding switch
Custom Actions
The Orderbook supports defining custom actions that can be executed on the level of individual requests.
In the default configuration, the following actions are preconfigured:
•Resend commands for the Locator Client
•A Review command for the Locator Cockpit
You can use the built-in commands or define your own custom commands to support project-specific use cases.
Resend
An existing order can be resent, for example, when the previously generated documents have expired and the user needs updated map documents.
To support this, you can configure a resend custom action, which will appear below each order in the Orderbook.
1.Navigate to the Components tab.
2.Locate and click on the Orderbook component.
3.Scroll to the lower part of the configuration panel to find the Custom Actions section.
4.In this section, you'll find two preconfigured commands
oEdit & Resend
oResend.
The Edit & Resend command allows the user to modify certain order parameters before resending the request, whereas the Resend command simply reuses the exact same parameters from the existing request.
You can enable either one or both of these commands, depending on your needs.
Hide components
In Studio Web, each component includes a built-in Visibility Filters section. This allows you to define whether a component is visible or hidden for specific users or user groups. You can configure these filters individually per component to tailor the user interface based on roles or permissions.
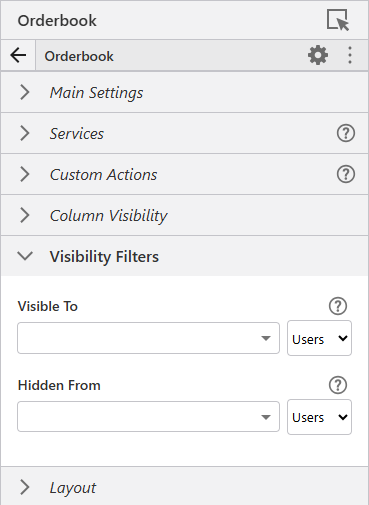
Once you click into the dropdown fields within the Visibility Filters section, Designer will automatically populate the list with all users and groups available in your connected ArcGIS Portal.
Since Network Locator does not use Esri identities, this feature cannot be used directly from the Designer interface.
Instead, you need to edit the app.json file directly. In Designer, you can open the app.json by pressing Ctrl + Shift + E.
To hide a component for specific config roles, add the hiddenFrom property to the respective component. This property accepts an array of config role names that should not see the component.
